Sunday, March 31, 2013

How to Shoot an EXR Camera Article Updated for F900EXR and HS50EXR

image

I’ve made quite a few revisions and added the newer EXR cameras to the general info. Just letting those who have not read it in a while that things are rather different from a few years ago in case you would like to read it again …

http://kimletkeman.blogspot.ca/2009/10/fuji-f70exr-how-to-shoot-it-mkii.html

HS50EXR and F900EXR – Review Part 10 — Default Settings

So my choice of the bad light ISO ladder as my first full comparison started a world-class caca storm regarding the acuity of the lens, the default settings for noise reduction, and the ever so tiresome HR versus DR mode debate.

Ultimately, you choose what you want to shoot and live with what happens. I can only show you what I am seeing and how I interpret it.

Alex asked the question today – is the HS50EXR at 0,0,0,-2 (the last being noise reduction) essentially equivalent to the F900EXR, which of course does not have the ability to “tune” these settings (how about it Fuji? that would be a real treat.)

To answer that, I shot a quick test out my window on a cloudy day … 500mm, 100ISO, DR400, M size (duh), and HS50 settings at 0, 0, 0, –2. I think the crops say –2. but that’s what happens when you deal with an inconsistent interface that requires you to understand nonsense settings. (-1,0,+1 makes a lot of sense as a scale … –2,0,+2 does not as it has no meaning and raises the inevitable confusion over the missing ones :-)

So here are the crops … do note that these are the moral equivalent of looking at a 33” print … (when I say 46” print, I am of course looking at L sized images, and sometimes I say that when I  mean M size so I hope that people will simply assume that to mean “poster sized.”)

And there you have it. The settings are essentially identical. I find that the HS images come out with a slightly nicer tone curve, very slightly flatter. The sharpening is about the same between the two, although here it was the same in my defaults shot and slightly less sharp in my –2 shot. I believe that’s an IS statistical anomaly and that you should be touching images up with capture and / or output sharpening anyway. In bright light the NR is about the same on either 0 or 02 settings.

Republicans gleefully shred Obamacare, the whole thing is caught on tape!

Saturday, March 30, 2013

HS50EXR and F900EXR – Review Part 9 — Indirect Daylight Indoor ISO Ladder for the HS50EXR with L versus M

So this time we have sunlight streaming in from a south facing window and a slightly changed subject and the best JPEG settings I know of right now. Which are:

DR400 (DR100 for L @100ISO, DR200 for L @200ISO, DR100 for 6400ISO, 12800ISO)
Provia (standard) film mode
Color 0 (default), Sharpness 0, Contrast 0, Noise Reduction –2 (off)

Now, as with any Fuji, there are always exceptions. I show the key exceptions in the DR line above, that the camera forces certain behaviors depending on image size and ISO. You just have to get used to that. Shooting M size alleviates that confusion, and you actually get better images, as I will show shortly …

I shot from a solid tripod with the focus on the little emblem to the left of the face on the bill. SO the bill is the primary target. But I include dark see through fabric and round surfaces in the crayons and coin in order to show surfaces and edges, which is where the L size degradation shows most forcefully.

When I talk about surfaces, curves, edges, etc. I am really trying to ensure that images retain this sense of “dimensionality” that causes you to react as if the image is a window, as opposed to a painting. The difference between images that do and images that do not is palpable at a visceral level. There is a saying for the surface noise and edge destruction or its traditional “fix” with excess smoothing that is often called “painterly.” To me, this is an epithet and it means that the image is an obvious reproduction and might as well have been painted as opposed to photographed.

I strive for the opposite reaction, which is just “wow” in a nutshell. As ISO rises, this becomes more and more of a challenge as surfaces and edges are destroyed rather quickly. But, modern sensors are getting better, and even these tiny sensors are pretty credible at lower ISOs. And as far as I am concerned, you can maximize your odds by choosing the right settings, which in pretty much all cases is essentially M size DR400 with an EXR sensor.

Moving on …

I will first show you images that are essentially the crops I processed in the large (4MB) image at the bottom. I show you 4 images here, and you can think of these as looking at a small part of a 46” print from 20 inches. This is not how people look at images except perhaps in a gallery that allows a close approach.

100 ISO – L first, M upsized second

Now 3200 ISO, same order

For those whose minds are open, you will see that both L and M are just about identical at 100 ISO. I.e. there is simply no more visible detail in the L image. That’s just how EXR works.

Then there is the 3200 ISO set … hmmm … the edges and surfaces are under attack more obviously in the L image, and the chroma noise is quite a bit higher. There is also a loss of contrast on the bill. All of this means that, while neither image is much to write home about, the M sized image has retained a more obvious dimensionality while the L sized image is looking a lot more like a high ISO image from a tiny sensor (as in, typical of how most of the tiny sensors handle super high ISO.)

This has always been the EXR edge, and it remains the same in every EXR sensor that I have seen.


And then there is the full ISO ladder. This is an enormous file, so don’t click on it if you have dial up internet, unless you are really patient.


A note on the whole L versus M debate. Don’t be fooled by the forceful opinions you see where L “crushes” M and blurry images are posted to prove it. These images are invariably poorly shot, with no attempt to sharpen up the M size image after upsizing (showing a profound lack of skills and understanding of what interpolation does to an image) and with little attention to surfaces, dark subject, and very fine details.

Blurry buildings do not an argument make, except on the Internet. So please just examine these closely. I shoot M size exclusively, and nothing I have seen from the HS50 has changed my mind, except perhaps when shooting with factory settings. Then maybe it does not matter because I think there is a bug in the firmware. But if you drop noise reduction to –2, and shoot every else at 0, then M mode seems to shoot very nicely.

HS50EXR and F900EXR – Review Part 8 – Astrophotography

And again the HS50 takes center stage. The evening started with clearing skies tonight and by the time the Moon and Saturn rose in the southeastern sky, the skies were crystal clear. When one has the opportunity to shoot a camera with a true telescope focal range (there are more than a few legitimate telescopes whose focal lengths fall short of the HS50’s massive 1000mm) what should one do? Why, shoot for the moon of course … and Saturn since it was hanging out in the vicinity.

So … the moon first. I tested M size first and found it to shoot very clean images. (Well, duh.) And although it’s only 8mp, the 1000mm makes up for a lot of sins :-)


HS50EXR  @185mm (1000mm EFL)  100iso  f/8  1/80

Following the “sunny 16” rule, I think this should have been an over exposure, but it was actually really nice. The edges of the moon were perfect, with none of the weird artifacts or CA I’ve seen in the past. Big kudos to Fuji on the quality of the lens at full zoom. I shot a lot of images and found a very small percentage of them to be slightly blurry, indicating that the “seeing” was very good tonight. Great air, in other words.

Other interesting settings:

image

Normal sharpness because high creates nasty artifacts. DR100 because it does not need to be higher (the moon has no dynamic range to speak of.) NR turned down low. The perfect settings for this task.

Here’s a second take on the same file. For the first one, I used OnOne’s Perfect Effects Free Edition and got some nice contrast in there. For this one, it is all Lightroom.

That one is a bit more subtle in every way. But still nicely detailed and smooth where the moon should be smooth.

Now we switch to an L sized file. I was pretty surprised when I started looking at the L files at the amount of noise in some of them. I was experimenting with settings and found that this file had some of the sharpest rendering of craters. But it also had much more noise than the M sized file (which is a given, of course.) The settings here are the same as for the M sized file by the way.

The place where L size fails is in areas of low contrast detail, and the place where I notice it the most is the little lines coming out of the craters. They just do not have good edge definition, as there is a lot of noise and smearing caused edge destruction. Very nice craters, though … I gotta say.


HS50EXR  @185mm (1000mm EFL)  100iso  f/8  1/80

Ok … some very nice moon detail and pretty clean open spaces. I prefer the L sized craters and the M sized everything else. Exactly what I always say … M size generally provides a nice file because so much of the detail that matters is fine, low contrast detail.


And we move on to Saturn. I played around with various settings and ended up getting several decent renderings of Saturn. I’ll just post a few of them here with their settings … there is not much to discuss since I have posted many times before. Saturn is a tough object to shoot in that you need perfect support and a perfect exposure to be able to separate the rings from the planet.

Well, with this level of magnification, separating the rings is a given. So here we go … Here is a wee one to start …. note the excellent separation of the rings.


HS50EXR  100iso  f/8  1/80

Yes, it’s pretty small. And note that I accidentally left the moon settings on. The rest of the settings (tone, sharpness, NR) were all on the lowest setting. I think it turned out pretty decently when you consider that I exposed for sunlight and shot a planet many millions of miles away.


HS50EXR  3200iso  f/8  1/50

A bigger and cleaner image. I had to reduce exposure quite a bit, but lots of detail emerged. The rung separation is very clear, and that is a bit of a thrill. Settings all remain at low. It’s a tad larger, and yes, I shot this one at L size (M size for the first one.) L size here can do no damage since there is no large low contrast detail surface to be smoothed.

And the same file processed in Perfect Effects … with rather a lot of effects stacked up.

That’s a bit much, but it shows the saparation of the rings really well. A bit distorted, but it is unmistakable.

And there you have it. A fun and successful half hour of planetary exploration. The focal range on this thing is just breathtaking. But it is the acuity of the lens at full zoom that is mesmerizing.

Friday, March 29, 2013

HS50EXR and F900EXR – Review Part 7 – RAW hack is an EPIC FAIL :-)

So I hacked the RAW to see if the hawk a mile away in a tree image from part 6 could be improved upon. Hacking the RAW is trivial with a tool like ExifTool GUI … you click on the image, then click on “Workspace” and finally in the field at the bottom of the right hand pane, you change the name of the camera. You end up with this:

image

Lightroom is perfectly fooled by this one change, so the RAW file is suddenly importable. And import it I did.

But I noticed right away that the colors were wonky. The hack worked last year on the F770EXR because the camera whose name I used – the F550EXR – has basically the same sensor, despite the marketing hyperbole about a new and improved sensor. But the F800EXR sensor is of that same generation while the F900EXR and HS50EXR have the new sensor with phase detect pixels on them. And it appears that the color matrix is really different. The old demosaic algorithm has no ability to deal with this matrix. Case in point:

Note also the wonky right edge, as the HS50 lens has distortions that could not possibly match that in the F800EXR. So all in all an EPIC FAIL!

Help me Obiwan Adobe, you’re my only hope Smile

Yes, that nerdy thought just came to me out of the blue.

Of course, a black and white image based on this set of colors is going to be equally weird. Almost infrared-like, it turns out.

Still, it was fun to try.

Adobe said on their forums today that the F900EXR and HS50EXR support was coming out really soon, so I am holding out hope that I can get Lightroom 4.5 beta before I have to give the camera back. We will revisit this image should that come to pass :-)

From the New York RAW kitchen. No RAW for you!

HS50EXR and F900EXR – Review Part 6 – How about that reach? **Updated Again**

Again we focus on the HS50, as it is the camera that is giving us (as in me) fits right now. I need to continue shooting JPEG settings until I find a combination I like. I might be close, now, as you will see in a moment. I’ve noticed so far, though, that the very worst settings for blur at M size are the factory settings – color=0, contrast=0, sharpness=0, noise reduction=0. Now, you might be tempted to think that 0 is “off” … as would most people. But Fuji’s firmware engineers were having a glorious day and decided that –2 is low or off while 0 is “normal” and +2 is “hard” or whatever. And there is no –1 or +1 so the scale is violent. Kind of a pushing all in thing …

Anyway, I picked up the camera for a moment and looked out the window from the second floor and lo, and behold, a spec … er, I mean hawk or Falcon of some sort way off in the distance in a neighbour’s tree. Since I’d never seen one within a few hundred feet of my house before, I was a little surprised.

But I started fiddling the settings to what I thought I wanted to try, screwing up only one – DR. I left it at DR100, which is what I shoot to equalize for L versus M tests. There was no real issue though, as the sun was settings and nothing important was blown out.

So this first image is what I saw when I looked out.


HS50EXR @4.4mm (24mm EFL)  100iso  f/7.1  1/60

So note how nicely the trees turned out, excepting the rampant CA. Here are the settings I shot:

image

Also M size, which is not shown in makernotes. These images were rather noise-free, which implies that M size at DR100 is a form of SN. It seems to bin. And even if it merely downsizes, you will see the cleanliness and details on the bird, so I doubt that I sacrificed any real detail (as I have proven time and again – a lack of sharpness is not the same as a lack of details.)

I had sharpening at hard, which is actually too hard. You have to fight all the halos and with fine branches, you get a weird effect where halos collide between close branches and turn that part white. That’s where the “crispiness” comes from in a lot of images and I think they look really unprofessional. So I will be reverting to soft sharpening again.

Meanwhile, I originally processed that in Photoshop and found Gaussian blur at 0.9 pixels works well to reverse it. Downsizing for web then brings back enough sharpness. But for the one above, I used Lightroom and had to use negative “clarity” to back off the excess sharpening. It worked well, and gives a nice soft look to the images that remind me of a larger sensor. Fine branches just look way better than crispy ones in my opinion.

Here is the Photoshop version … take a minute to look at why I did not end up wanting to lead with it. Hint: JPEG renders in hidden blocks and sometimes you expose these when you process the image for CA removal, for example.

The branches came out rather well, with few of the halos clashes and nice definition. Less CA, too, since I removed it by force. But … look at the top of the conifer at the right edge. Oops … (you will probably need to click on it to get the 1000px version to see it.)

Just another example of why JPEG is such a risk. By the way, a lot of the CA and blocking issues come from the fact that I had to harshly alter white balance because I had custom WB set from last night under halogen lighting. I.e. everything went blue. When I adjusted it, the boost in the red and green channels blew the image out and I had to drop exposure by 1.5 stops or so. This excess manipulation is where JPEG starts to quickly fall apart. But I saved it …

And obviously, that highlighted blob is the hawk I saw in the distance. This is a 24mm shot, the bird was rather more obvious to me than that. But still not detail until I looked through the EVF of the HS50.

And then I saw it. Beautiful!

It spent most of its time looking away from me, but I got a few captures of it looking forward. It never looked directly at me … bummer. Here is the best of those shots … I added an enlarged crop in the corner to show you how well this lens resolves, and in JPEG no less.


HS50exr  @185mm (1000mm EFL)  100iso  f/7.1  1/220

I ended up shooting many images and was waiting for him to take flight, hoping to catch the moment. And I did … the image is slightly blurred because I had to fire as I was panning, but I think it came our marvelously well.

Update: Gulp … I forgot to include that image when I first posted this … sheesh.

Update 2: A poster on DPReview identified this as the Merlin Falcon, native to northern Europe and North America with slightly different variants in each. http://en.wikipedia.org/wiki/Merlin_(bird)

The AF fired instantly because there was a lot of light. I have confirmed that the PDAF works great, but only when there is a great deal of light. Still, that works out well when hunting hawks.

This is a bit of a crop and I am really pleased with the quality, despite the blur. It is blurred for the right reasons and that makes all the difference to your visceral reaction.

Disclaimer. I am an idiot. Oh, did I say that out loud? What I mean is that I did not spend 10 seconds pulling the screen off the window to get a perfect view of the hawk, so I ended up shooting the entire series through double pane low E glass in the other window. Thick stuff. So now imagine how clean and sharp these images would have been without the glass.

Conclusion

How about that fricken reach Smile

And …

  • Don’t waste your time with hard sharpening for landscapes. Halos everywhere and they are hard to get rid of. Leaving them in makes the image look amateurish. Use mid level sharpening or try low level sharpening if you are a Lightroom user.
  • If you get crispy looking trees, try Gaussian blur in a standard editor like Photoshop or reverse the clarity slider in Lightroom to taste. Remember that downsizing to post recovers a lot of sharpness, but without the halos.
  • Please remember to check your white balance every time you go out shooting. I really made it difficult to process these.
  • The HS50 is a very sharp camera. But it has issues with some settings that really leave you in trouble.


Update

Adobe has released ACR 7.4 and Lightroom 4.4 and the F900EXR and HS50EXR are now supported cameras. And since I had shot the hawk in JPEG+RAW I was able to process this last night to arrive at a more detailed version of the hawk. Remember that this is a tree that is a full city block or so from my house and that the bird was visible only as a bump on a branch, and that this is a 100% crop … pixel for pixel on a 1/2” sensor as if you were looking at a 33” print from inches away.

Not too shabby Smile

Heavy Metal Toddler

This is an unashamed reblog from Weight Matters.

Is it just me or does she seem to be shouting in Klingon?

Regardless, one of the cutest and funniest videos to come along in a while. And give the fellow credit for some seriously slick editing. Well done!

HS50EXR and F900EXR – Review Part 5 – Macro

This article concentrates on the HS50EXR and its macro capabilities, spawned by a little winging on a popular forum over changes to macro focusing distances from the HS30EXR to the HS50EXR (687mm –> 1000mm … ya think? :-)

The old lens apparently had a sweet spot at around 200mm EFL (effective focal length, as expressed in terms of the old 135 standard, a.k.a. 35mm film,) where it focused to something like 12 inches. [Update: I was informed that the old lens sweet spot was 150mm EFL at 3 inches, which actually sucks since it would not let much light in and no insect would sit still for that proximity. The new sweet spot for the 50 is 200mm at 12 inches, which also sucks.]

I find that the closest that the HS50EXR focuses at 1000mm is 89 inches, which is decidedly long. But not outlandish when you consider the magnification, which is actually decent. It’s not like there are many dSLR lenses that can match it even at these distances.

So let’s start with a target. This is an 8.5x11 sheet of glossy photo paper on which I printed a standard resolution chart ISO 12233. I then hung it (last year, hence the coating of dust) on a pole where I can turn a clamp-on to face it for fairly bright lighting, albeit with an ugly temperature in the orange spectrum. I render all images in Lightroom as Black and White to avoid wasting time on trivialities like color balance.

The following image is shot hand held at full wide angle and is a slight crop showing the whole chart. I shot in JPEG using my standard settings at 400 ISO. I am shooting auto ISO 400 right now and this is still lit by only one bulb.


Hs50exr  @4.4mm  400iso  f/5.6  1/30

If you click through to look at the 1000px rendering, you will be impressed, I would bet, by the impressive resolution down to 1000+ lines per picture height. In other words, the finest gradations are showing detail even though I did not set up on the chart at the appropriate markers.

Suffice it to say that we do not have a resolution or acuity problem close up. This lens is good here.

Now, moving in at full wide with “super macro” mode on shows how close it can get and the rather nice magnification and detail you can expect. But it also shows super macro’s inherent weakness.


HS50EXR  @4.4mm  800iso (I lied about auto iso 400 :-)  f/5.6  1/60

Remember to click through as this is still a 1000px image of the full frame, This image shows that you get pretty good magnification, as that center square is maybe half an inch wide or so. But this image also reminds us that focusing with the lens touching the subject is going to fail to allow enough light into the scene. Which is why I have always found the concept of a “super macro” mode a bit laughable. Without light, there can be no useful imagery. And show me the live insect that will allow itself to be subjected to a lens within 1mm or less … not likely.

So … I have always favored backing out to full zoom in macro mode to maximize the bokeh. Without a nice background, a macro image is not going to impress, no matter how much detail is rendered. So the question, then, is how close can you focus and how much detail can you render? And yes, I am fully aware that this is actually two questions :-)

I set up the tripod and started dragging it back and forth until I found the point of closest focus at 89 inches, Seven feet five inches is rather a lot, but not really any worse than the average birding lens. And the magnification is not half bad.


HS50EXR  @185mm  400iso  f/5.6  1/105

That subsection of the chart is just about exactly 4” wide, perfect for flowers. A large Peony bloom will fill the frame, and the background at 1000mm EFL should be pretty creamy.

Next, I dug up my 67mm Canon 500D achromat (2 lens close up filter, highly corrected and extremely sharp), which is permanently mounted on my Sigma 105mm 2.8 Macro (F mount, which I use in MF mode using an adapter on my Panasonic m4/3 cameras as a 2:1 magnification 210mm macro lens.) Turns out t screws right on to the HS50EXR … can’t beat that :-)

Now, a 500mm achromatic close up lens is designed to focus lenses at 500mm (about 24 inches) from the sensor plane. Which means that we should get a pretty short distance from the lens. And low, and behold, we do. I eventually found the exact spot (and the latitude is remarkably narrow here) at 16 inches from the front lens element. No surprise, but wow.

Now allow me to blow your mind Smile


hs50exr  @185mm (1000mm efl at 16 inches from target to front lens element)  640iso  f/5.6  1/60

Now that’s what I’m talkin’ about … a full frame shot covering a very small target.

To confirm the magnification, I held a standard measuring tape against the target, pushing the target a mm away from the lens and putting it out of focus. The DOF is understandably narrow at this magnification.

The ticks on the tape are, of course, at 1/16 inches. So we can count 11.5 gaps, which leads us to a total measurement of 23/32 of an inch.

23/32 * 25.4mm/inch == 18.26mm coverage on the horizontal. Since the sensor is 1/2”, it has dimensions of 6.4mmx4.8mm. The magnification is therefore 18.26/6.4, or 1:2.85, which is very nice. Some pretty good flower close ups and insect shots should be possible with decent working distance and nice acuity.

All in all, a satisfying capability I think.

Avantree Hive Bluetooth Headset

Caught a sale on these for 36 bucks and had been looking for a decent set of wireless headphones that could do music and phone calls while not sounding like crap.

I found these on sale on the MobileFun web site in Canada (they have local sites in several places) for $34.99 …

image

… and since they have pretty good ratings everywhere, I took a flyer on them.

Three and a bit weeks later (they seem to have shipped Royal Mail from the UK) they arrived today (or maybe yesterday, I did not walk over to the mail box.)

And they are very small, don’t pinch, yet sound like real headphones when playing music from my Galaxy SIII … very clean, if a bit subdued.

DSCF7059_FinePix HS50EXR_25 mm_ISO 800_1-15 sec at f - 7.1
HS50EXR  800iso  f/7.1  1/15

For the price, they are keepers. While the volume could be louder, phone calls sound good and music sounds great. Can’t beat that.

Thursday, March 28, 2013

HS50EXR and F900EXR – Review Part 4 – Processed 3200 ISO output at normal print and web sizes …

This is a follow on to Part 3, ISO ladder. I reused those files for this post.

First off, let’s remember that the 1/2” sensor is not typically a high ISO sensor. But since people enjoy the reach on these cameras, and since most people would probably prefer to own one compact rather than several, it makes sense to examine how these cameras look in social situations at normal print and web sizes.

Part 3 seems to have excited a lot of debate and the HS50 is in a real struggle to remain relevant through these tests at higher ISOs, but ultimately it is the compacts that are the more likely social cameras. So let’s look at what happens when you actually process the output in Lightroom at 3200 ISO. I choose 3200, by the way, because we need decent shutter speeds to capture people successfully. No matter what you want them to do, people shift and fidget all the time and you cannot capture them at low shutter speeds. 3200 is the maximum at which these do not look awful … 6400 is simply ugly. 1600 is just a little low, although if you have a fair amount of light, please try dropping ISO.

The F900EXR is the newest of the compacts, so let’s see that one first.

The F770EXR is the camera I own, and the difference in the older JPEG engine is that there is a tint that I find quite hard to remove in this sort of orange colored light. I don’t mind the warmer look, but some people will not be impressed. The detail, though, is surprisingly good. People will render quite adequately if you can get them near a light. In shadow, things will not be pretty, but with tiny sensors that’s just a given. It is the reason why the trend today is towards fast lenses and large sensors.

Remember that you can click on these to see the 1000px rendering, which is as large as anyone ever posts on Facebook. It also shows what a 5x7 print might look light.

In part 3, the F200EXR came off really poorly at high ISO. The saturation and white balance was way off and there was a huge amount of noise. Yet, when you tweak things in Lightroom, you find that the detail where there is any light at all is actually quite usable. The bill, for example, looks excellent here. Remember that this is the 1/1.7” sensor and is quite a bit larger than the 1/2” sensor in the compacts and the HS.

Now, the HS50 is not a social camera in any real sense, but if you choose to shoot it, you will not want to use default settings as I did for the ISO ladder. I will be testing various JPEG settings and I will try to get RAW processing working to really suss out the HS50’s strengths. But for now, I can say that this file is not adequate … I would never display it even as a snapshot.

And of course I will close with the G5. This camera is a joy to use, but I would not tend to carry it in social situations. For that, I generally carry the GX1 (also an excellent 16mp sensor) and either a 2.8 Sigma or a 1.8 Olympus lens, allowing me to shoot several stops lower with higher shutter speeds.  But for comparison, this is how it shoots 3200 ISO on the 14-140 kit lens.

So for shooting in social situations where you have at least some light, these tiny sensors do an adequate job for snap shots. The detail is decent and the new JPEG engines maintain excellent saturation. I always recommend that you shoot to get a good capture and tweak in Lightroom, but of course we saw in the ISO ladder that the newer JPEG engines don’t need that much work. Once downsized for web or small print, a lot of the noise vanishes.

HS50EXR and F900EXR – Review Part 3 – ISO Ladder (*updated*)

The time-honored ISO ladder allows us to look at each camera’s performance in JPEG against its peers. In this case, I compared the two against one another, but also against the F770EXR, the F200EXR (much older technology but a larger sensor) and as a reference, the Panasonic G5 m4/3 camera shot and processed in RAW.

The usual protocol … no IS, tripod, timer release, manual mode, and so on. The G5 had no BR applied until 800 ISO. The G5 also has an issue with focal plane. The right side of the bristles are out of focus. Otherwise, this is a rather interesting comparison.

And without further ado …


My Analysis

The HS50EXR struggles from 200ISO onward. It appears to want to clump pretty badly. The F900EXR does very well.

The newer JPEG engines hold decent saturation all the way to 6400 ISO. Wow. The F770, on the other hand, wiped out pretty early on color balance.

The F200EXR shows its age. It cannot hope to play in this league any more.

Note: There is a follow up article, part 4 3200 ISO, that examines more real world usage of these same files at 3200 ISO. Have a look …

Wednesday, March 27, 2013

HS50EXR and F900EXR – Review Part 2 – Details, details … the great L versus M debate rages once more … (*updated*)

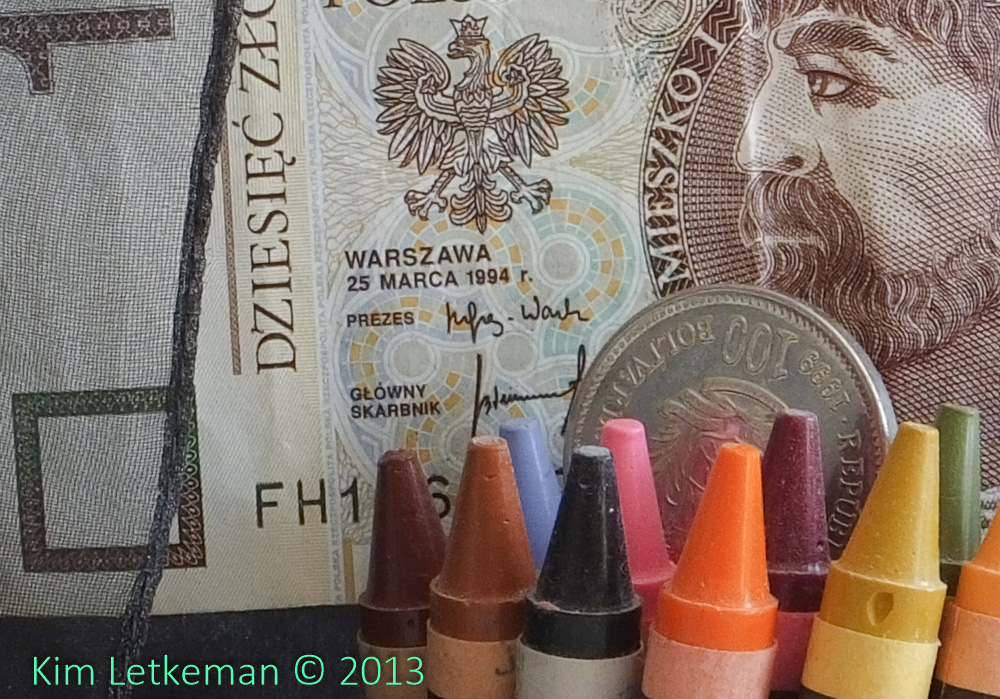
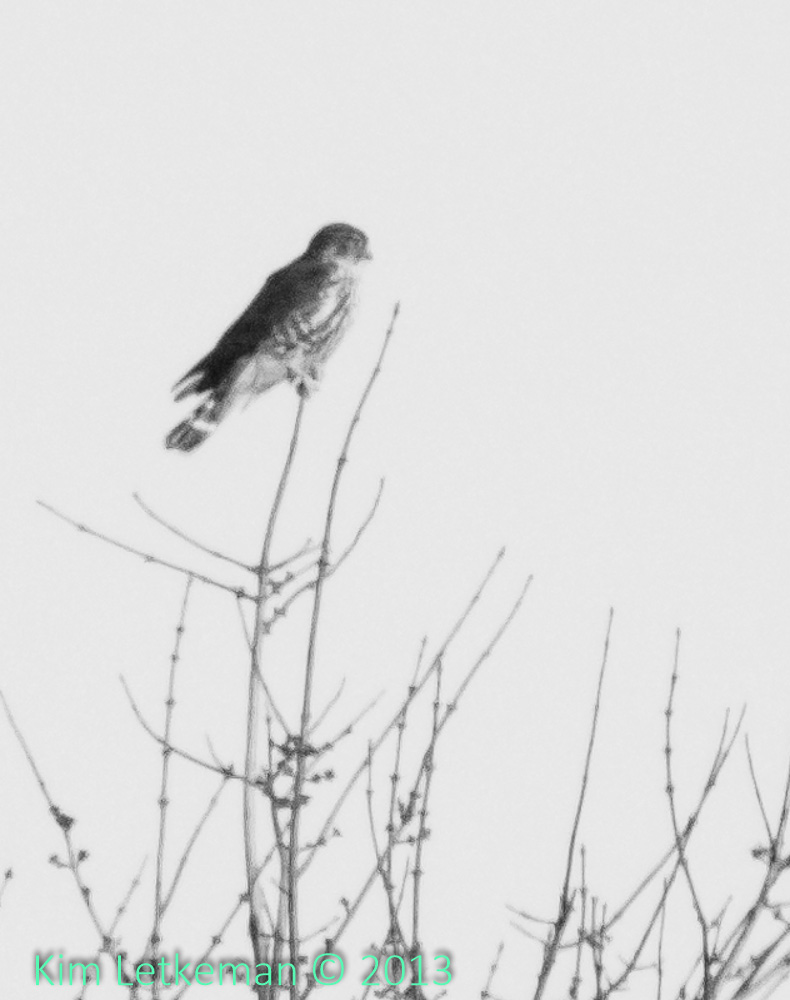
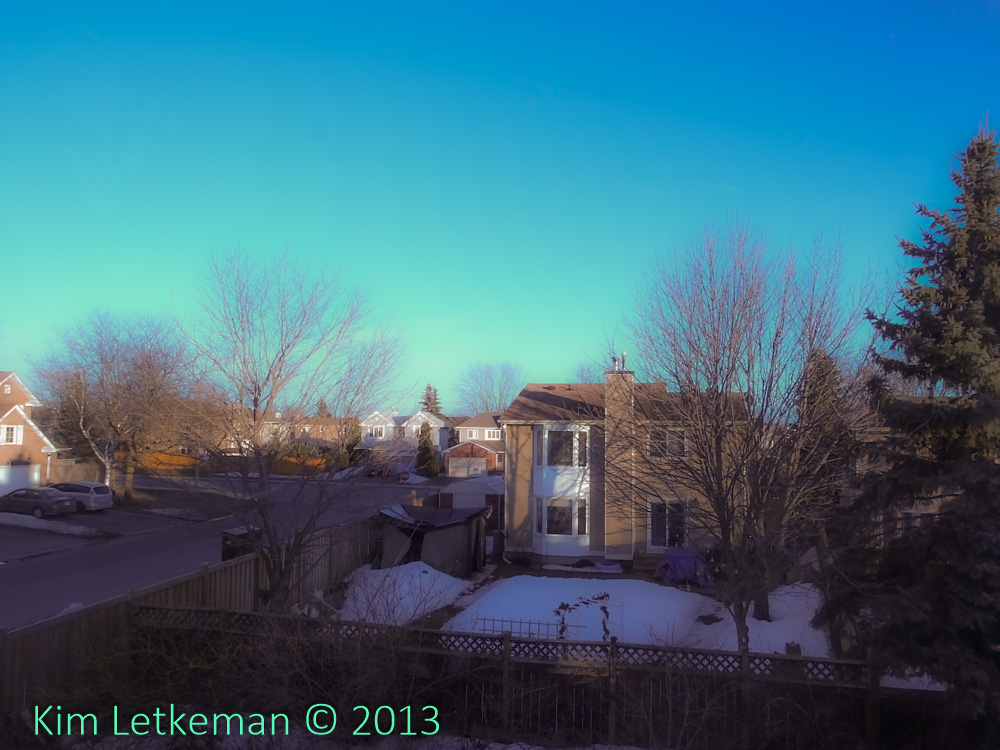
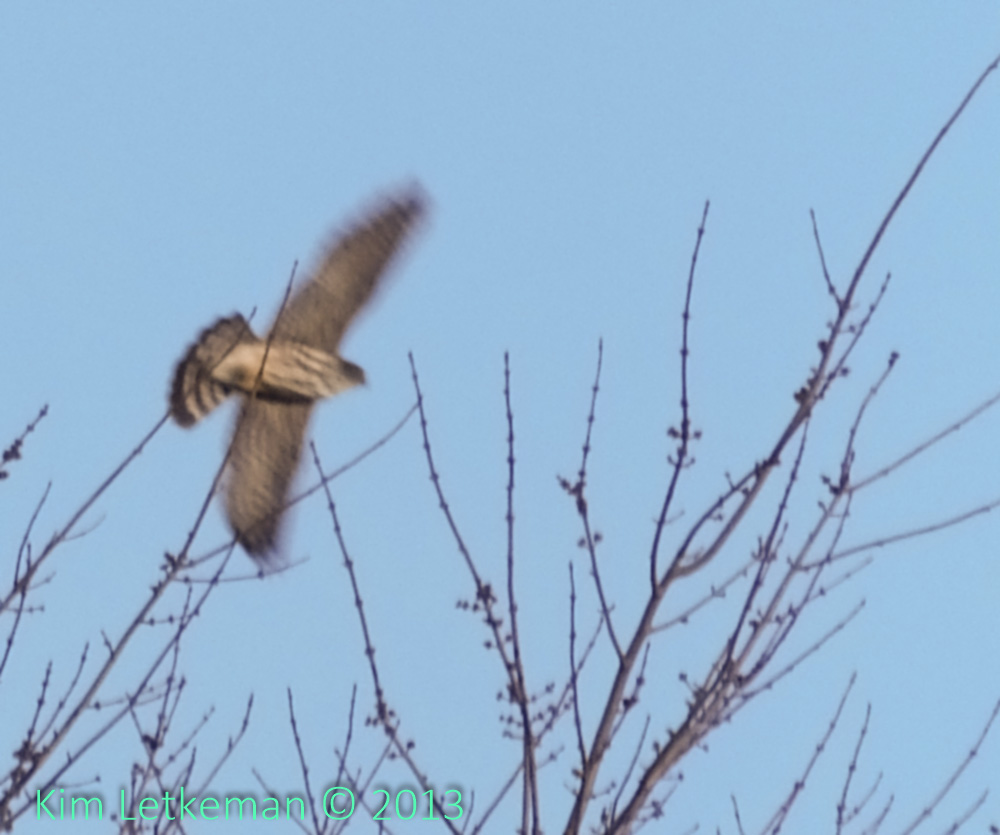
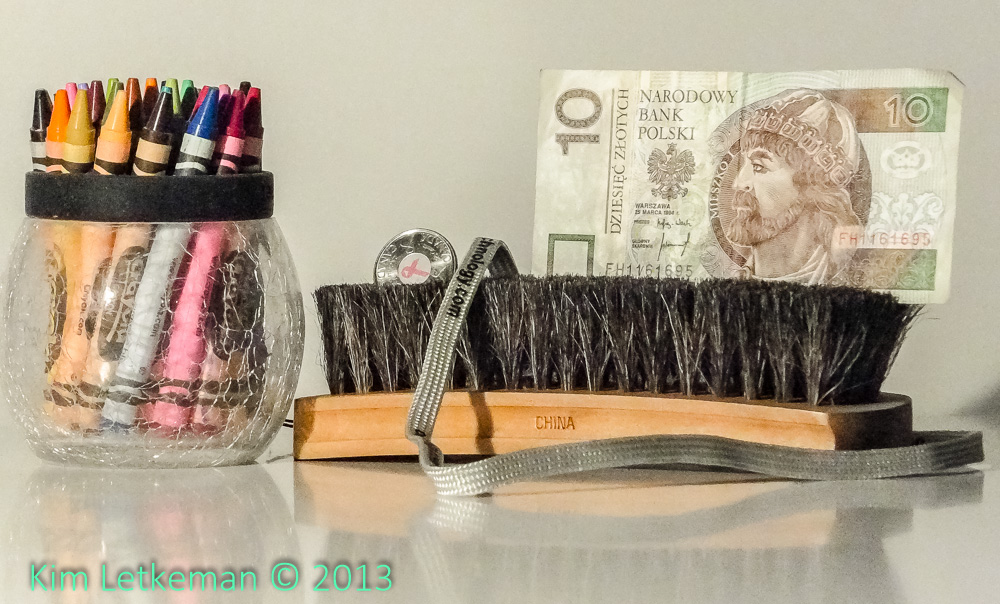
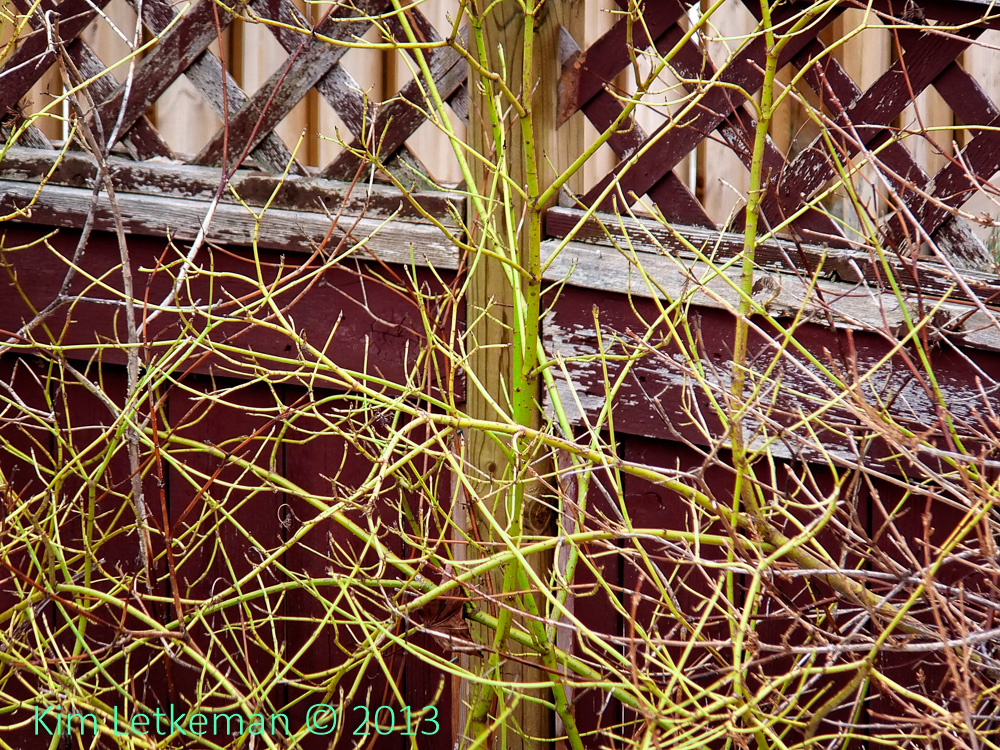
I opened an upstairs window to look outside and set up a tripod to shoot the three cameras at full zoom at my wonderful Yellow-Twig Dogwood, which of course is all yellow twigs and no leaves as we enter the spring season. The fence in behind was painted back around 1998 and so is a little bit worn out, but being covered all summer long by the very large and full bushes in front of it pretty much eliminates any incentive to deal with it :-)

Anyway, I shot these in manual mode on tripod with IS shut off and self timer release, so there should be essentially no issues with the images.

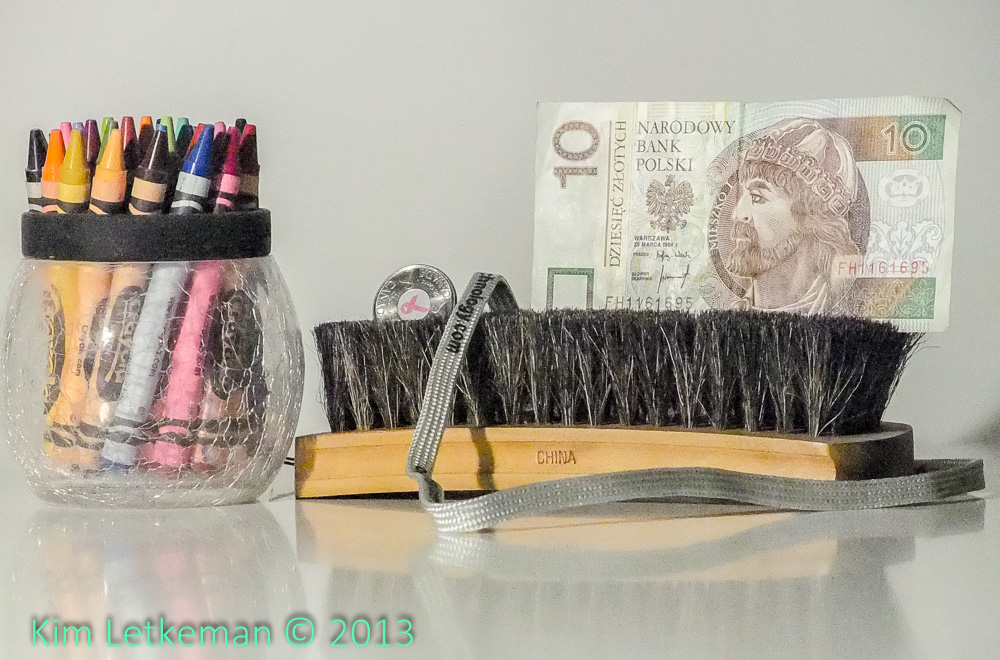
I shot both M and L images in both JPEG and RAW, but since there is no Adobe support at this time, I will start by looking at the JPEGs. The Fuji JPEG engine is pretty excellent, so there is no real issue with using the JPEGs. The inherent advantages of RAW are somewhat mitigate on a dull day like today because it is so easy to get a decent exposure.

I’ll first show you each camera’s rendering of the image after an identical pass through Lightroom 4 and OnOne’s Perfect Effects Free Edition. This latter tool is pretty amazing in that you get all these wonderful effects and a layers engine to boot. Plus, a simple masking tool and brush tool, so you can do some serious work with no investment at all. It works as a stand-alone processing engine, so if you’ve been looking to work with a sophisticated engine consider trying this out.

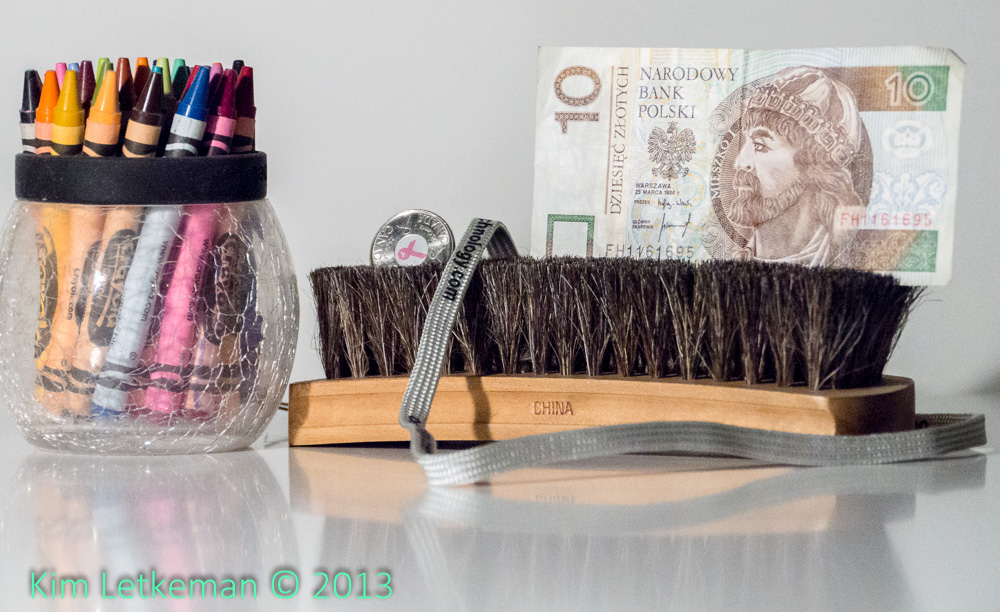
Meanwhile, I used two effects – Amazing Details and Landscape Natural – and since each is on a separate layer I dialed in the amount I wanted. I then saved a present and applied it to the image I was processing first. It automatically applied the effects to all the loaded JPEGs and saved a PSD (layered Photoshop) file for each, not touching any of the existing originals or edited files, which is Lightroom’s great strength.

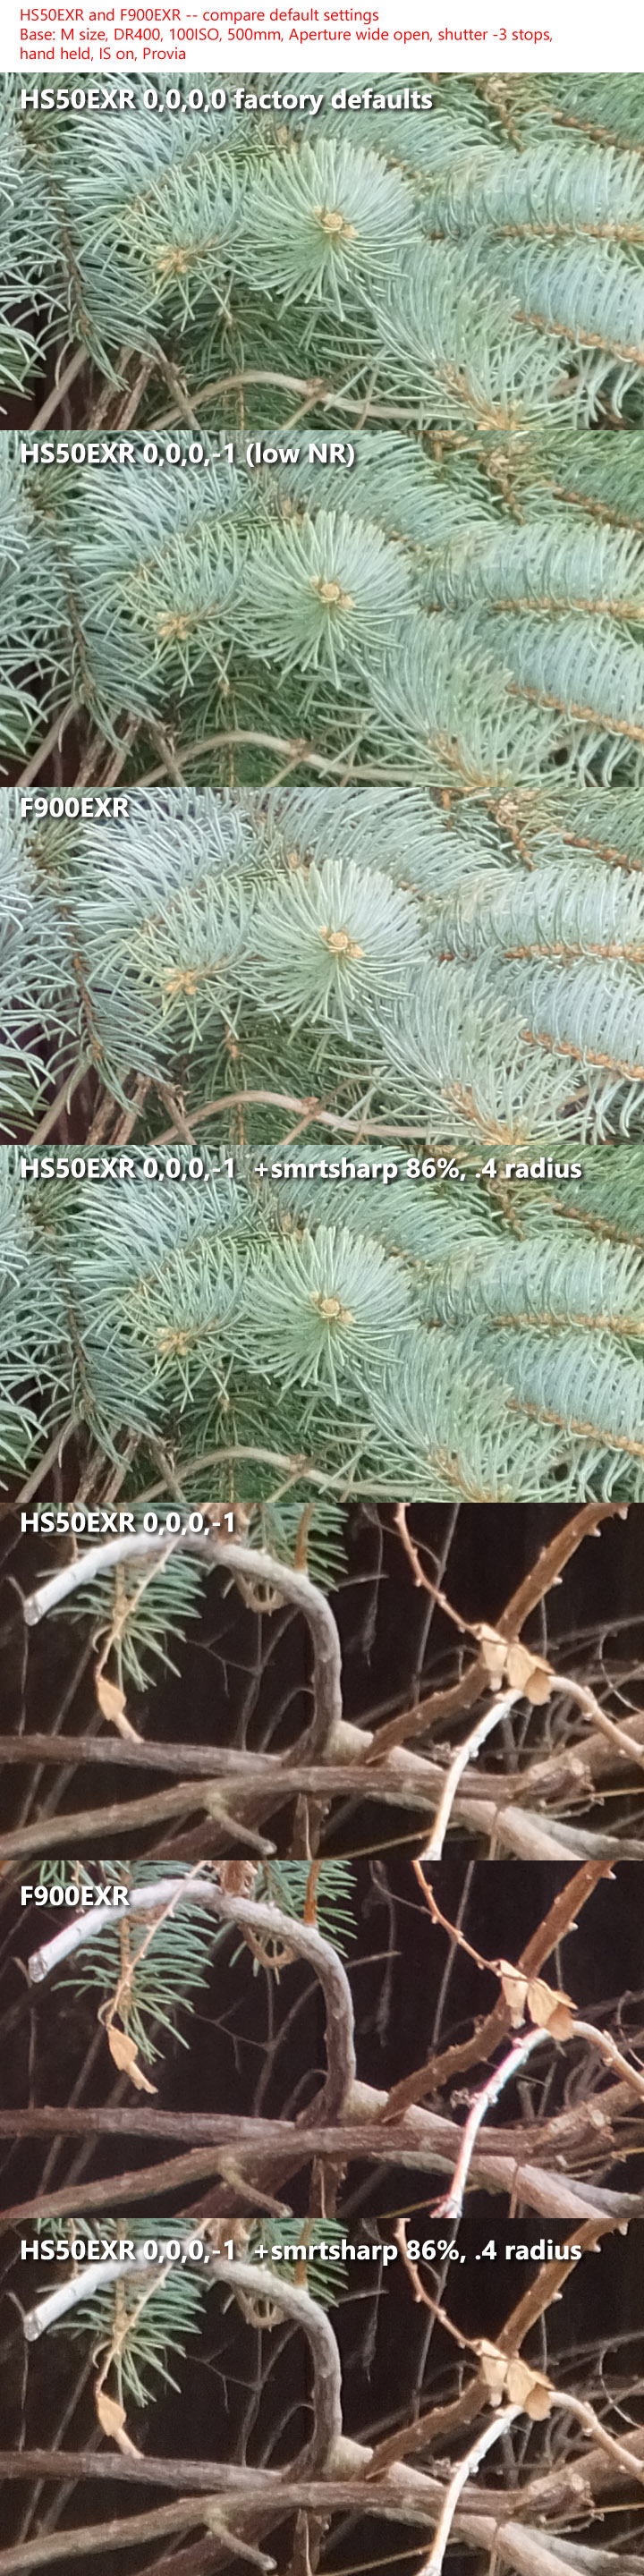
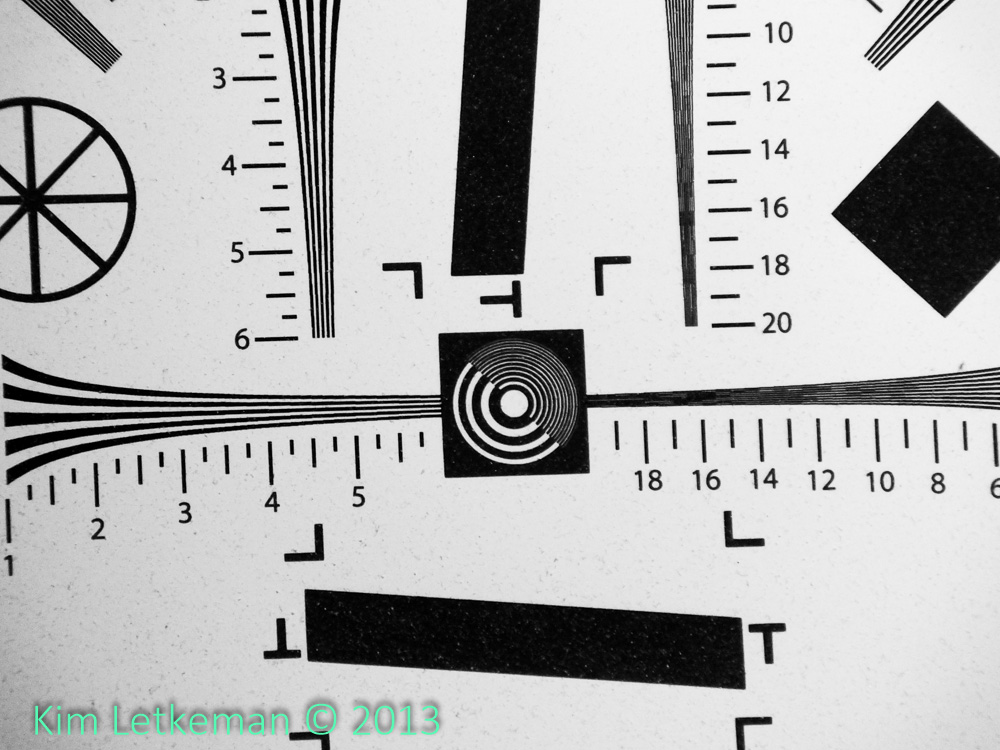
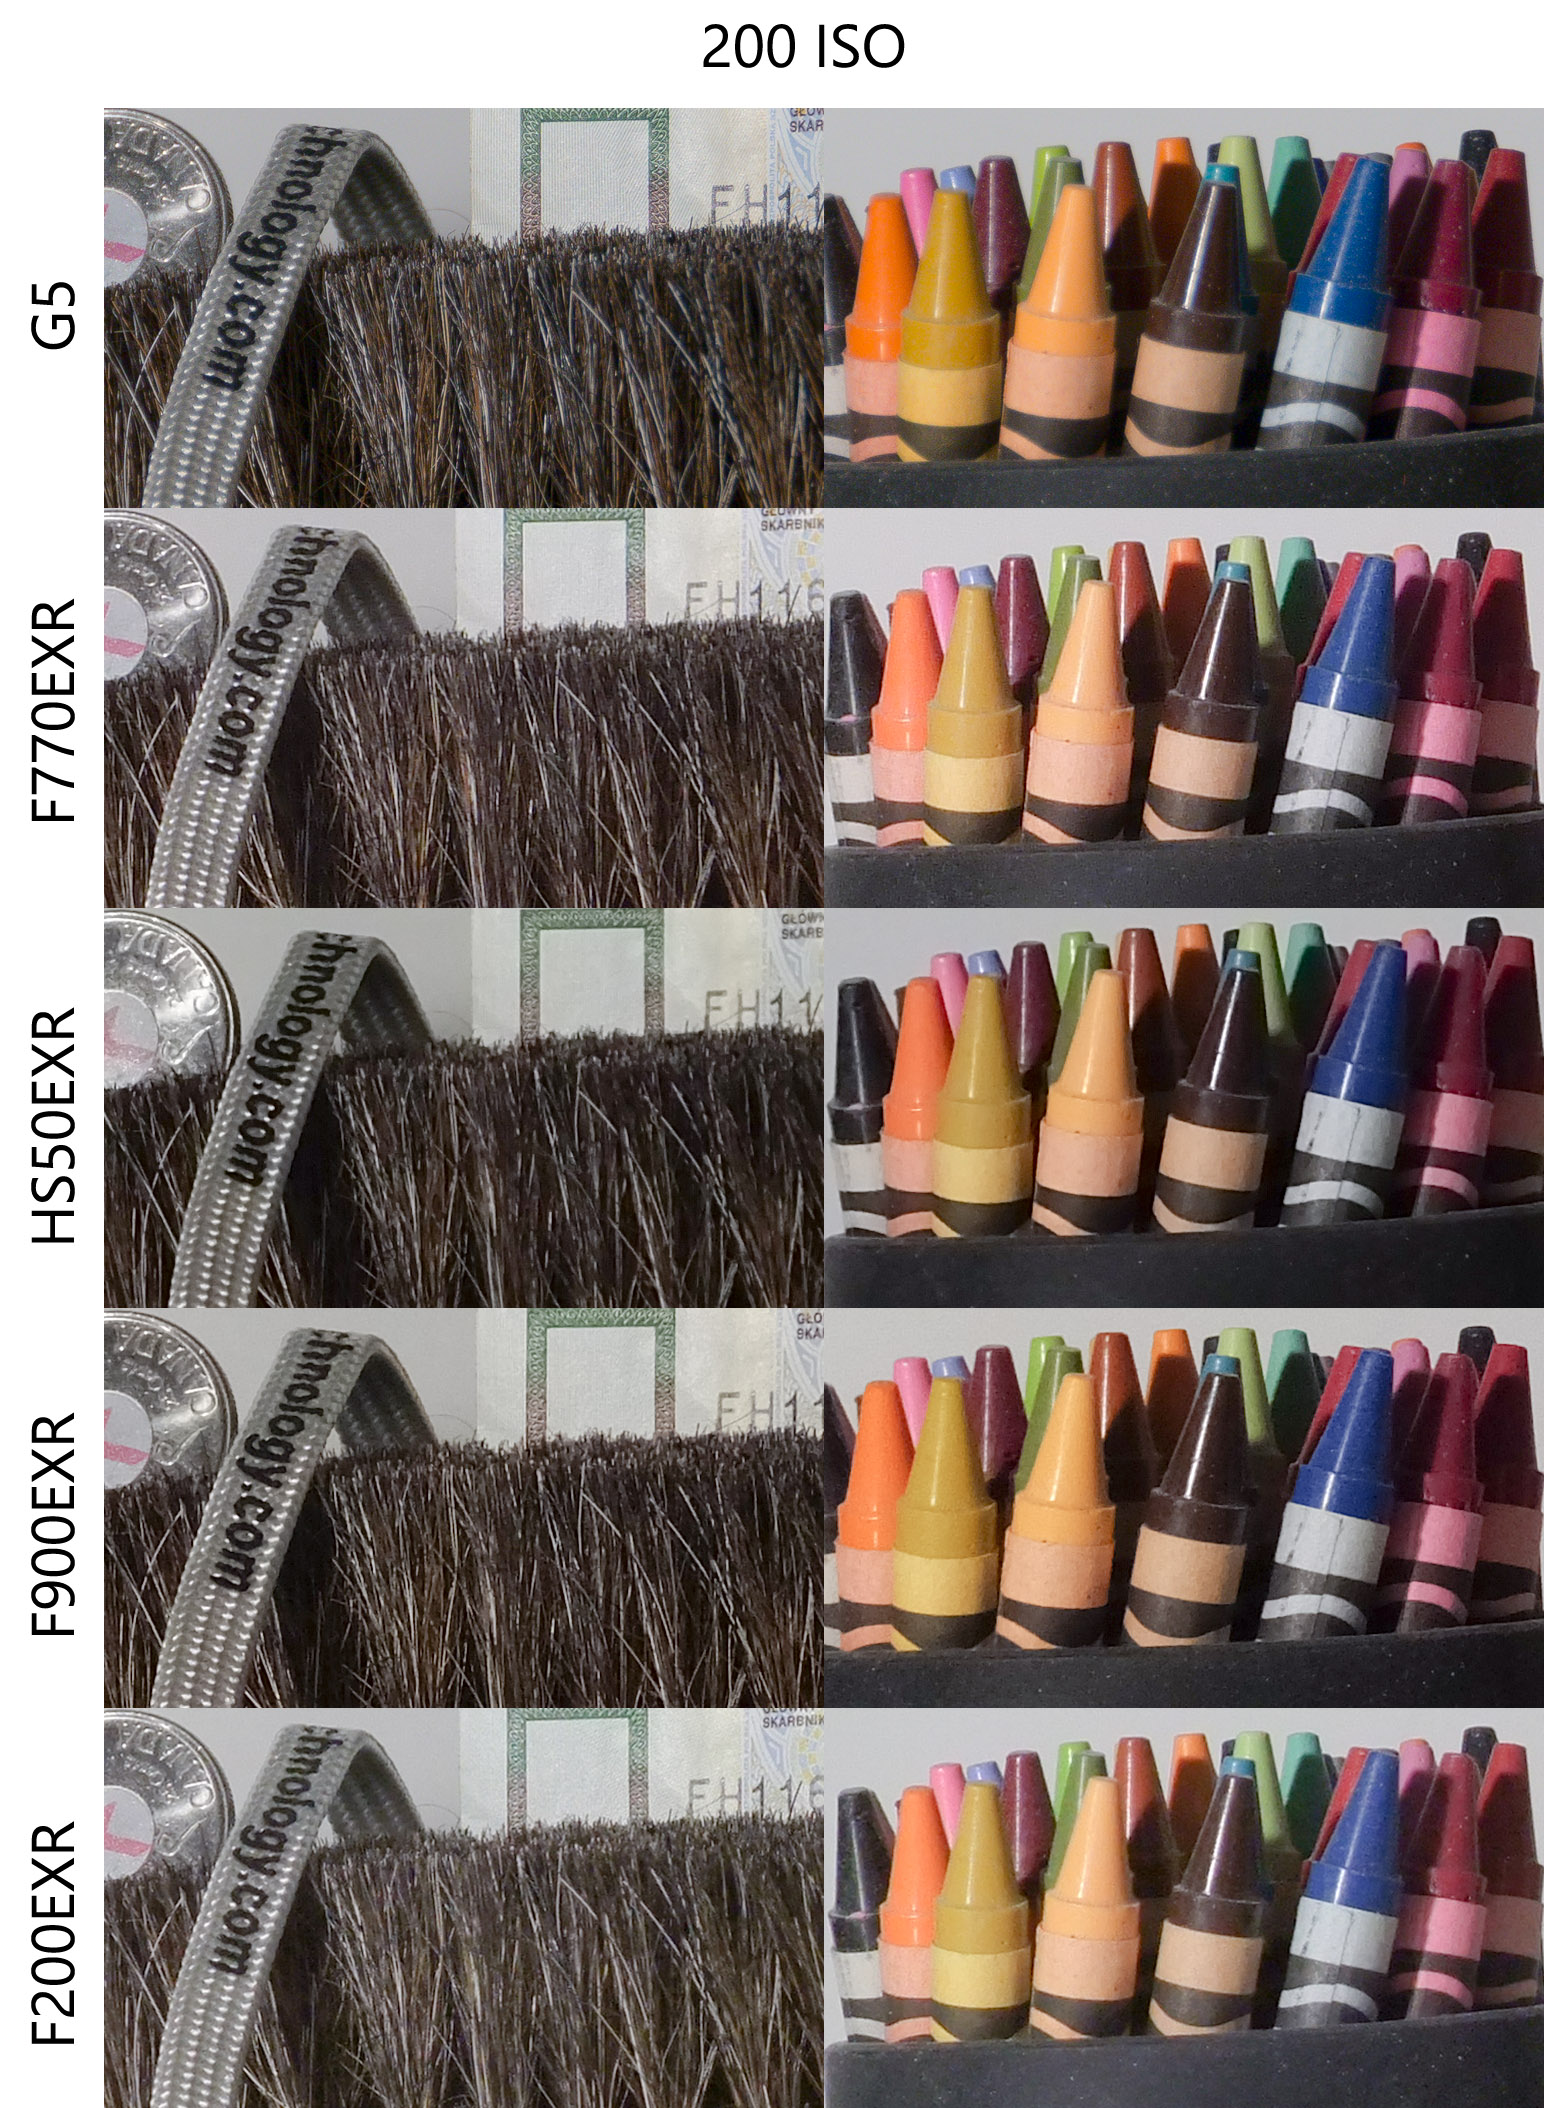
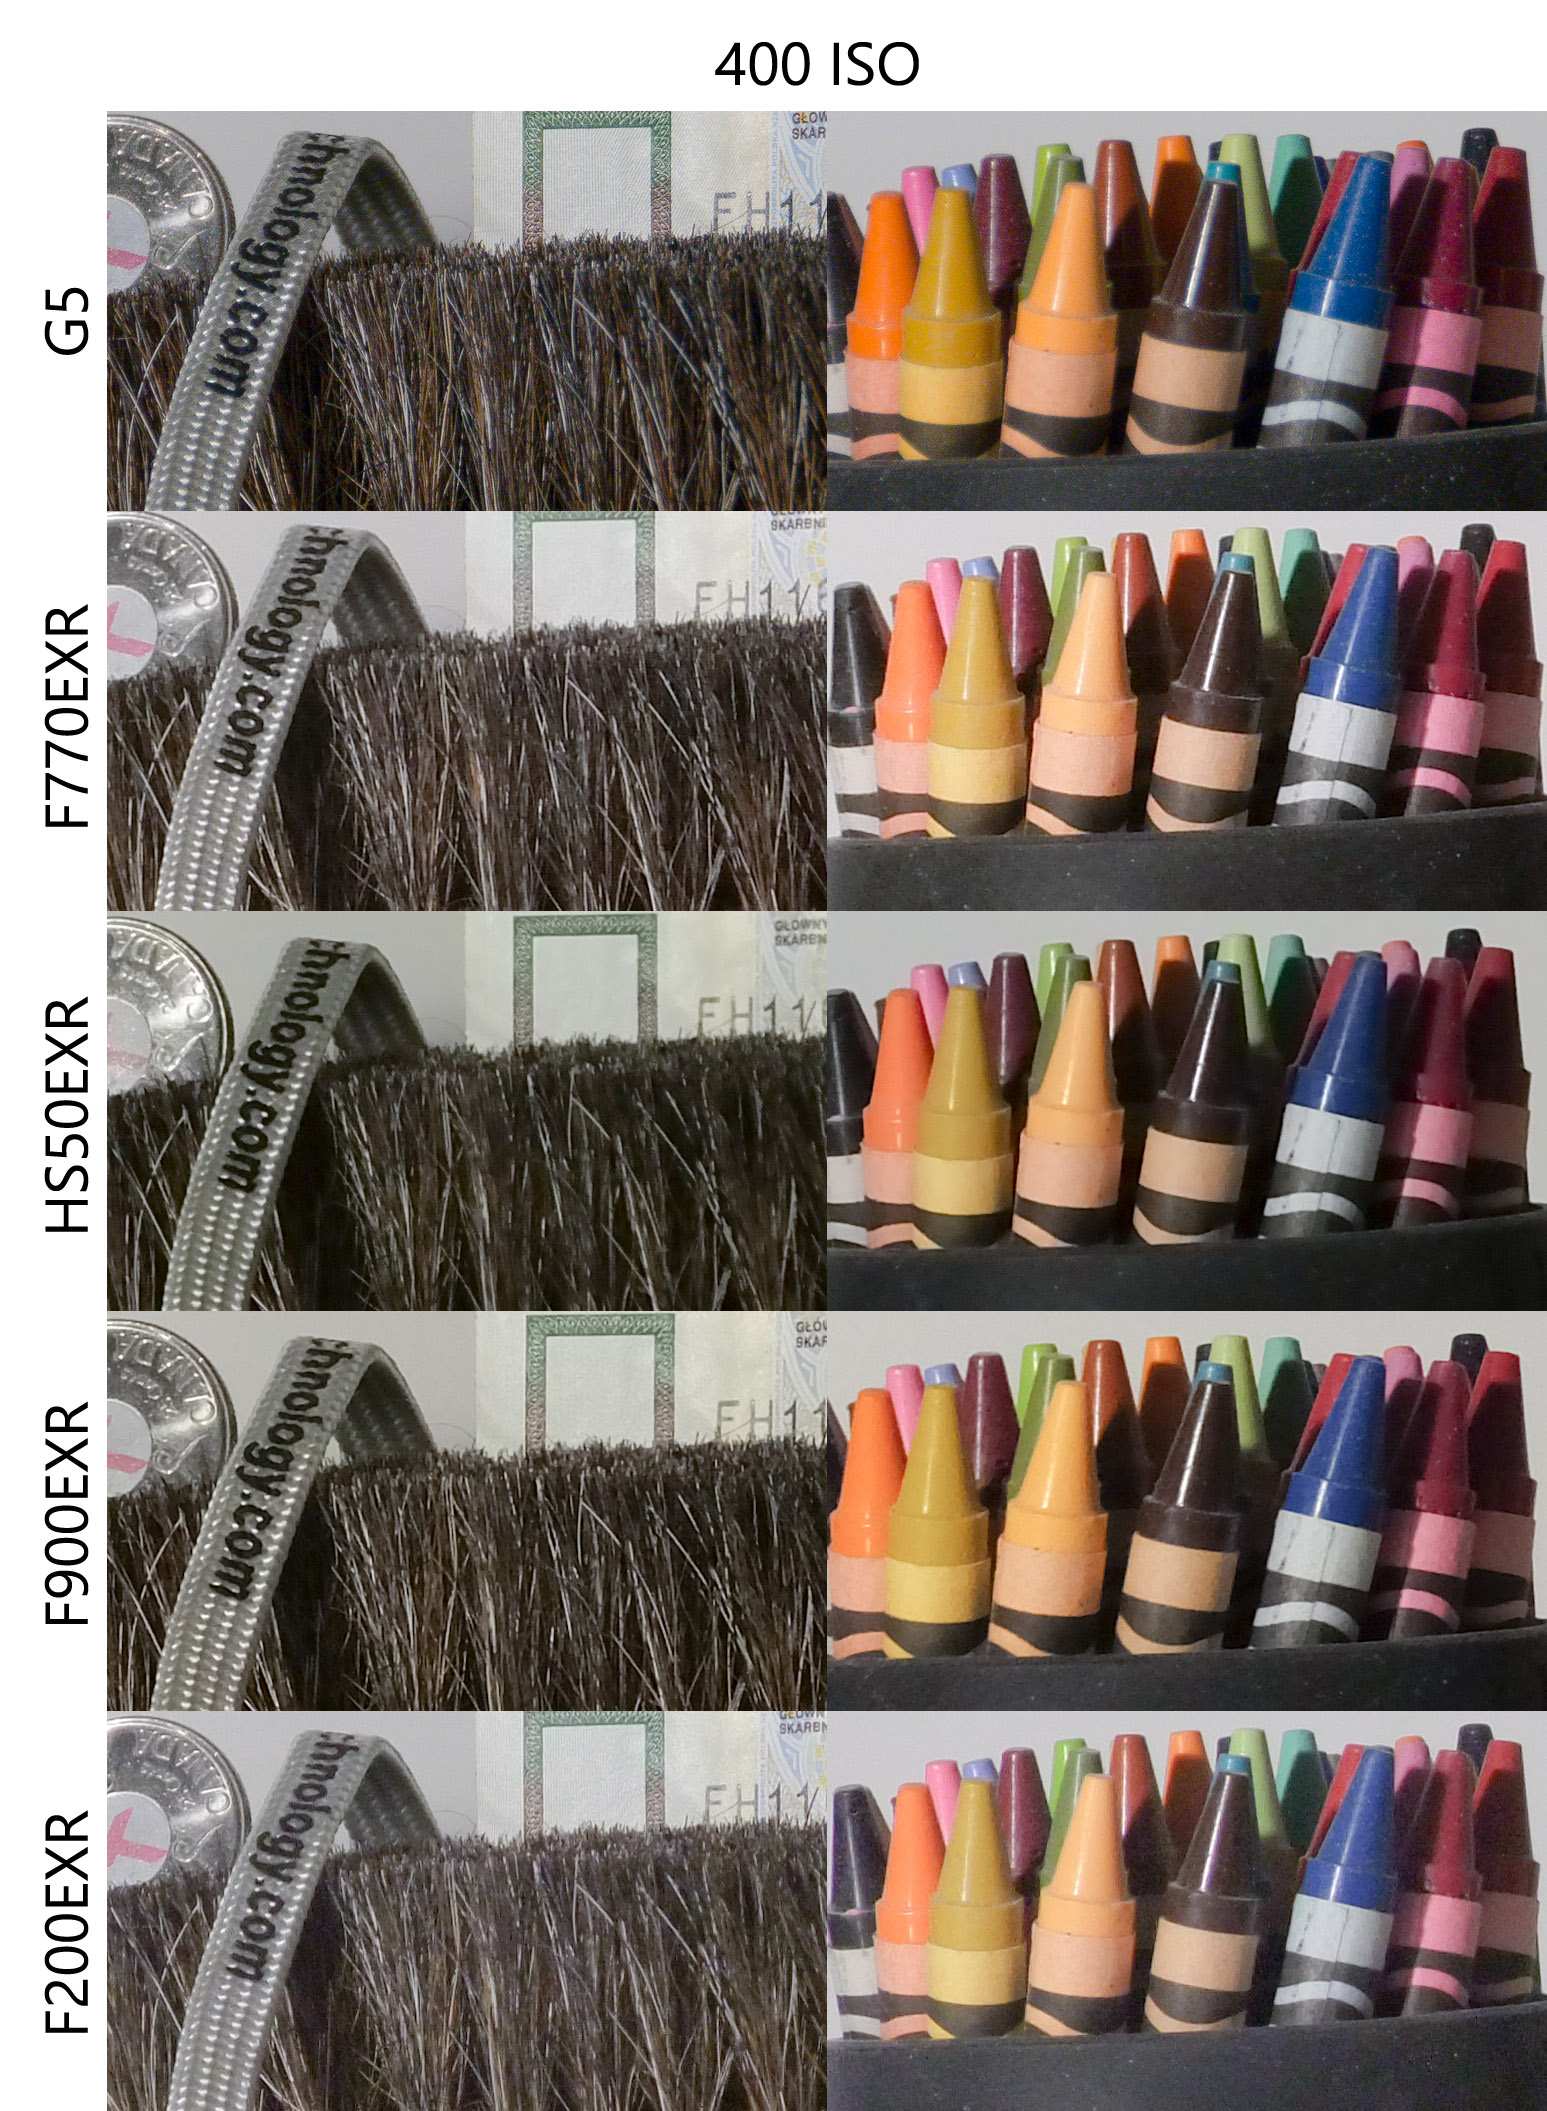
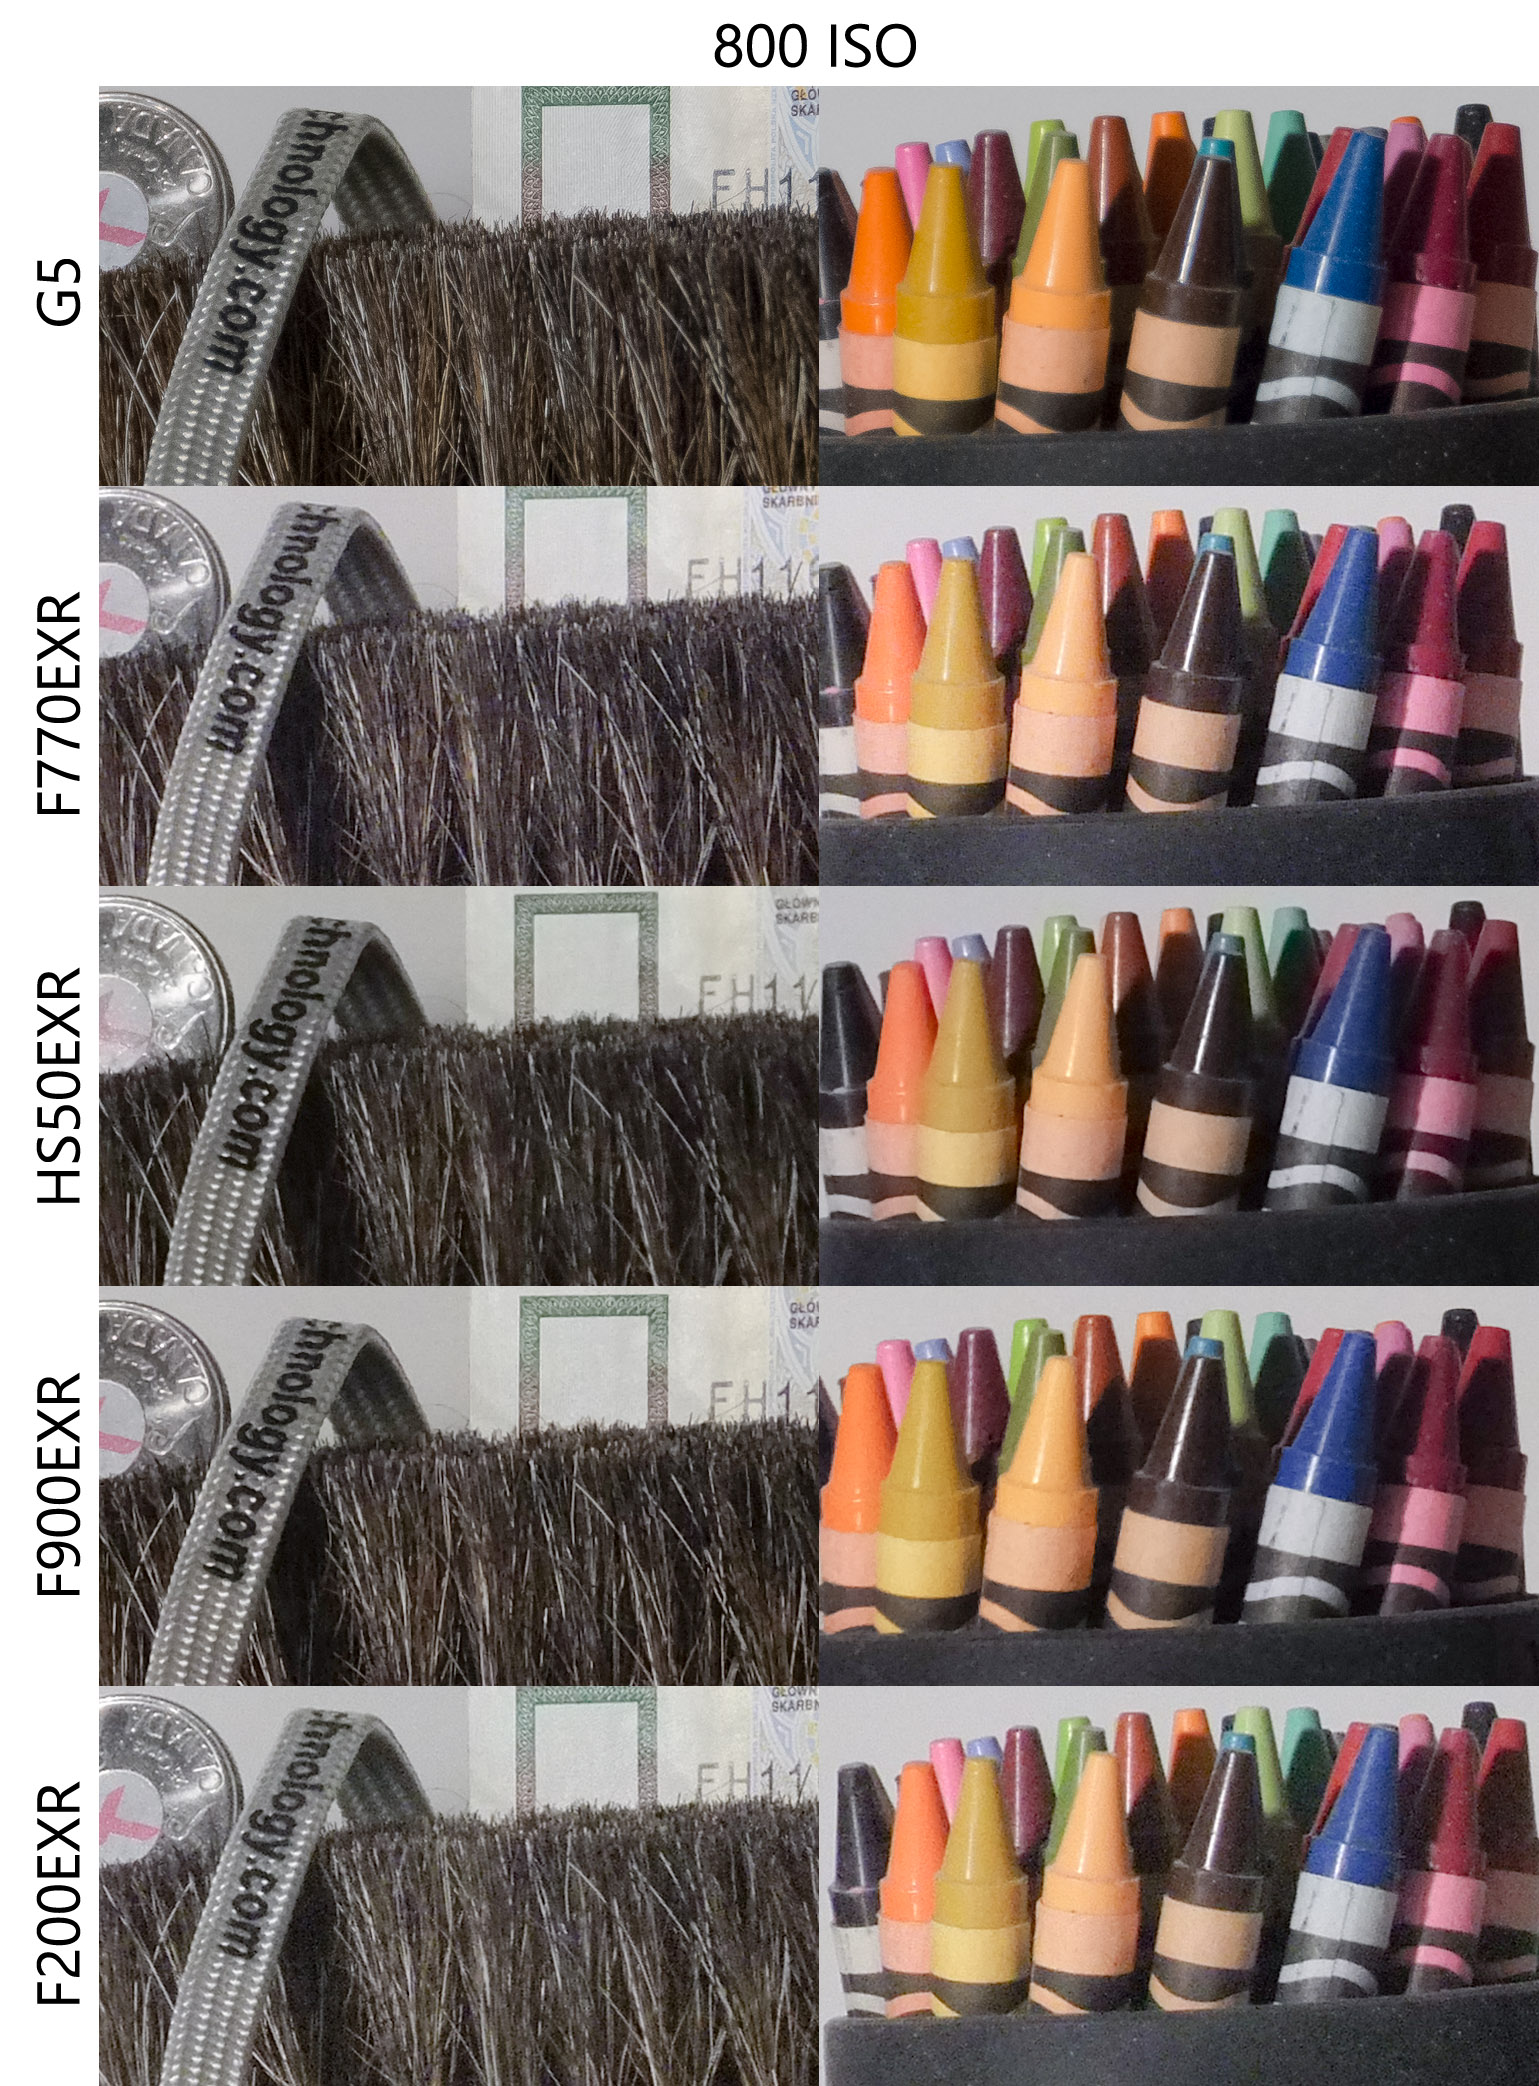
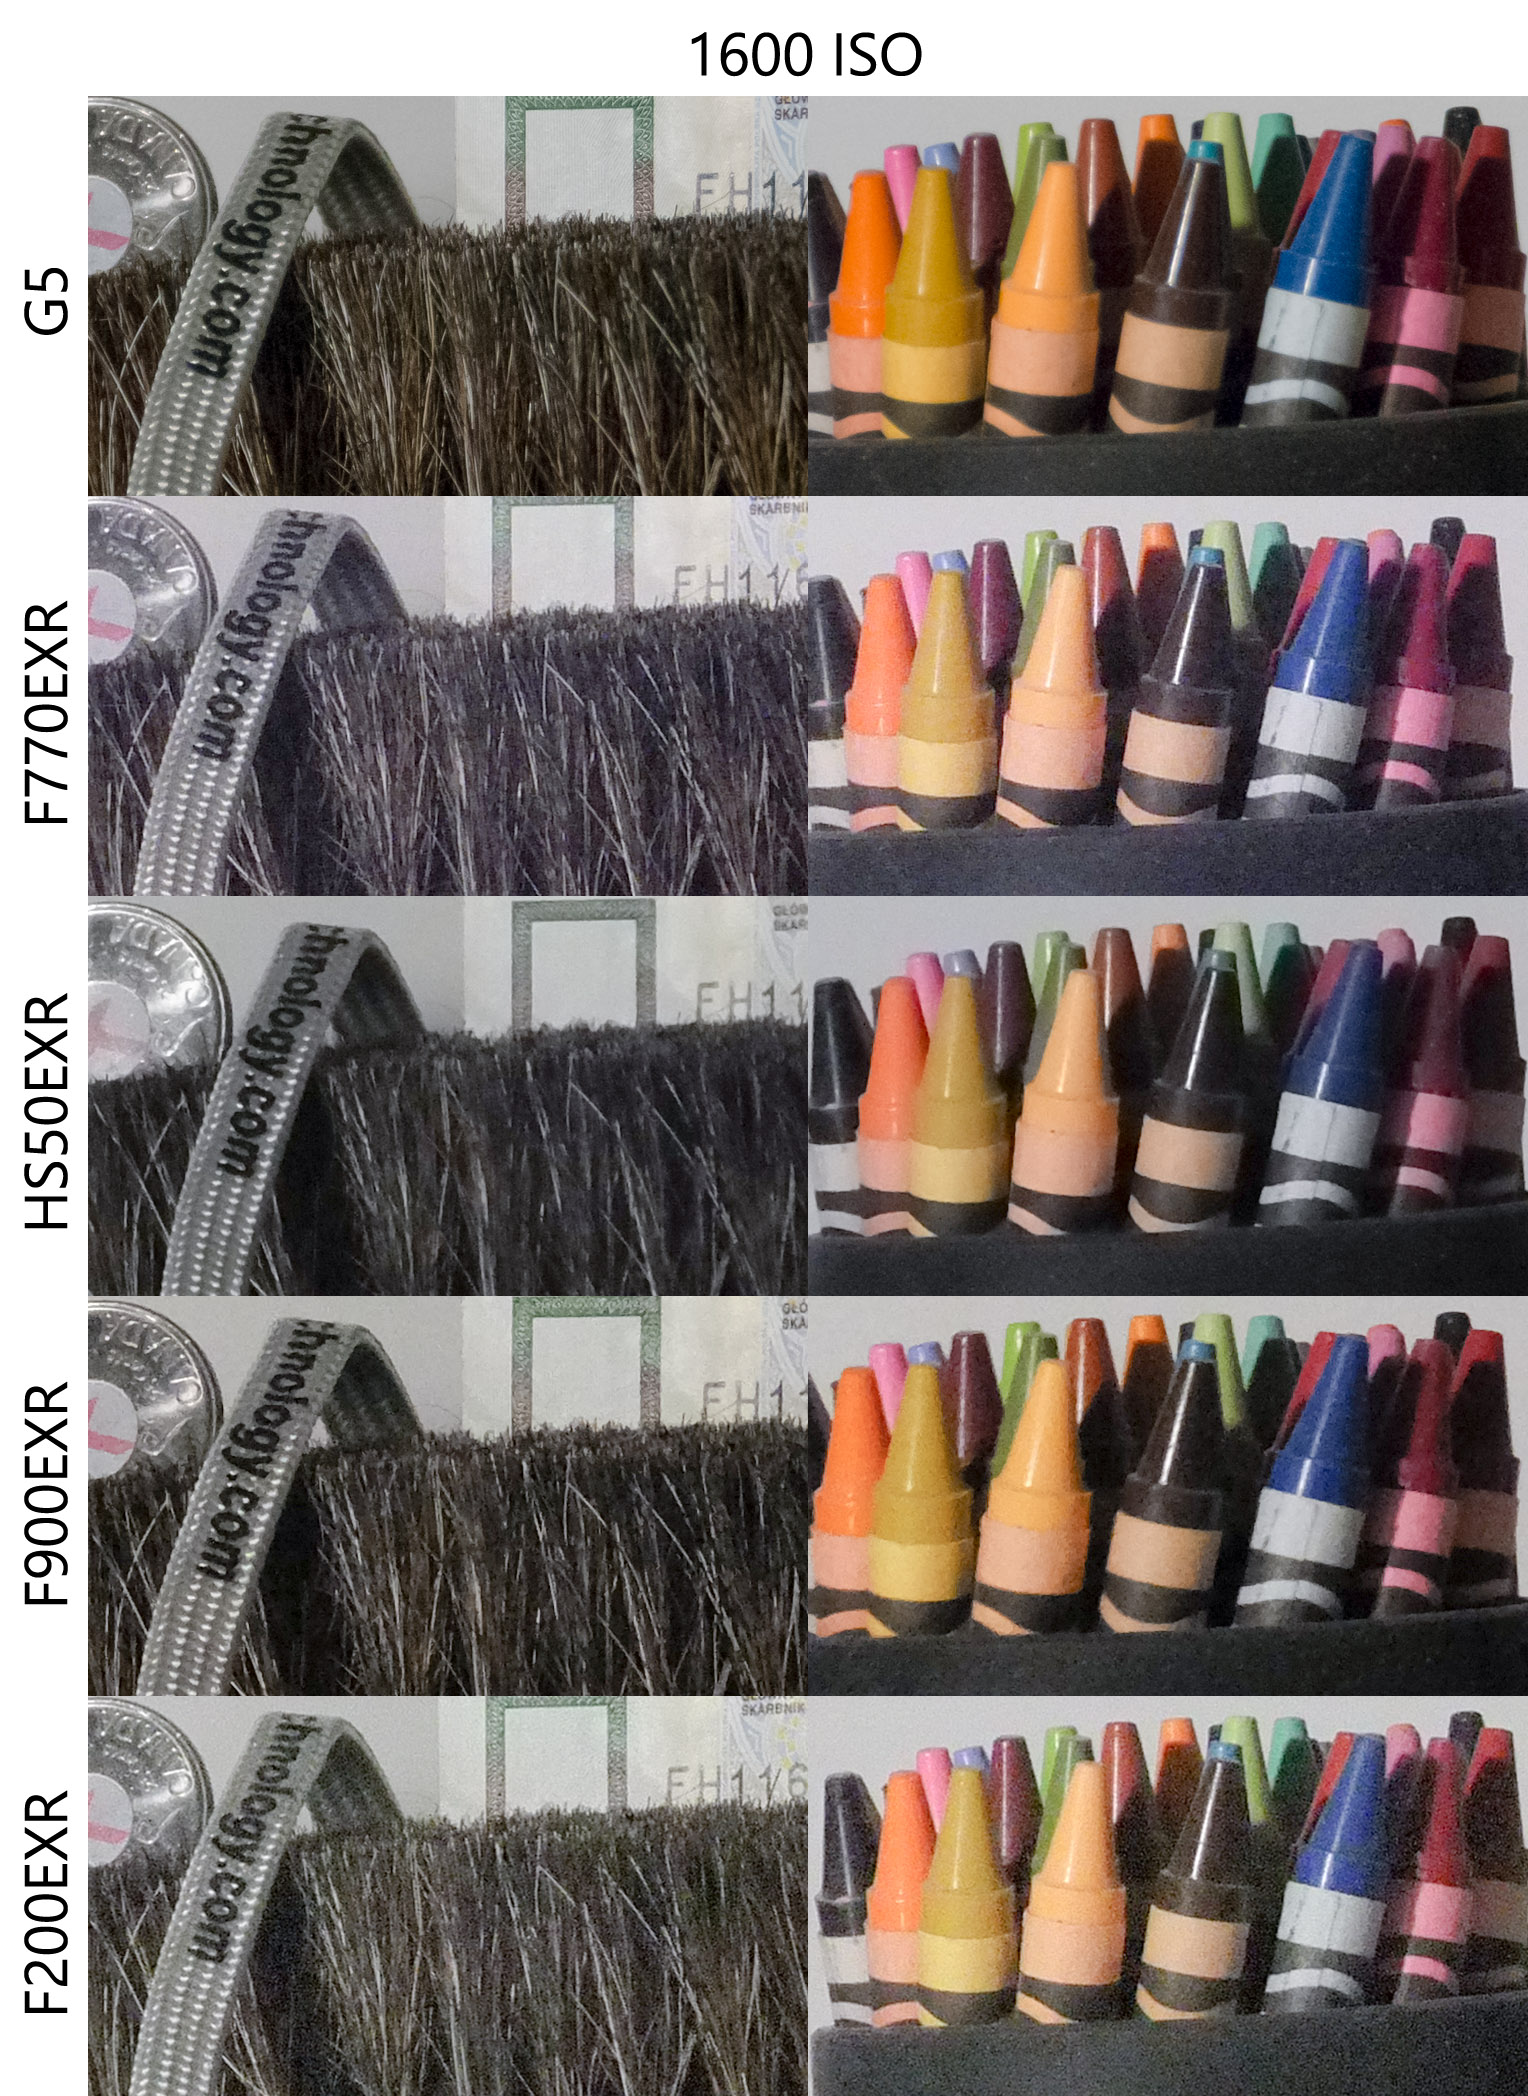
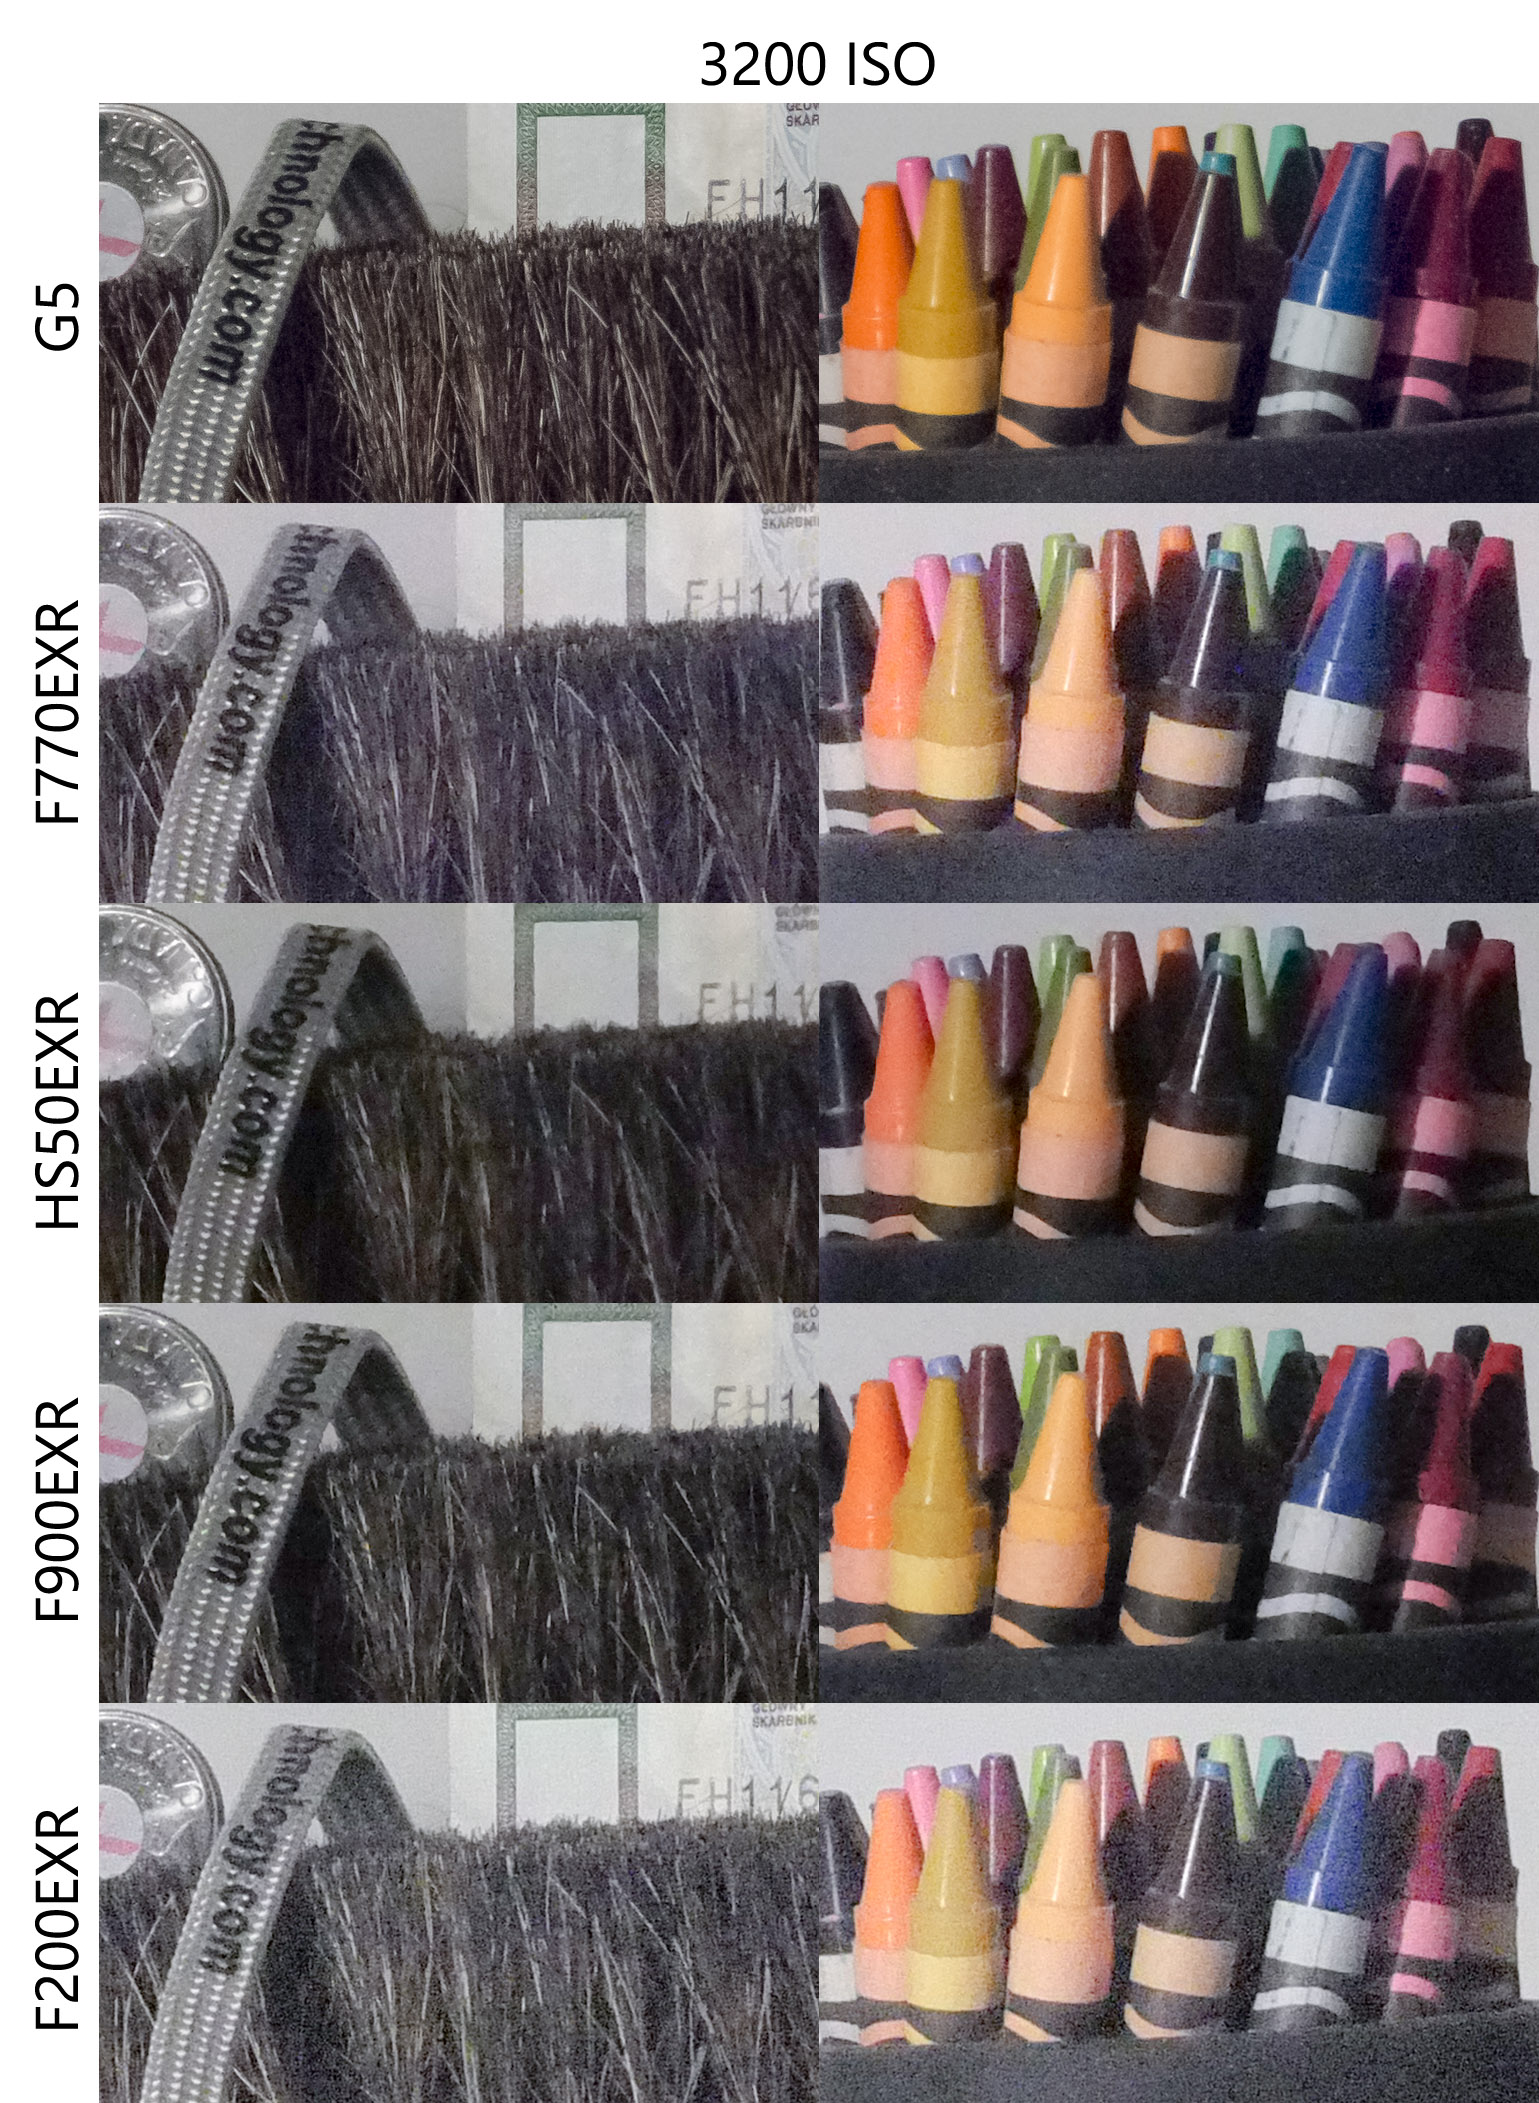
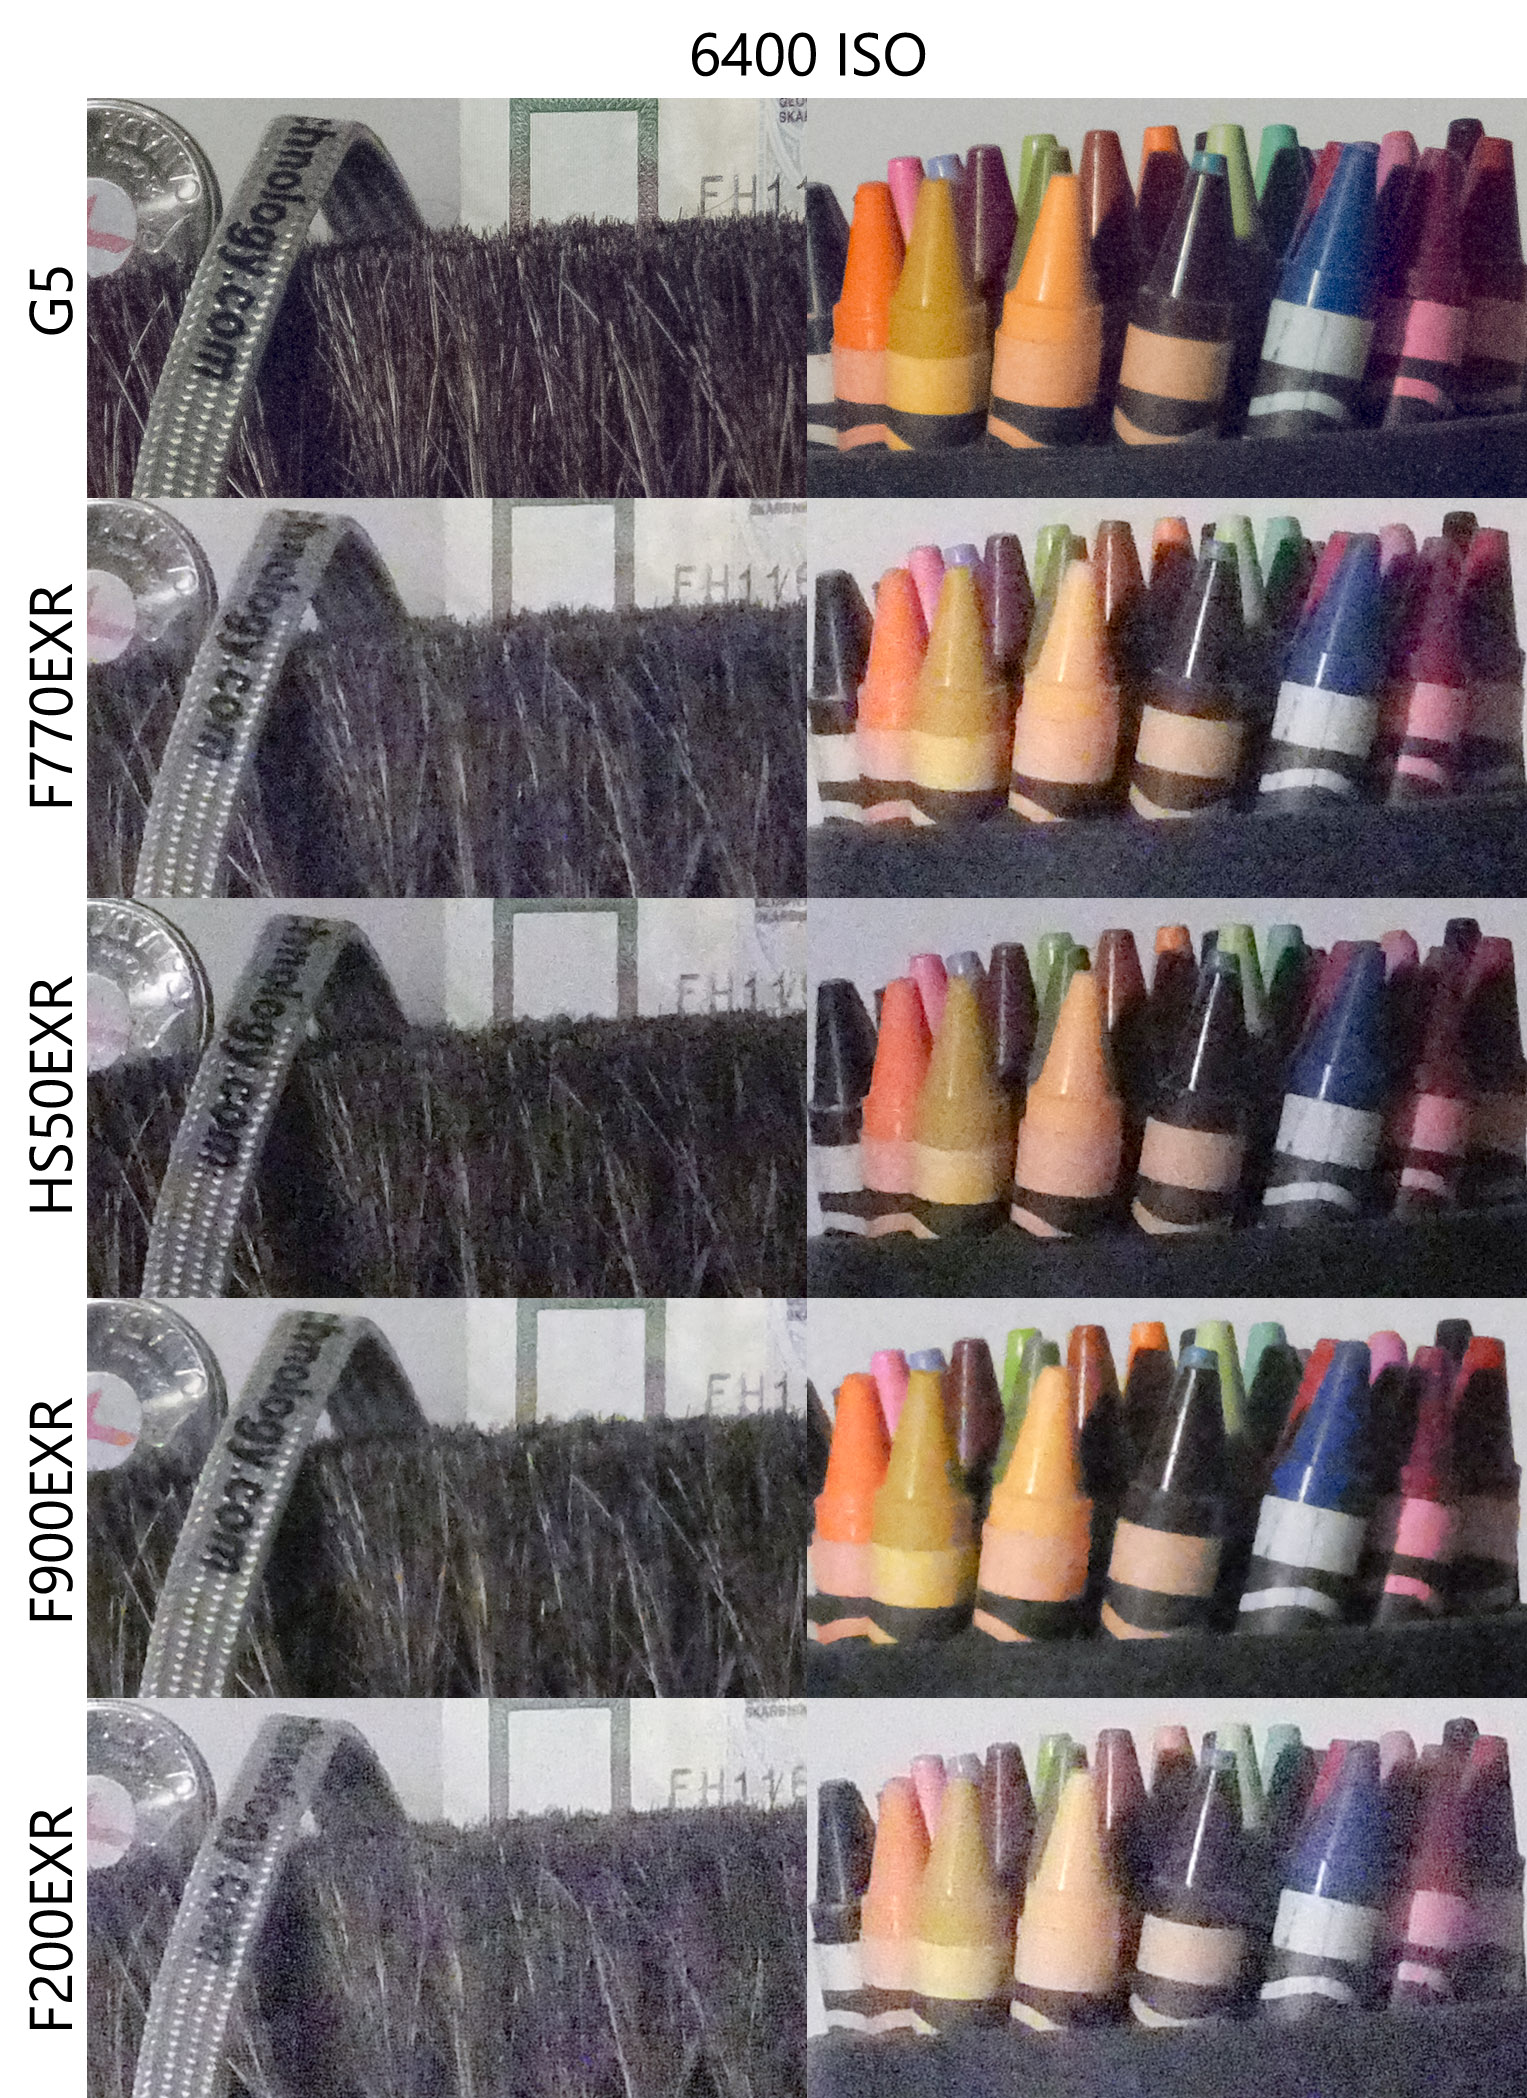
The first set is shot at 500mm effective focal length (EFL), including the HS50EXR. At the end I show the HS50EXR at 1000mm EFL. Note also that I show the HS50EXR at both f/5.6 and f/8. When you see the crops in the next section you will see why.

Note that the HS50EXR, being the only camera with a tunable JPEG engine, is shot with all tone and sharpness settings on low so that the JPEG engine applies as little “bruising” as possible. You will see a bit later that this makes a huge difference, especially at L size.

And without further ado:

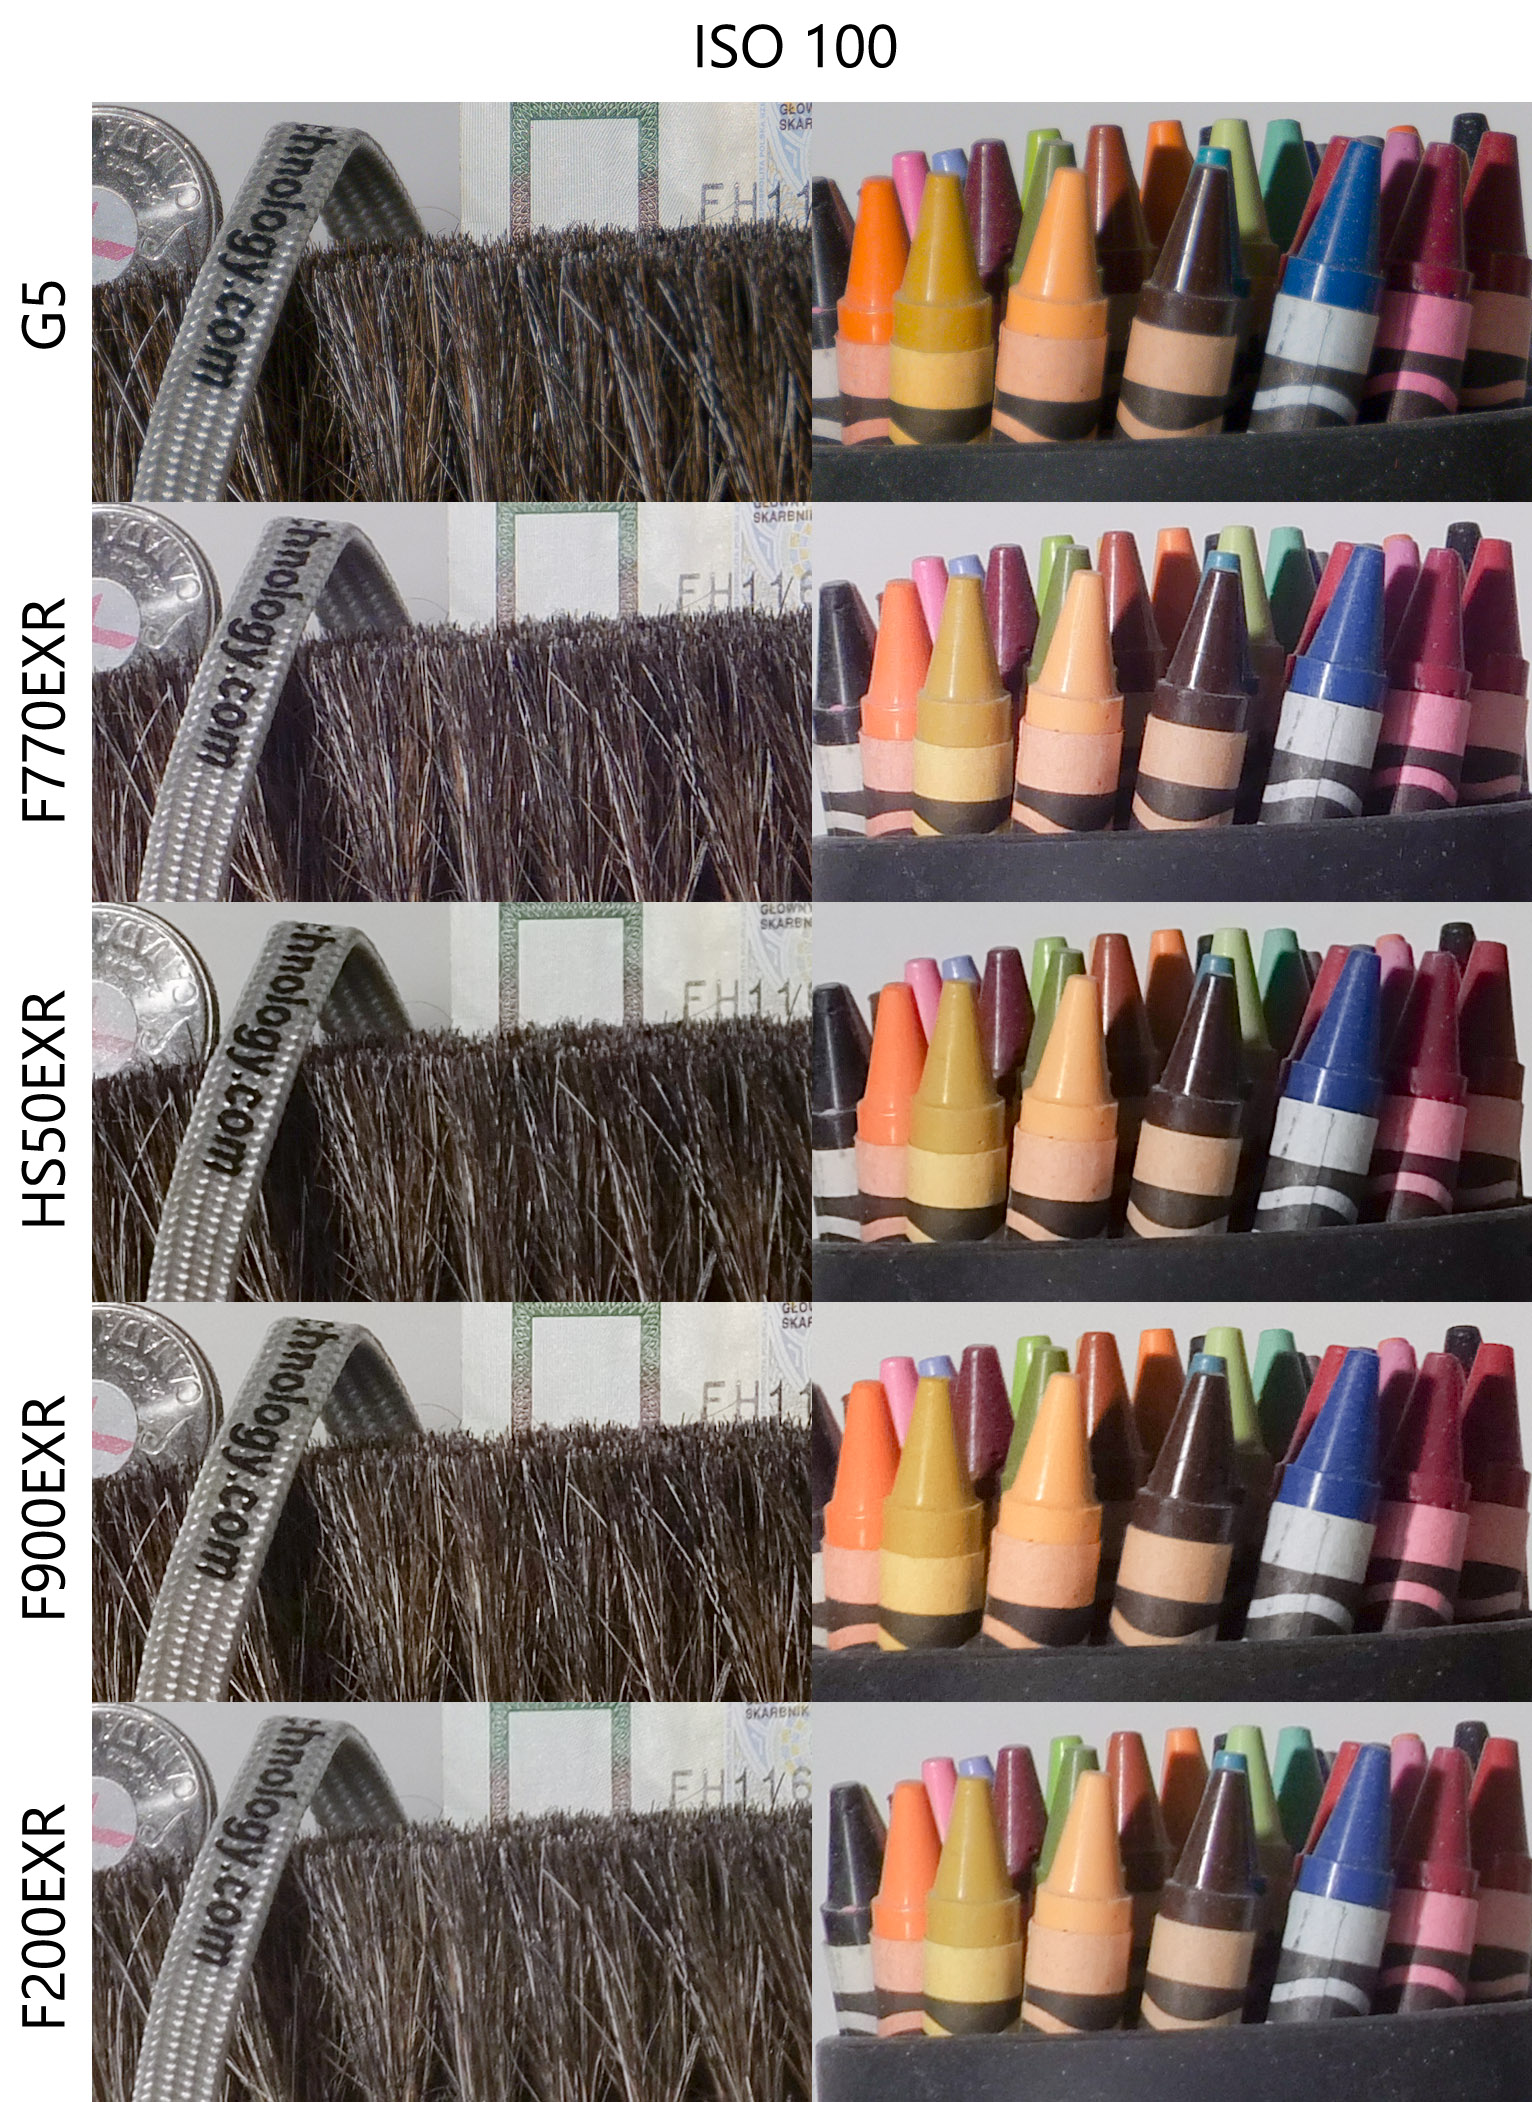
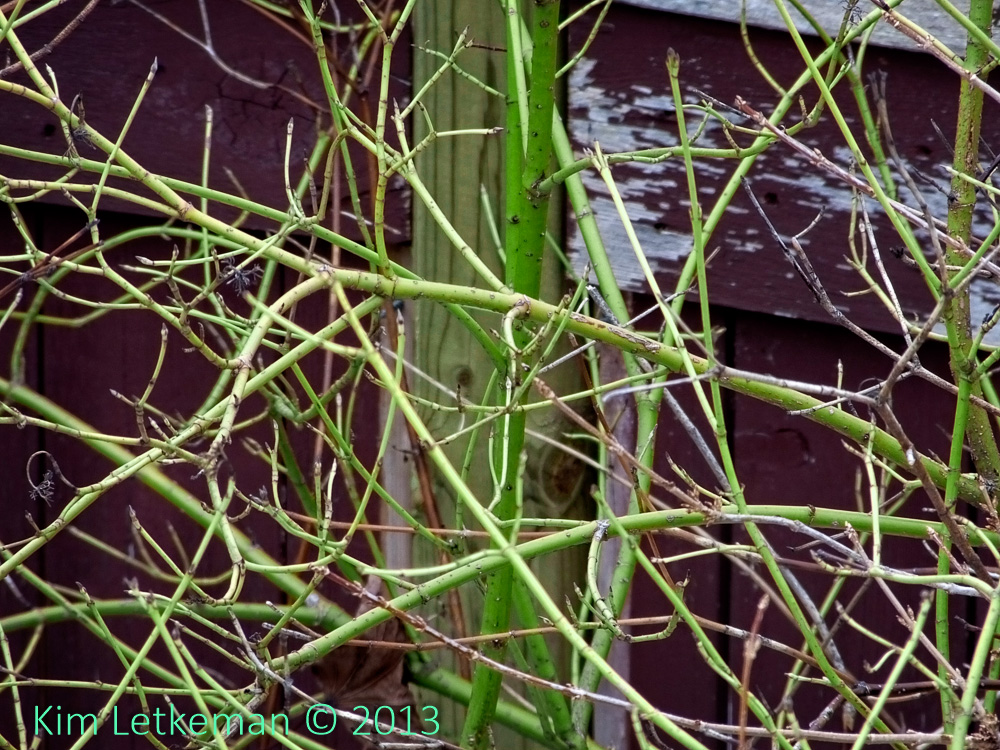
F900EXR  100iso  f/5.3  1/40


HS50EXR  100iso  f/5.6  1/50


HS50EXR  100iso  f/8  1/25


F770EXR  100iso  f/5.3  1/30


HS50EXR @1000mm  100iso  f/8  1/20

Observations

The F900EXR looks the best in both tone and detail. The F770EXR is also good, with decent microcontrast, but you will see the results more clearly in the next section. The HS50EXR is a bit muted, but that is simply the controls that I toned down (pun intended) for this exercise.

All in all, they all look alike. Big shock. Same basic sensor technology, same JPEG engine. Duh.


And then there is this M versus L size debate. Some questions that need to be answered:
  • Does L size render more details? This is not the same thing as simply spitting out more pixels.
    • Generally speaking, no. There is no more detail. The HS50EXR is almost – but not quite – an exception in that the L files have quite a bit more clarity if you shoot the JPEGs correctly, with the tone, sharpening and noise reduction all turned down low. But simply sharpening the M upsized image more or less equalizes again, so the answer is that the actual results are essentially the same. This is, however, an improvement over the non-adjustable JPEG engines where edge degradation and smearing ruin the images when shot at L size. And shooting the HS50EXR at normal settings will also ruin the images, even if some people cannot see that degradation.
  • Does L size crop better?
    • By definition, no. The quality of the pixels is actually lower, so cropping is less useful in L size. Again, shot correctly, the HS50EXR images have almost no penalty for shooting L size (but if you sharpen them at all, you will see that there is still a touchiness that is not there on M sized originals.)
  • Are there other penalties for shooting L size?
    • I’m glad you asked that :-)  Remember that L size has no binning or blending, which means that any dynamic range setting above DR100 is going to raise ISO and that is fatal to the images. Seriously. The immediate loss of details is noticeable. Of course, once downsized for Facebook it does not matter all that much. But be aware that it definitely removes some of the clarity through degradation of surfaces and edges both. Now, if this does not bother you, then you can shoot L size at any ISO safely. Because you are not really seeing the clarity that these cameras are capable of.

The bottom line is that I would not waste any time shooting L size. Too much risk of accidentally shooting at higher ISO or of blowing highlights and blocking shadows. I see no real upside since there is never an obvious detail advantage. I have seen people adamantly (indeed, stridently) claim otherwise, but their proof is invariably incompetently shot with blur or other issues destroying any possibility of seeing what is really going on.

This makes it sound like the difference is pretty subtle. And it is. But in any image that has a lot of fine, low-contrast surface or edges, you will get a great deal of damage that is not all that subtle any more. This ruins the acuity of the image and even at small sizes it is possible to see it. Your brain reacts viscerally to the acuity of an image, so if you remove the basic acuity, just downsizing will not bring it back. It shows, so don’t take the chance.

YMMV of course (but if it does, think long and hard why :-)


And now for some crops …. everyone’s favorite thing …

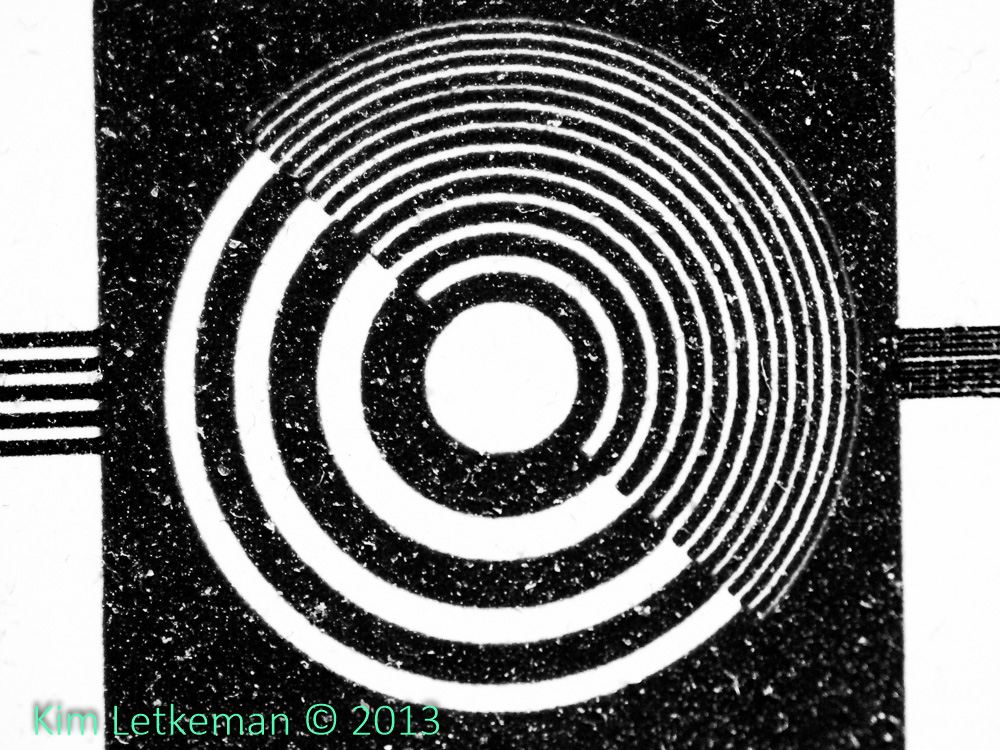
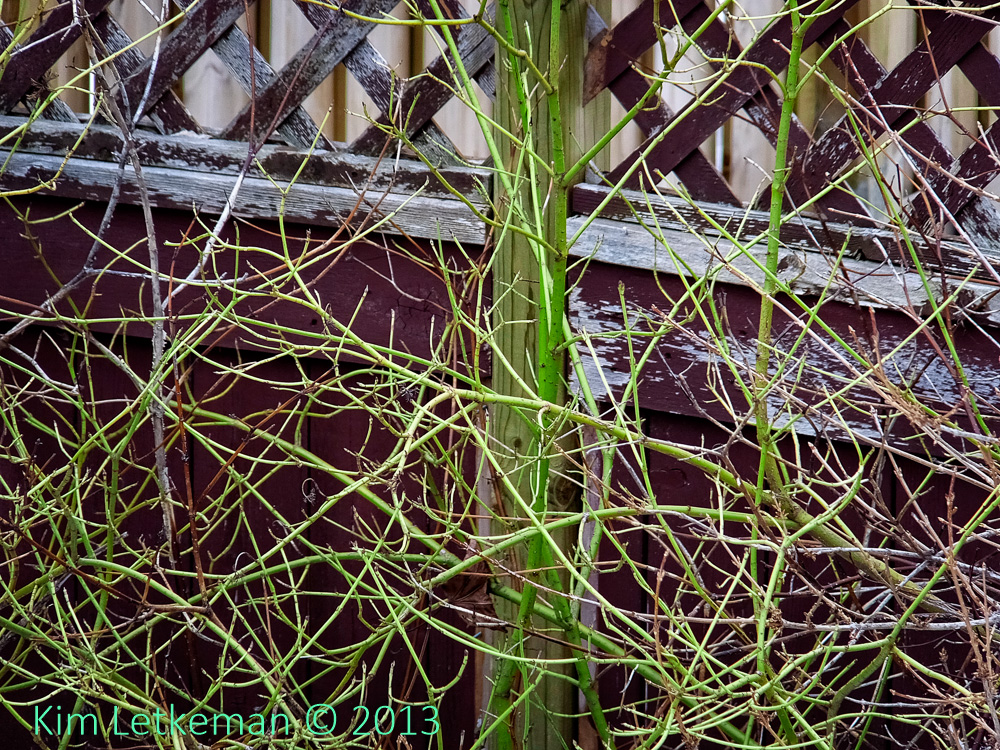
Here is a comparison between F770 at M and L size. The images are equalized with slight sharpening of the upsized M image, and then the whole image is slightly sharpened to accentuate artifacts a bit and magnified to make them unmistakable.

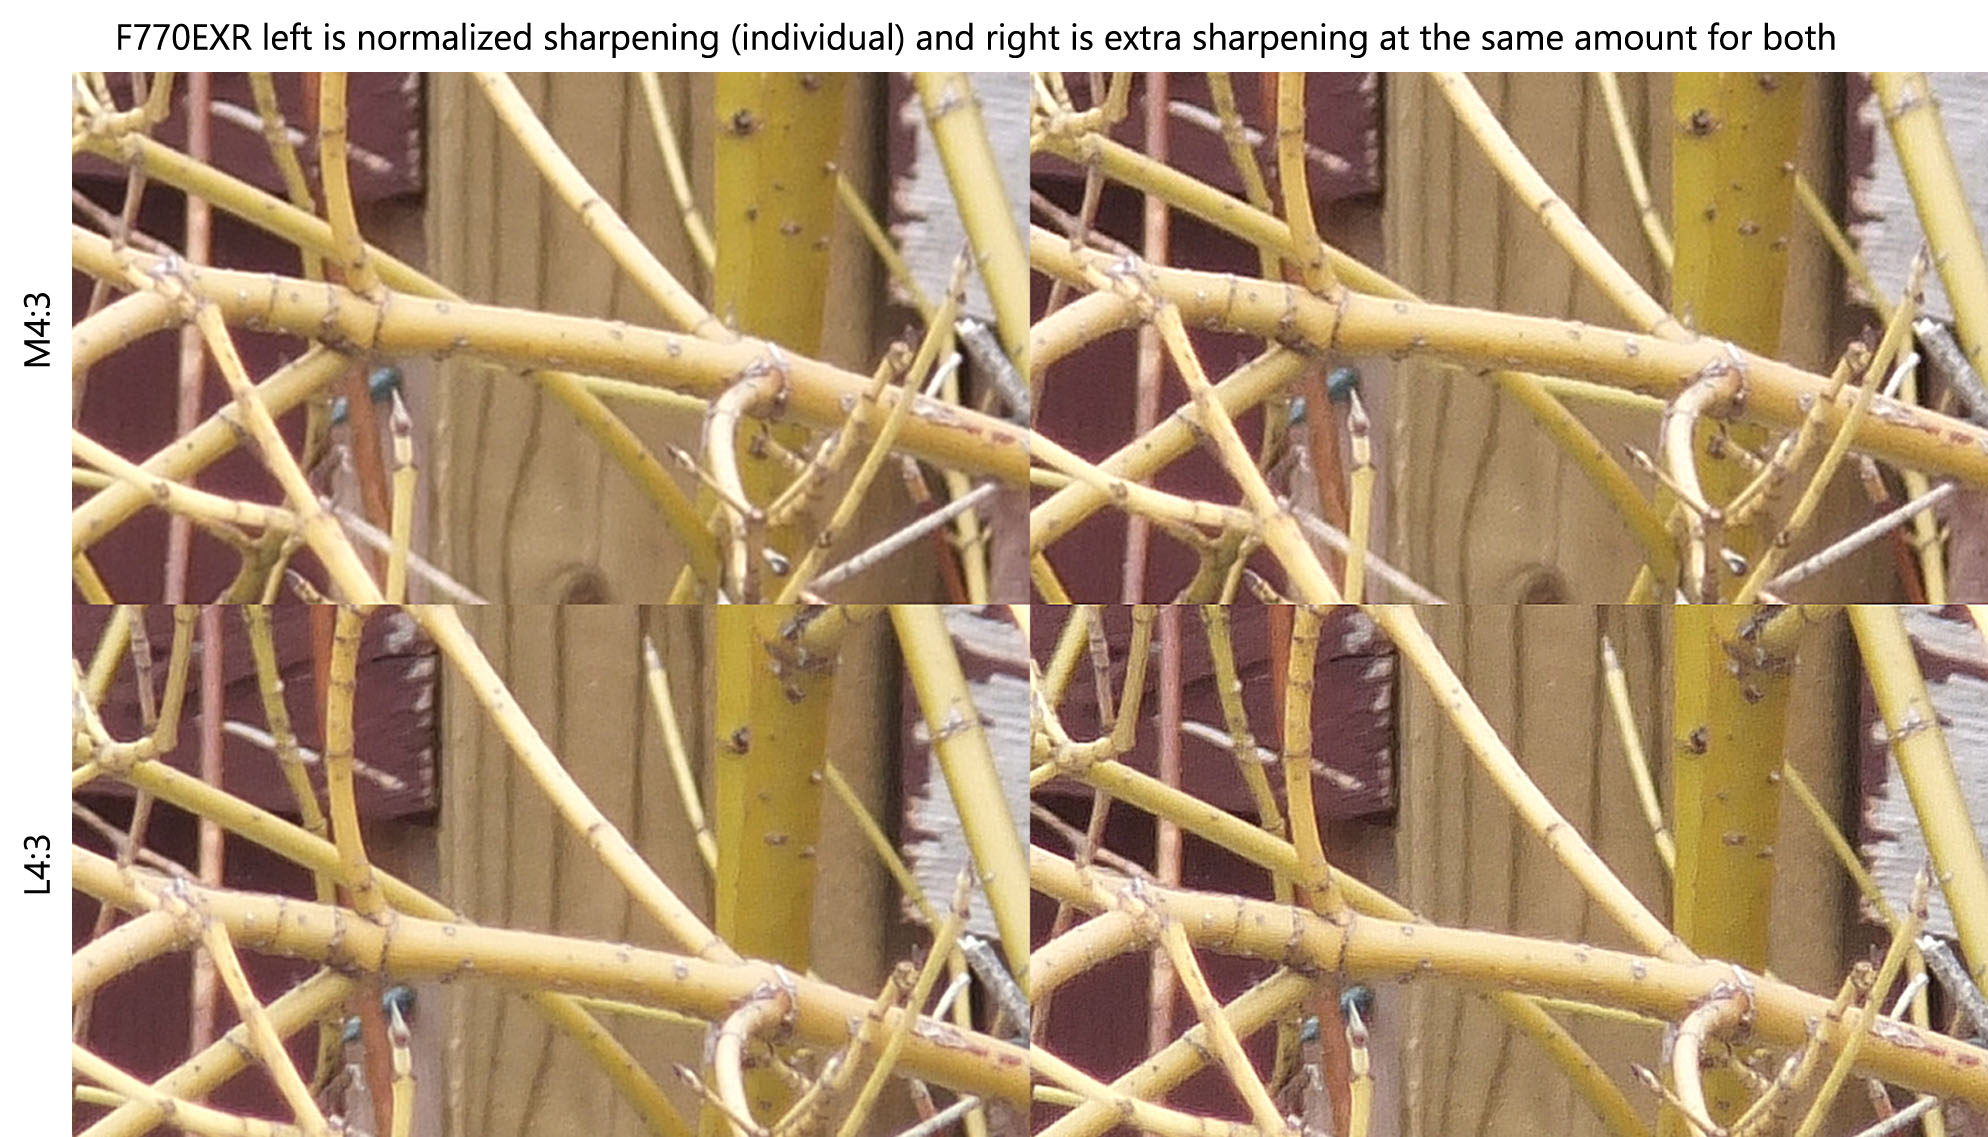
The image is huge, so please click on it and then expand it by cliking on it again.

So what should you see?

The L sized image is almost tolerable if you use it with no sharpening. But look in the top left corner and the issues with edges show clearly. Also on the fence post right edge in behind the thick vertical twig on the right side. The M size looks like a rounded edge, the L size has enough artifacts to take away from that illusion.

The limitations mentioned in the previous section do not go away either. There is a slightly higher acuity to branches in front at L size, but that is balanced by the increase in surface noise and other artifacts. Even a slight sharpening brings this out very clearly, destroying the image.

Update:

I just noticed something … holy crap! Look at the big, thick vertical twig at about the 1/4 mark from the right. Closest to the top of frame (higher on the M sized images) is a fairly big knot like thing. Then about half an inch down at full size, you will see a smaller but not insubstantial knot right on the visible vertical crease in the smooth bark. At least, you see it on the M sized images. On the L sized images it is completely gone! A victim, I presume, of the kinky EXR demoaicing algorithm.

Brain Farts ‘R Us Smile

Thanks go to Mitchell Pollock for pointing out that there are two branches there and the famous missing knot is just behind the first one in the L sized image. Sheesh … my excuse is that I have had no time off in about 6 weeks and my brain is getting mushy. Since Fuji had the cameras available now, I decided to review them now despite my lack of sleep lately. This is what happens … :-)

The next statement remains accurate, though.

Just another reason why L sized images tend to underwhelm so often. Too much edge destruction, surface artifacts, distortion of details.


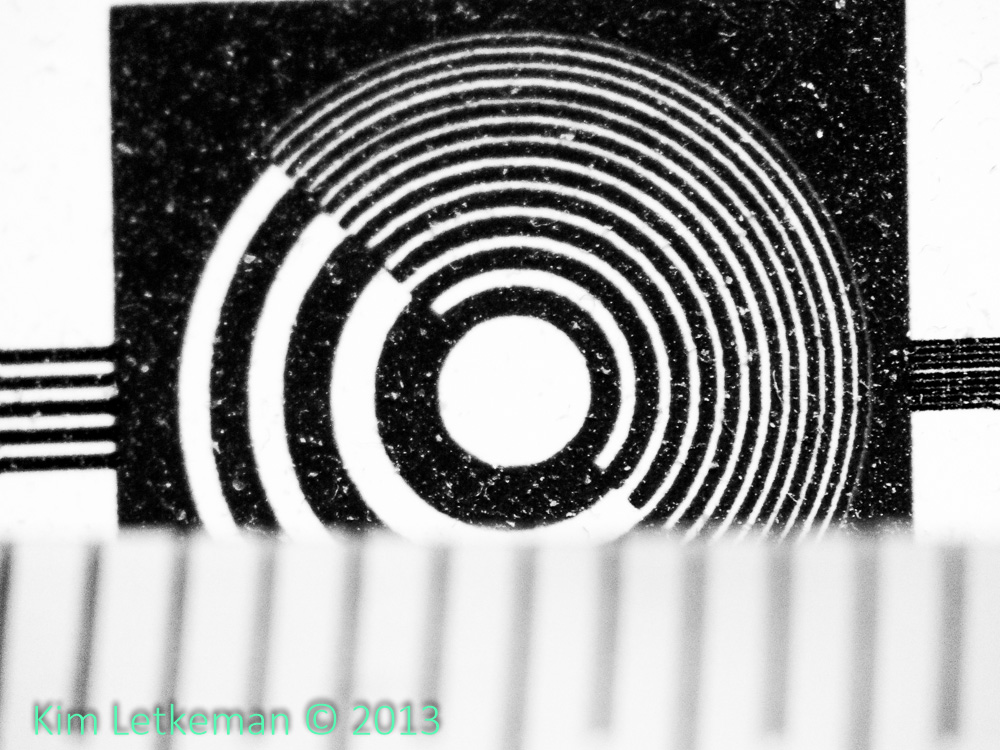
This next set of crops compares the three cameras with the HS shot at two apertures because the wide open image looked so awful on the LCD.

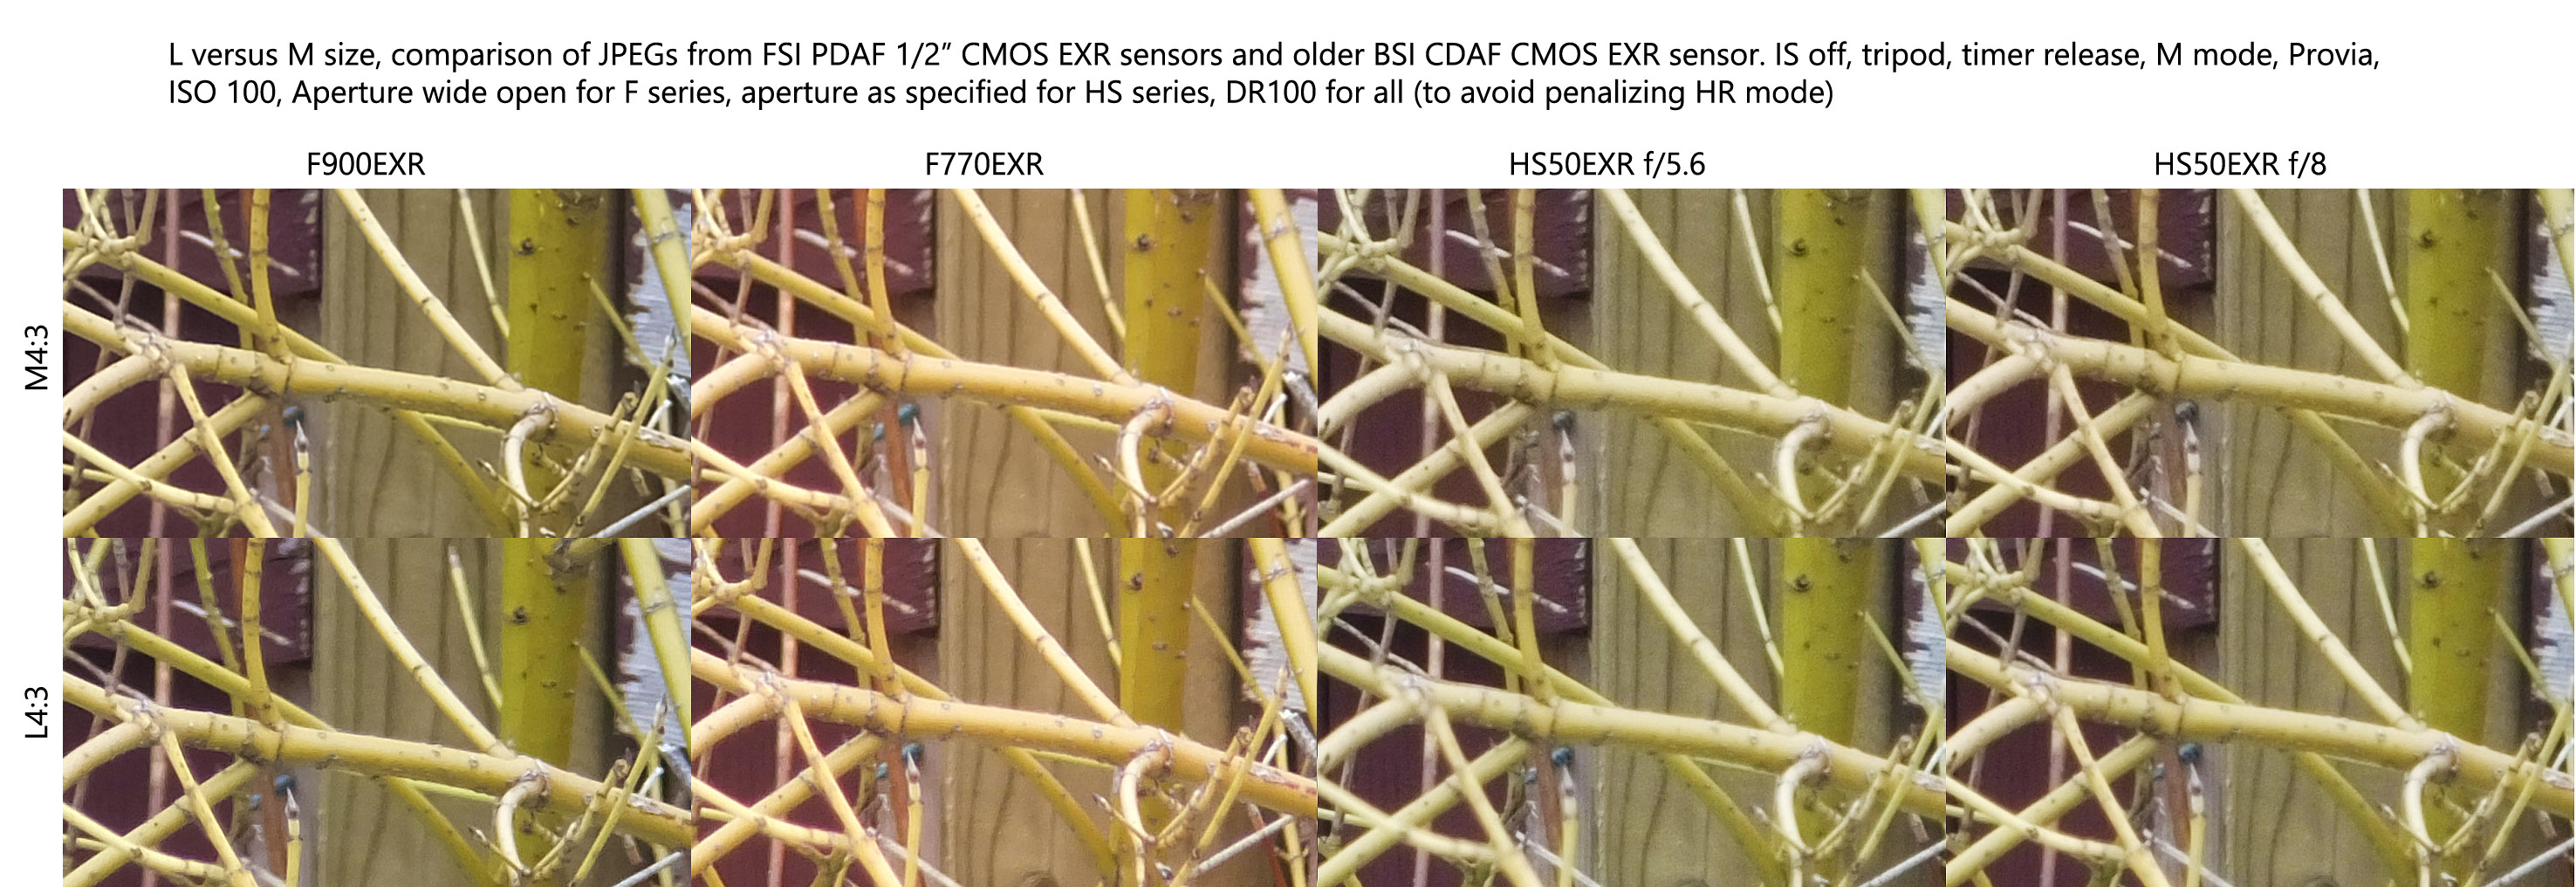
Now that image is MASSIVE, so please open it up and click to expand to full size.

Observations

The F900 looks a lot better than the F770 with better clarity which appears to come from cleaner detail and higher microscontrast. More evidence that they have tweaked the JPEG engine and are making great strides.

But it appears that the F900’s L sized image is worse in the background than that of the F700. Slightly cleaner in the foreground, but I don’t consider that much of a tradeoff. Top left corner is simply mangled by L size.

So how about the HS50? I added extra processing to the HS50 to bring back the detail, contrast and saturation I sacrificed to get a nice clean capture. The images look ok, but they do not sharpen up very well. The F900 pretty much stomped the HS50.

I will have to repeat the head to head with normal JPEG settings just to see what is going on. So far, the HS50 is a little underwhelming for sharpness. This clarifies for me why I have yet to see an HS50 image on the forums that blows me away. The lens may not be capable. It has, after all, galactic range :-)

The acuity is so weak that the M and L images look about the same. Not really any difference at all. WHich is not a good thing, because both are utterly crushed by the F770 and F900 in this test. Like I said … more testing required to see what is going on. Not much fun shooting a telescope that cannot resolve anything. Note that the extra noise comes from trying to pull sharpness. It should not be that difficult.


Conclusion

The F900 is really impressing me so far. The HS50 not so much. The F770 is holding its own, which is good … because I just bought the darned thing :-)