Tuesday, November 8, 2011

The Orion Nebula – D7000 + 105mm f/2.5 Ai

So I was rather intrigued with my results the other day with that Sigma macro lens. I noticed Orion sitting outside my window a half hour ago so I dragged the D7000 on tripod with the 105mm f/2.5 Ai on it to see how sharp this lens is wide open. And I must say that it is seriously sharp.

I experimented with exposures and settled on one that gave pin-point stars and the best nebulosity. I suppose that it is no surprise that I ended up at 6400 ISO with f/2.5 and 1/2s.

So the results … a dollop of Topaz Denoise 5 was needed to clean out the super fine grain.

The stars are a bit soft, but that’s because I cropped very closely and then resized upwards. I am very pleased with the look of the nebula, as it has the right shape and some of the key stars are there. Cool …

Now, what does it really look like you might ask …

Ok … so the Hubble telescope is a little better …

http://hubblesite.org/gallery/tours/tour-orion/

Sunday, November 6, 2011

D7000 does poor man’s astrophotography …

The moon shots and Jupiter shots through the binoculars with the F550 the other day gave me a real grab tonight as the sky was crystal clear around 1am. So clear that I could see many more stars that normal, despite the continued presence of an annoying street light in my front yard. When I sit at the back of my house, the house blocks that light, so I get a nice view of the southern sky. Especially in late autumn, as the tree in my neighbour’s back yard is finally stripped of leaves :-)

The first thing I did was look at the Orion Nebula with the binoculars, and darned if I couldn’t see some nebulosity. Hot damn! I then tried to capture it through the binoculars with the Fuji X100, but I could not get the cameras aligned well enough (both on tripods for the longish exposure needed.) And then its battery died. Oh well …

I tried the F550EXR and could not see anything on the LCD. No success there.

Then I went in and grabbed the D7000 and put a Sigma 105mm 2.8 Macro lens on it (although it turned out that you focus at infinity when going through the binoculars, duh.)

I found that the LCD also refused to show me the subject so I got on my knees (the subjects were high in the sky so the camera and binoculars were tilted quite dramatically upwards) and focused manually. With the Sigma, the best focus turned out to be at the infinity end of the range at the stop.

I just could not get anything in the binoculars, so I figured it would just be easier to shoot without them in the way. Then I started to see results. For example, the first shot I made of the nebula showed it quite clearly. Here it is, as it is much better than the second one.

D7000 f/2.8 1600ISO 6s

Wow … the nebula is right there in your face. This is a crop of course, but it is surprisingly large on the sensor. This mainly due to the excellent resolution of this lens and the D7000’s 16mp sensor. It is only about 158mm effective … 3x magnification at the most.

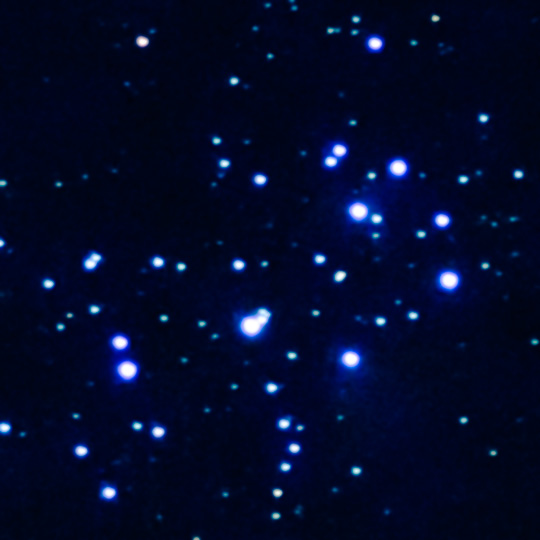
So then I thought … what about my favorite star cluster, the Pleiades? That one turned out quite interesting …

D7000 4000ISO f/2.8 4s

I spent quite some time processing this as I was trying to strike a balance between the contrast and the preservation of what looks like a bit of nebulosity between the stars. I use a gorgeous shot of the cluster as my desktop background and these stars really are this blue and there really are blue clouds around them. This is a decent representation of the cluster and that amazes me.

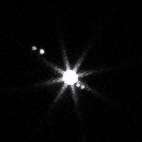
I tried several shots of Jupiter then, and ended up stopping down for better resolution. I finally came up with this spectacular image, and do remember that this is shot at 158mm effective. This is exactly what was on the sensor, desaturated to remove slight blue fringing around the planet.


D7000 4000ISO f/4 1/4s

WOW! I love how excellent lenses create that lovely star effect. But look at the clarity with which all four Galilean moons are rendered. And this at 158mm!

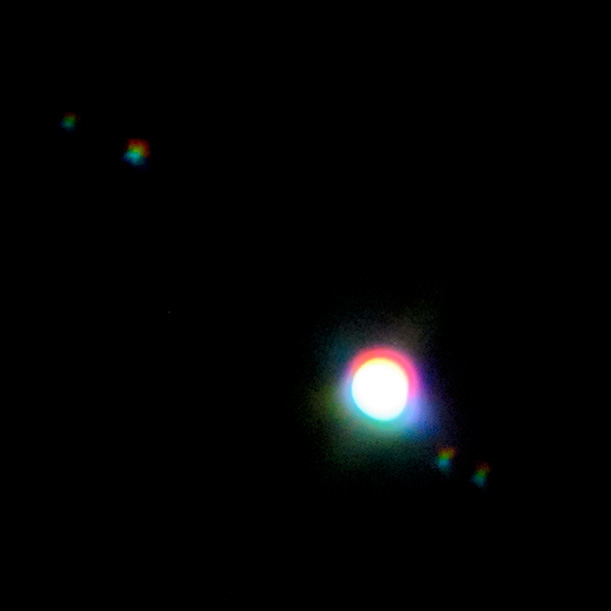
I tried one final shot, lining up the D7000 with the Oberwerk binoculars again and shooting Jupiter. I got an image this time and it shows the spectacular amount of extra magnification available form the binoculars (10x) … but there is massive fringing and the image is simply less satisfying. But that’s ok … afocal on binoculars is really pushing it anyway :-)

D7000 4000ISO f/4 1/4s

So go out there and have some fun. You can get fascinating imagery even with short lenses if they are good enough. A macro lens like the Sigma is designed for tack sharpness at macro distances, but I was pleasantly surprised at its prowess when set at infinity. Go Sigma …

Saturday, November 5, 2011

Watch your color profiles! *Updated* for people who use Internet Explorer

Ever notice funky colors when looking at one of your images in a web browser? That can happen when you save the file in the wrong color profile.

Sidebar: Chrome and Firefox show the colors funky as expected. But the latest Internet Explorer browsers actually interpret the color spaces correctly, so you will not see the funky output I am describing.

This can easily happen when you listen to advice on the forums and edit your images in the Adobe RGB color space. This space has a wider color gamut than the ubiquitous sRGB (standard color space of the web, most labs and most printers) so people use it to print on high end photo printers for more vibrant colors. And that works, because they understand the the aRGB image must then be proofed against the output color profile, which is going to be a printer and paper combination.

But for most of us, converting the colors to sRGB and saving as sRGB makes all that bother go away. And everything looks just fine.

If, on the other hand, you save the aRGB file as a JPEG without changing to the sRGB color pace, you will wonder at the strange and muddy output. Heaven forbid that you do this with CMYK … the typical browser will display that in a clown-like form …

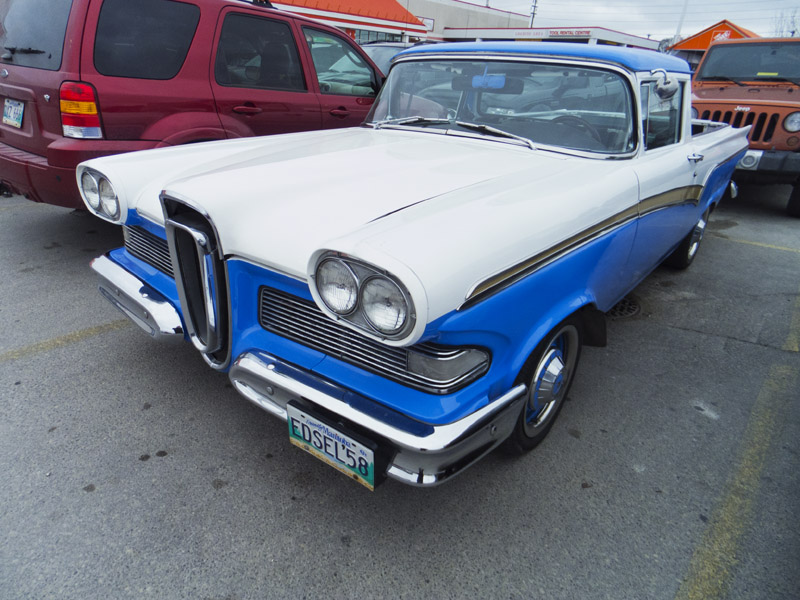
So here is an image shot and processed my usual way. In aRGB to the end. Convert to sRGB and save as jpeg. Easy peasy …

image

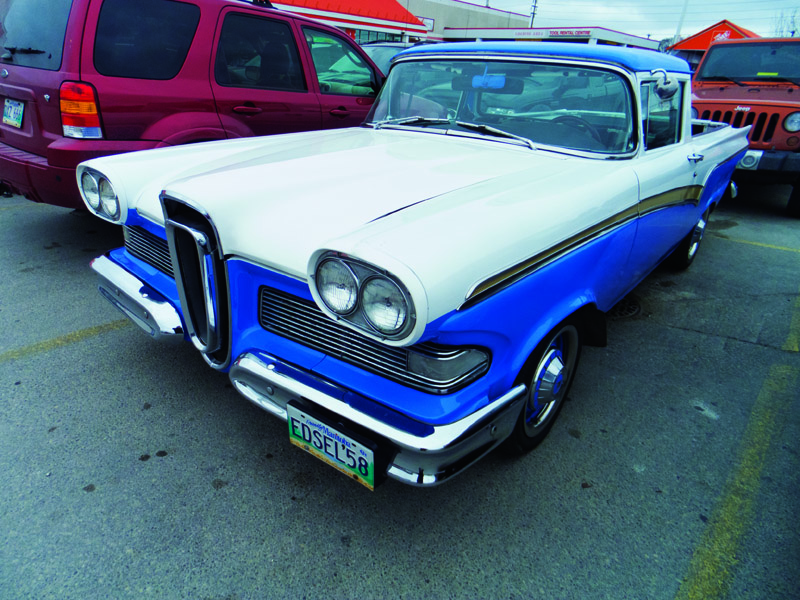
All the colors are nicely balanced there. Now what happens if I forget to convert to sRGB and save in the aRGB profile?

image

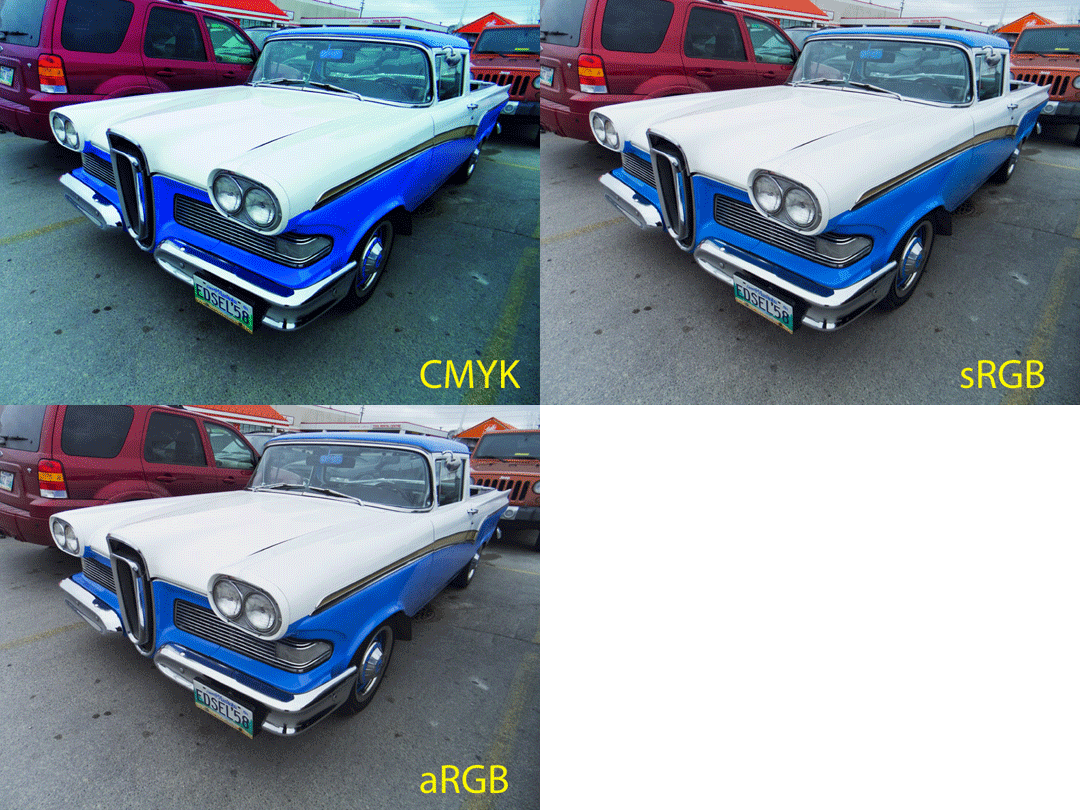
It’s mostly a muted presentation. In CS5, these two files look identical because color spaces are properly handled. But the browser treats both as sRGB and, well, the reds get pretty muted and the blues are slightly muted …

Send in the clowns … you convert the file to CMYK by properly applying an output profile to the file (don’t just switch color modes in photoshop without applying the output profile.)

Sidebar: I am editing this post in Windows Live Writer, and it is clearly color aware since the aRGB and sRGB files are identical and the CMYK file is slightly muted, as shown in the following screen shot.

But when you read this on your browser, the CMYK file POPS!
FUNKY colour Smile

image

image

So there you have it … don’t make this mistake.

Update: There are some who use Internet Explorer who might be wondering what I am on about. After all, you cannot see what happens in the other browsers. Well, here is an animation made from sRGB screen captures from Chrome. Which means that any application will correctly display the issue for all to see …

Friday, November 4, 2011

F550EXR – The Moon and Jupiter through Oberwerk 10x60 Mariner Series Binoculars

Outside the Pho restaurant this evening, I tried shooting the moon with my F550EXR hand held from a standing position. The results were moon-like, but nothing to write home about. So I braced the camera on the car and shot this. Not awful I am thinking …
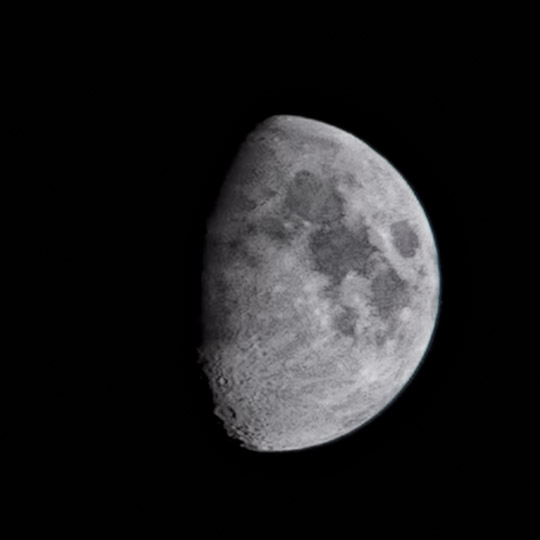
I decided then to try photographing the moon again through my Oberwerk Binoculars afocally (which means holding the camera to the eyepiece) once I arrived home. The clear, cloudless night was just too tempting.

I had received a new tripod adapter for the binoculars earlier this week and the difference is like night and day when observing. I can now see everything crystal clearly with no movement of the binoculars. I have been looking at the moon, Jupiter and at the Pleiades star cluster. Absolutely stunning views from these binoculars.

These binoculars have many special qualities:

Oberwerk Mariner Series Binoculars are the highest-quality hand-held binoculars we've ever offered. These extra-rugged waterproof mil-spec Oberwerk 10x60mm Mariner Series Binoculars are ideal for birding, hunting, surveillance, astronomy, and of course nautical applications.

The Oberwerk 10x60 Binoculars have a wide-angle 5.3 degree field of view. All air-to-glass surfaces are fully broadband multi-coated to decrease light loss due to scattering and reflections, a feature normally found only on binoculars with much higher price tags.

Oberwerk 10x 60 Marine Binoculars feature heavy-duty rubber-armored metal construction, oversize BAK4 prisms with shockproof mountings, extra-rigid and precise center-focuser, right ocular diopter adjustment, twist-up eyecups, brass 1/4-20 tripod adapter threading, caps, and hard case.

The objectives are larger than normal for 10 power (10x50mm is more typical) which means of course that their light-gathering power is improved. I can tell you that the view in these things is incredibly bright. The moon actually hurts your eyes when full.
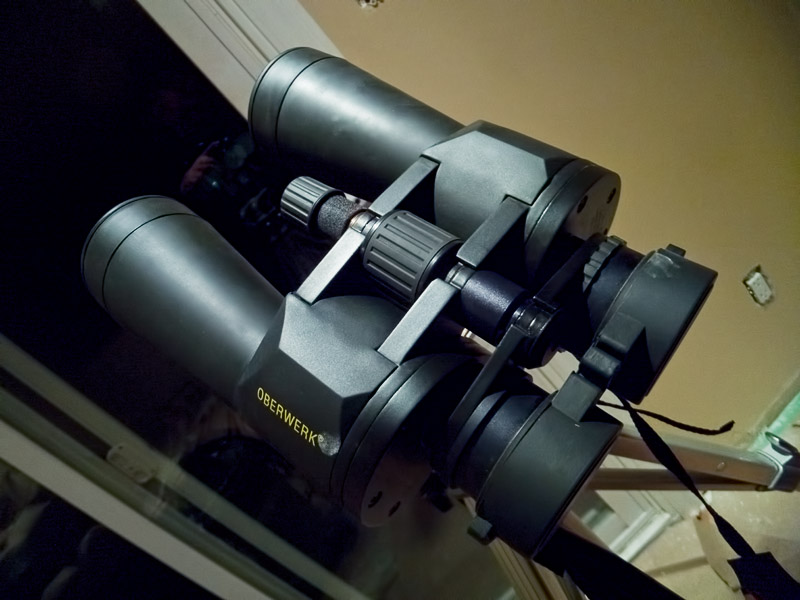
Shooting images through these is a bit of a challenge of course. You have to align the lens with the eyepiece. You have to get the magnification just right and to switch on macro mode to get focus (at least, I did.) The exposure is not quite the same as it was through the lens alone.

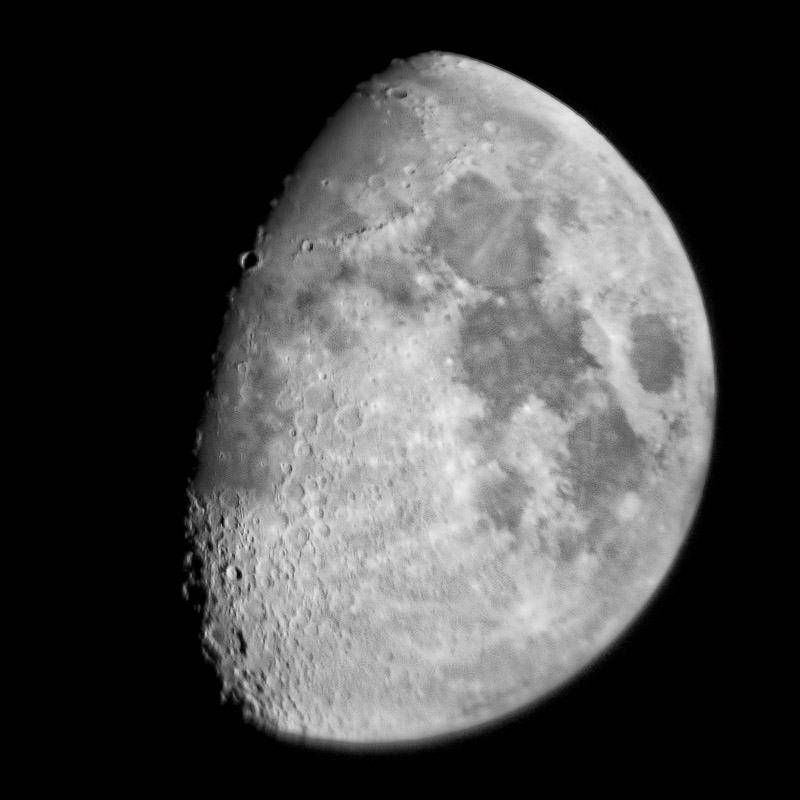
But after some experimentation I came up with three usable images.

This one is pretty good top left, but is blurry everywhere else. Still, pretty magnificent detail for a 1/2” sensor compact long zoom.
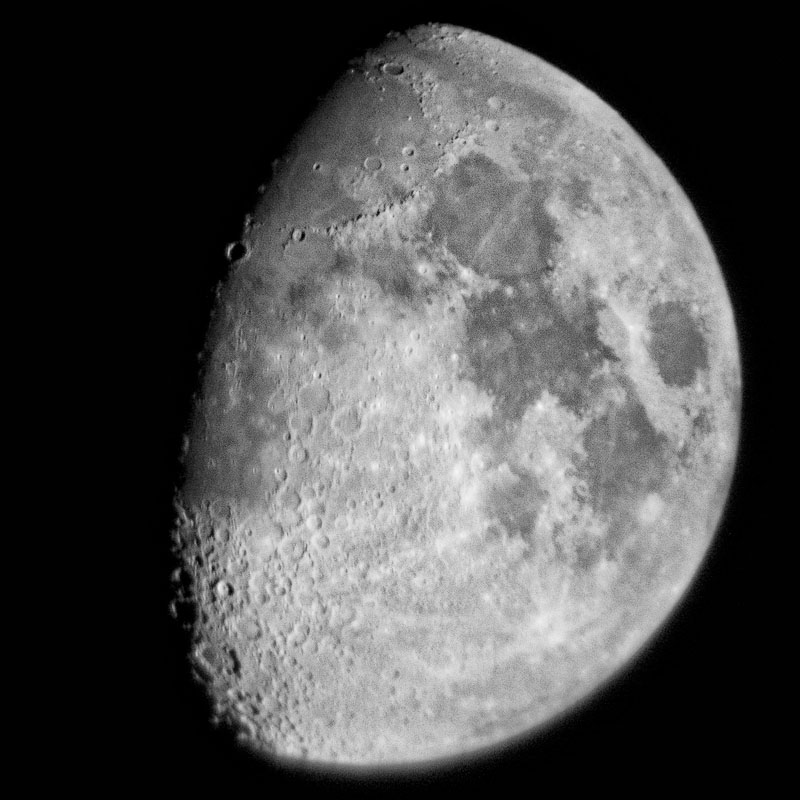
The next one is much better. The same fringing on the bottom, but otherwise pretty decent. Not as much feeling of blur. The Apenninus mountains at the edge of Mare Imbrium are clearly visible, which I think is a pretty good feat with a 1/2” sensor.
And the big winner … only a small bit of blur at the very bottom … the rest is superbly detailed. Wow.

F550EXR  100ISO  f/6  36.4mm  1/160s
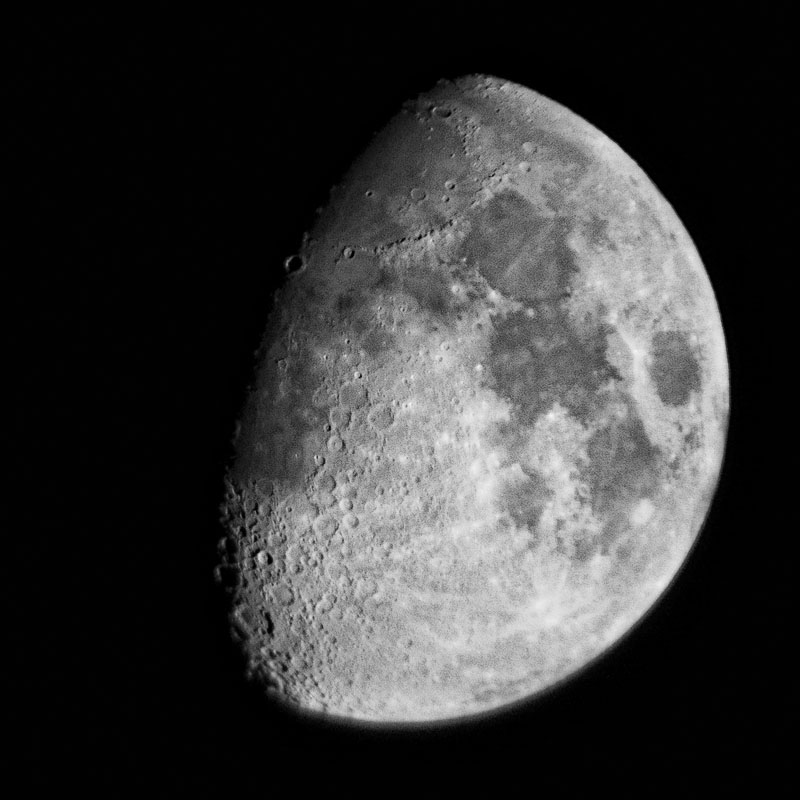
That last result came after I had figured out that a bit less zoom improved the view for the camera, which removed most of the blur. That revelation came when I was shooting Jupiter. I shocked myself by getting an extremely usable image of Jupiter and all for Galilean moons! This just blows my mind … I had to verify the position of the moons on the Juplet and low, and behold, this image is completely legit.

F550EXR  3200ISO f/6  1/25s  33.8mm
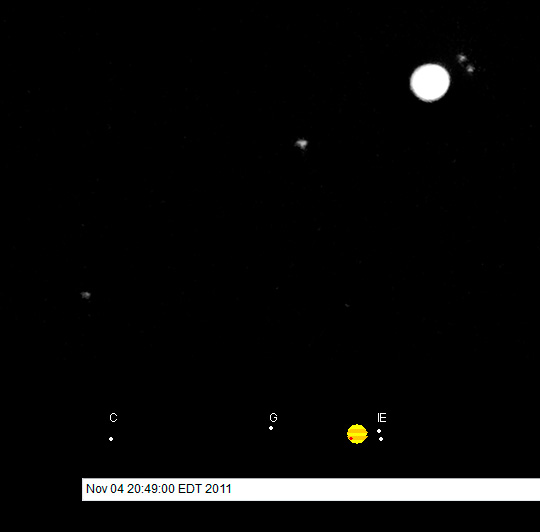
I have had shots form the D300 that required more processing than this one. This is testament to the quality of the optics in the Oberwerks. Amazing …

This proves again that the sensors on smaller cameras are just fine for shooting bright objects.
Friend or Pho?

Nick and I enjoyed a steaming bowl of Pho in our new favorite local Vietnamese Noodle House. These guys are amazing. Last time, I suggested that I liked their broth the best of all of the local noodle houses (we have three within about a 1 mile drive) and the woman behind the counter said that their secret was simmering the broth for 23 or 24 hours.

Whatever their secret, this stuff tastes incredible.

F550EXR  3200ISO  f/3.5 1/13s (this is really low light)

Thursday, November 3, 2011

“observes” == “checks out”?

image

I think the G20 summit will be a rather raucous affair …