Tuesday, December 30, 2008

Neat Image 6 versus Topaz Denoise 2.1

I've been using Topaz Denoise for some of the trickier noise reduction tasks lately, as it does a wonderful job of smoothing surfaces while leaving very small details intact. An impressive piece of work.

But Neat Image, my favourite general purpose noise reduction tool, has released version 6, a major upgrade. That means that it is time to test these two against each other to see who will be my "go-to" tool.

My initial tests with Neat Image were startlingly good, so I knew that I had to look at them pretty closely. I chose an image that I had done with Topaz Denoise in the past and that had blown me away with its ability to handle difficult shadow detail. This image was shot this spring at the Globe Theater in London, sometime during a performance of A Midsummer Night's Dream. This was a night performance and I had floor tickets (best value for 5 pounds in the Universe in my opinion.)

The Globe is all wooden beams and thatch, and the lighting is subdued. So I was forced to shoot at 2500 ISO to get decent shutter speeds. I used the D300 and 18-200VR, which resolves a lot of detail for a consumer mega-zoom. I took rather small crops from the middle of the frame and then processed one copy with Neat Image 6 in 16-bit mode in Adobe RGB color space. I processed the other copy with Topaz Denoise 2.1 under the same conditions.

First, here is the frame from which I took the crops. This is downsized only, no noise reduction at all. When you see the crops, you will be able to line them up with the scene near the middle of this image:


Neat Image took less than 10 seconds to complete its job while Topaz took the usual 6 minutes or so. The shocker is that the Neat Image is almost identical:


If I had any criticism of Neat Image, it would be that I could not remove the little artifacts it leaves behind. They look like mosquitoes, to quote Thom Hogan. But they are really tiny and do not show up when downsized (shown at the end.) I doubt they would show up on any normal print. So I forgive the tool.

I have two minor criticisms of Topaz Denoise. First, it is a little aggressive by nature and blurs things a bit more than I like. With more effort on tuning, I think I could have had less blur, but the tool is slow enough that it does not encourage much experimentation. Even a little hysteresis in the user interface would allow one to press a few buttons without the interminable recalculation time of the preview.

The second criticism is that Topaz likes to leave behind some fairly large textures where there is a lot of noise. It is fairly smooth texture, but is surprisingly large when compared with Neat Image's mosquitoes.

To be fair, when I upsized the crops and printed them together on a sull 8.5x11 sheet of gloss paper, I found that the images looked great, and the lack of grain really improved the overall look. Considering that these crops at 4x7 are the equivalent of posters, I was pretty pleased overall.

Here are the downsized crops, showing that the grain remains very visible in the original (as it does on the print), but that the other two look great. And the Neat Image version wins this by a nose in my opinion. Factor in the speed of Neat Image (at least 36 times faster) and it's more than a nose.


Neat Image can be purchased here. Topaz Denoise can be purchased here. I can see value in owning both. Some images just work better in Topaz Denoise, but I can see the need being fewer now that Neat Image 6.0 has been released. And note also that Neat Image 6 has a 64 bit plugin version. Unfortunately, it costs a little extra.

And for those who want to use Neat Image with device specific profiles, try this page. For those who shoot the Canon G10, my complete set of device specific profiles will appear shortly, I just created them and uploaded to Neat image a couple of days ago. They are designed to be used with ACR5 in 16-bit, Adobe RGB mode with no prior sharpening or NR. They do a great job. Of course, I also include a full set of jpegs in all sizes (except 640x480, which Neat Image cannot process) and all ISOs, including 3200.

Happy reducing ...

Sunday, December 28, 2008

Canon G10 Exposure Compensation Matrix

I shot a few images with the G10 at a Christmas Eve / Birthday celebration with family, and decided that I needed to spend some time experimenting with the G10's exposure compensation capabilities.

Let me be dead clear here ... this is a back light test for fill flash. This is not a "soften shadows in full sun" test for fill flash. I'll have to figure out how to do that one another time.
In this experiment, I shoot the G10 at a Scooby Doo doll for my subject, with no front lighting at all. The background is an industrial-looking corner of my basement that is lit overhead by a compact fluorescent bulb equivalent to approximately 100 watts. Being a modern bulb, it has a color temperature similar to that of a tungsten bulb. Which allowed me to gel the flash with CTO Orange (a small piece taped over the flash) and thus balance the foreground and background light.

I further balanced color temperature by setting WB in ACR5 on the letters on the Glad box on which Scooby is leaning. The first surprise was how much the color balance changes as the flash compensation changed. From very cool to very warm ... which means that this flash follows a color curve from warm at the start to cool at the end (I think) ... squelching early gives a warm color to the subject's light, which when balanced in ACR cools the whole scene. The color balance is perfect from 0ev onwards, but -1 and -2 cast warm light.

I created a 5x5 matrix of these images with the rows representing changes in ambient exposure and the columns representing changes in flash exposure. The G10 responded very well to this and gave me accurate exposures in every cell, judging by the changes from left to right and top to bottom. The only unpredictable occurence was the previously discussed color temperature change. (Double click to see the full image, click back to return.)


It is fairly obvious from looking at the matrix that the 5 most interesting images are the top half of the middle column and the left half of the middle row along with the center cell. I.e. there are five possible best exposures here.

The classic advice for shooting people in a room with fill flash is to drop ambient by 1 or 2 stops and then shoot TTL with flash. So let's look first at these to potential images.

Ambient -2 Flash 0


Ambient -1 Flash 0


Interestingly, the light output is almost perfectly balanced at -2/0 which can be seen by the lack of any shadows on the box on the foreground. The ambient casts an identical light to the fill ... and there is no change in color temperature either, indicating a pretty close match to the CTO Orange gel on the flash.

On the other hand, this also means that the ambient cannot drown out the flash shadows cast onto the background, and they too have equal intensity to ambient shadows. This can by seen on the wall on the right, where the ambient shadows to the right of the 2x4 studs comes from the fluorescent bulb, while the shadows from the working table and some of the junk on it hit the insulation with equal intensity. So this exposure might not be appropriate in this case. We really don't want unnatural shadows (i.e. flash shadows.)

Things get a bit better in the -1/0 shot, where the flash shadows have lost one stop of intensity (i.e. are 1/2 as bright.) They are visible, but becoming irrelevant. There is a slight ambient shadow now on the box in the foreground, which is actually quite accurate since the bulb is plainly visible. So this exposure is better in all ways than the previous one.

Now what about the 0/0 shot?

Ambient 0, Flash 0


Ambient light is now dominating. Flash shadows are almost gone (but not quite.) This is the best exposure yet.

The last two exposures that could perhaps eclipse this one would be the -1 and -2 flash exposures at 0 ambient. Here they are:

Ambient 0 Flash -1


Ambient 0 Flash -2


Well, both exhibit an unpleasant color shift, which could of course be warmed somewhat in ACR. But that would warm the subject as well, which might be inaccurate ... i.e. the flash no longer balances well with the ambient when the flash is gel'ed. It may, however, balance better without the gel, since it is coming up overly warm.

Anyway, there are no flash shadows in 0/-2 and barely perceptible flash shadows in 0/-1 where ambient light falls. The 0/-1 image has a nicely exposed subject, so I think I would prefer it every time over the 0/-2 image. The question is whether it looks better than the 0/0 image?

Well ... the overall colors and balance of shadows looks best to me in 0/0 ... but you may choose differently. My conclusion is that the G10 can be shot without gels when compensating the flash, but should have gels on when compensating only the ambient. For shooting at a party with lots of lamps about the place, I'd shoot with a gel on and set to 0,0 and tungsten WB or 0/-1 without gel and also set to tungsten. You might need to rebalance in ACR or equivalent, but if you like warm images then the jpegs will be fine from the cam.

My other conclusion is that the G10 mercifully responds perfectly to ambient compensation in matrix metering mode, so there is little need to play with other metering modes in most shooting situations.

Friday, December 12, 2008

The Moon Revisited -- Perigee Six Image Stack

I've written in the past about the moon, and my adventures in shooting and processing it. You can read those oldies here and here.

Tonight the moon is at its closest approach in quite some time. This perigee is only 118 miles further away than the closest approach in the last 375 years, so this has to qualify as a fairly big event. I noticed the incredible brightness of the moon (apparently 14% brighter than usual) as I drove home tonight. It's also a bit bigger in the sky, although that's rather hard to check :-)

I resolved to photograph it again tonight as I was driving, and right after wolfing down a bowl of cereal (dieting ... that's another story) I gathered my D300, 300mm F4 AFS, and my new Kenko 2x teleconverter. I have tested this teleconverter and found it to be a bit softer than my other one ... but there is more reach so I thought I'd give it a shot.

I wanted to do some fancy automated interval shots, but it was so bitterly cold outside that I chose instead to fire off 6 quick shots at 400 ISO with a high enough shutter speed that the 2 second timer should be enough to get crisp images. Since the shutter was way outside the danger zone (around 1/15s on a tripod), I did not need to deal with mirror slap. The timer handled only residual vibration from touching the camera to start the timer.

Once the six shots were done, I bolted back into the house to thaw my extremities and grabbed the memory card from the camera. I processed one of the images in ACR4 and tweaked it some in CS3 (local contrast, contrast and saturation.) Then downsize and sharpen. I think it came out very nicely.


Then, I thought I'd take all six images (the only images I shot, actually) and stack them. I used the command "file=>scripts=>load files in stack" to get all my RAW files (which had been converted with identical settings in ACR5) into separate layers. Then, I used the command "edit=>align layers" to get all the moons perfectly aligned.

Next, I reduced the opacity of all layers to about 50% and set all layers but the bottom to screen blend. This effectively multiplies only pixels that exist to make them brighter, but cancels random noise, since it will rarely appear in the same place in any two frames. I added a black layer at the bottom of the stack to serve as background, which also helped a great deal in cleaning up the sky.

The screen blends managed to make the moon too bright and the gamma too weak (low contrast), so I added an "exposure" adjustment layer and brought the moon back out with stronger gamma, which began to really accentuate detail.

Next, I performed local contrast work, adjusted the saturation and contrast, and downsized with some sharpening. I should have sharpened more here (the Kenko 2x is a bit soft with this lense) but I saved as jpeg and closed everything up. I was not satisfied when I looked at it in the browser so I committed heresy and loaded the jpg back up into ACR5. Here, I cranked the sharpening pretty hard and much preferred the new look, so that is what I posted. Here is that 6 shot stack:


Unless I am hallucinating, the detail came out really clearly. Looking closely, it has an almost 3D appearance, which is nice on full moon. In my opinion, nothing can really compare with Michael Stecker's image, but this is still a very satisfying result.

Edit: I processed an image from the Fuji Talk Forum taken by an S1000fs ... a nice capture, but suffering from serious jpeg compression artifacts. So much so that there was nothing I could do to keep them from showing in the final image. However, while trying different techniques, I notices that Topaz Denoise was able to smooth the image dramatically and this allowed a lot of extra color information to come out. So I thought perhaps that I could try the same thing on one of these images. Turns out it didn't work ... at 400 ISO the D300 doesn't produce enough noise for Topaz to even see. However, I then thought I'd try Topaz Adjust and let it play with the color. I used the preset "mild color pop" and did it ever! This is nothing compared with Michael's image linked above, but it it getting very interesting nonetheless ...

Saturday, December 6, 2008

Canon G10 ... High ISO is pretty good!

Well, I am pretty happy with the Canon G10. I much prefer its output to that of the Fuji F11 except under very limited circumstances, mainly 1600ISO. And even then, the G10 can be made to look not horrible :-)

Now ... I could be suffering from a serious case of cognitive dissonance, after all ... the G10 has tiny photosites and cannot possibly shoot at high ISO. It certainly can't successfully compete against the any member of the venerable Fujifilm Finepix Fxx series of cameras, can it? Well ... so far I think it's doing pretty well. My concert images are pretty decent when you consider that I shot from farther away than at any time with my Fuji F11.

So, to rid myself forever of this post-purchase rationalization, I decided that a formal test in bad light was needed. I have not done one of these in a while ... the first round of these was several years ago to convince myself that the D70s could defeat the F11. Well, that was pretty easy of course, as the larger sensor maintained much nicer tone as ISO rose.

But the G10 pixels are far smaller ... I think they are something like 2 square microns or something ridiculous. Anyway, a test was needed to rid my self of the nagging doubt. Interestingly, I shot a few real world images at 800 ISO last night, leaving a local restaurant. And I was thrilled with the results ... this can is really, really fun to shoot with and the results are wonderful, as shown in these two images.


You'd think that would be enough, wouldn't you :-)

Anyway, I shot two series of images and produced a set of crops from one, and a set of images form the other. The crops come from an image of a little Scooby Do doll hanging from my basement wall. There is texture in his collar and in his ear that is very instructive as ISO rises. I made a large image with crops at all ISOs from both spots, and the Canon performs surprisingly well. I favour detail retention over smoothness, and the Canon does not disappoint.

Here are those crops:


Once sharpening is equalized (detail can never quite be equalized, the Canon is overpowering), I find the Canon much smoother at all ISOs. It also holds details longer than the Fuji, still showing quite a bit of detail in the collar at 800 ISO. The Fuji has mostly wiped out the detail at 800 with its NR, and remember that the F11 has the least aggressive noise reduction in the Fxx series.

Now, there is also the overall look to consider. If one wants to shoot and directly print in social situations, the F11 does retain better saturation at 1600 ISO. This is unquestionably. Along with its inherent smoothness, it has quite the advantage out of camera. But those who reel off a series of images like that are either going to post a serious memory or blast them onto their facebook account.

The former case requires some attention to detail with processing (in my opinion) and so the Canon gets a chance to equalize. The latter simply doesn't matter. The vast majority of facebook images are awful technically anyway.

So can the Canon G10 equal the Fuji F11 at 1600 ISO? Well, judge for yourself. These three images are the F11 at 1600 ISO, the G10 at 1600 ISO, and the same G10 shot with some extra processing to mitigate its weaknesses.


The greens are much better on the Fuji, even after processing. But the reds are better on the Canon, and it would take a bit of work to get the Fuji to have decent reds on every shot. So ... a tie? I do have to admit that the Fuji image is warmer than both the Canon images, so some will favour the Fuji.

Perhaps we should take a quick peek at the low ISO images in this series. That might be instructive. F11 first, G10 second.


This was pretty much how they came out of the cameras, and the Canon was much better. In every way ... warmth, color, detail, acuity. I also find the Canon superior in all ways while shooting, and since I prefer its image quality from 80 through 800 ISO and I don't mind its 1600 ISO once I've processed it, there is really no contest here.

I declare the G10 superior to the Fxx series for me. That last part means that this is my judgment based on what matters to me and my interpretation of these images and how much more pleasant and functional the camera is in the hand (the difference is so dramatic that I have no words for it.) The album with all the shots is here, although you've seen most of it in this blog. But it is easier to compare there I think.

Now, for those who might vilify my test or my conclusions ... spare me. Test the G10 yourself ... you'll be very pleasantly surprised once you've shot with it for a while. You'll never want to shoot with an under-featured compact again.

And that resolution ... whoah ....

Wednesday, December 3, 2008

Neil Young in Ottawa ... Spectacular Concert!

Wow ... if you have not seen Neil Young on his latest tour, you really ought to take a look. He is in amazing form, and the voice is intact, something that cannot be said of every band that finds its way here. James Blunt was not quite up to form, although the concert was still well worth the admission. But Neil sounds like he always has, and like his CDs. But these versions of the songs still have a unique feel to them ... which is what makes it all so worth while. Neil rocks like a young man by the way ...

He did a lot of the great songs people look forward to, although with something like 50 CDs to his credit, there is a lot to choose from. But we got some really great tunes like Powderfinger, Cortez the Killer, Harvest, Unknown Legend, Old Man and he even closed with Rocking in the Free World! His encore was a brilliant version of the Beatles' A Day in the Life. People left on cloud 9.

Now, the price is very stiff for this tour. Two tickets well over 100 feet away will set you back at least $500 cad after taxes etc. I had no plans to go, but a little luck struck about 4 hours before the concert, when a coworker posted the need to unload a pair of tickets for half price ... needless to say I needed no further encouragement.

I brought my new Canon G10, which I decided I much prefer shooting over the Fuji F11, despite the Canon being weak at the more useful ISOs of 800 and 1600. I use other tricks, like underexposing at lower ISO, etc. It works well enough and the camera is a joy to use. And note that I was even further away (but only by 20 or 30 feet) than I was at James Blunt a few days before.

Neil had strict rules regarding photos and recording. None whatsoever would be permitted, as is plainly written on the ticket.


Since I picked up the tickets at the arena, I was unaware of this and brought the camera anyway. The security people made a bit of a show of dragging people out of the concert, but in the end there were just too many small cameras for them to stop. Flashes went off constantly. I was careful, though, to keep the camera in my pocket and to only shoot a few images at a time, and very stealthily. No need to get kicked out of the greatest concert I've heard in a long time ...

By the way, the whole set it visible here, in my gallery.

As I mentioned, I was a long way off, and at an angle. So there is not a lot of ambient light in these images ... the backgrounds are dark, since the nicely lit stage is not behind Neil in most of these. But, as with James Blunt, the images serve nicely as memories of a great concert.

I did not arrive in time to hear Everest, the first opening band. But the second band, Wilco, was quite good. They sounded like Neil at times and like Blue Rodeo at times. Their unique twist was this cacophony they'd break into now and again, which is apparently their signature in live shows. Quite entertaining at times. I literally burst into laughter in one song, where the singers continued their country harmonies through an injection of noise from one of the guitarists and the drummer that sounded just like an air raid ... when it was over, the group was still singing this lovely mellow ballad. It happened three or four times in the song, and it worked really well.

Anyway, here's what they looked like. This is a heavy crop from a long way off, so don't expect the same quality as when I shot the Wallflowers from 10 feet with a dSLR :-)


And then, of course, Neil came on and took our breath away ...


If you enjoyed these, have a look at the rest of the album. And go see Neil Young if you can!

Sunday, November 30, 2008

James Blunt in Ottawa

Last night, James Blunt played Ottawa at the ScotiaBank Place. Luc Ducet and the White Falcon opened the concert with an excellent set. He has a good voice and is an excellent guitarist. Great bluesy riffs and an overall country blues feeling to the set. Anyway ... it was a terrific hour.

James came on close to 9:30pm and played a fairly short set. It was all over before 11pm, but it was very enjoyable. This is my first time seeing him and my first impression is that he is a very good entertainer. Solid guitar, extremely good piano and of course magnificent voice. If you don't have his CD "All the Lost Souls" I heartedly recommend it.

I did find his voice a bit strained. He had some trouble reaching the high notes, his bread and butter, without cracking or falling off the notes, but he held on for the whole concert and the power parts of the songs came through loud and clear. I suspect he's been on tour for a while, although I have not checked.

The light show was decent, but both sets were poorly lit for photography. Of course, I was in a suite on the 100 level and was further from the band than any other time where I've had a camera with me, so the emphasis on spots with weak ambient coupled with the distance from the subjects was a real challenge.

And I got an early Christmas present about 5 hours before the concert ... the Canon Powershot G10. I brought that camera and my usual concert camera, the Fujifilm Finepix F11, along to test them head to head.

The G10 is a real shooter's camera .... the controls are very good and it is easy to change anything you want in a few seconds ... even though this was my first time shooting the camera. The F11 is ok in that way, because I've shot many thousand images with it ... but I didn't waste much time with it after feeling the G10 in my hands. Wow ...

The F11 is one of the Fxx series of Fuji cameras that is renowned for their high ISO prowess. They can shoot fairly clean images up to 1600 ISO (3200 is really just a joke in compact cameras) but they sacrifice a lot of fine detail. The G10 theoretically sacrifices more than that, with poor saturation and all kinds of noise from a sensor that has more than double the pixels of the F11.

So I shouldn't even bother, right?

Not so fast. Take a look at this article and you will see why I was willing to give the G10 a test drive (I have until 5 January 2009 to bring it back, a very good policy from Future Shop and one reason I buy from them a lot.)

I managed to shoot only jpegs at this concert, despite the fact that I wanted to shoot RAW images as well. I failed to read that part of the manual before the concert and simply could not find the setting. I did not have my reading glasses with me and did not see the tiny arrow indicating that there were more sizes off the page ... *sigh* ...

But that makes this an even better test. If the images look good at higher ISO in jpeg, I *know* that they will look even better in RAW later on. Note also that both cameras were shot in normal jpeg compression ... approximately 12:1 on the F11, not sure on the Canon. This is still excellent, and I did not find jpeg artifacts to be visible during my processing.

So .... without further adieu, let's see the opening act, Luc Ducet.

This was one of my first images ever with the G10 ... and I shot it at 1600ISO, committing heresy :-) ... it's not great, but it's not terrible either. Remember to click to see the larger version of images on my blog.


Here's a similar image shot at 400 ISO for comparison. A bit more detail visible here.


You might be wondering how I shot the same images with ISOs 2 stops apart. Simple enough ... I use Tv mode and set the shutter speed to a fixed value, usually around 1/100s. I have found empirically over many concerts that 1/100s is usually enough to freeze a singer standing in front of a microphone.

For comparison purposes, here is a Fuji F11 image at 800 ISO. Not as nice in my opinion -- good detail, which is always a Fuji strength, but a lot of banding and other noise related artifacts. And white balance and saturation are awful. I was quite surprised. The light was perhaps a bit dimmer than for the other shots .... I don't recall.


When James came on, I recorded video for the first 10 minutes. I gotta say that the long reach of the G10 lens and the superb IS makes for a smokin' video recorder. And it is so cool that they use the H.264 codec instead of the awful motion jpeg codecs used by Fuji and so many others.

Here is the first shot I made of him, again inexplicably at 1600ISO. It was pretty dark, only blue spotlights ... sheesh, what brutal lighting for a digicam. Again, not great, but not terrible. In fact, I am pretty pleased.


I went on to capture quite a few images, some even as low as 200 ISO. The ISO dial is so easy to use that it begs you to experiment ... and I did. 200ISO creates really dark images, but the quality of the pixels in the G10 is pretty high at that ISO. To be clear, these are snap shots, memories, social shots. They are not portraits and could not be enlarged except in a artistic fashion ... of course, I have no legal right to profit from these anyway. My point being that the quality of these need only stand up to the web ... and they certainly do that as a group in my opinion.

Where was I? Oh yeah ... the 200 ISO image. Very, very clean. I was so pleased when I saw this one come up in Bridge.


That's shot from over a hundred feet away! And here is a fairly close crop of the image ... showing that there is some detail in there. All 6 strings are visible, I believe.


I will close with a few more from the part of the set where he runs through the audience giving hugs and then jumps into a secondary stage with a piano that he plays for several songs. Also far away from me and poorly lit.

To see the whole set of about 30 images, go here.

Here he is on the secondary stage, shot at 400 ISO. The people are all visible, as there was a bit more light on them at that moment. Made for some nice ambiance in the shot. Note the sharpness of the security guy's face on the far left. And note also that this was shot at 1/8s ... kudos to the IS in the G10 ...


Here is one a short time later with the Fuji. Shot at the higher ISO (800) and faster shutter speed (1/100s) makes it decently sharp. It actually looks quite nice.


Here's a wide shot from the Fuji, showing the stage at the other end of the arena and the one spotlight shining down. Decent amount of ambient light allows me to show the audience. This one started pretty dark and the result is a little harsh looking. Still, not bad, especially when you consider it is shot at 1600 ISO.


Back to the Canon. With the very wide 28mm lens, I was able to capture a really nice ambient shot. This is a portrait crop from a wide landscape image, shot at 400 ISO (I inadvertently reported this as 1600 ISO when I first posted this blog entry), and is far smoother. IS helped with that, and there are a lot more pixels to work with and they are at a fairly high quality, despite the incredibly tiny photosites. And I didn't even shoot this in RAW :-)


Ok ... one more for the road. Here's a 400 ISO image from the G10 ... quite clean, a fairly strong crop, yet quite clean and detailed. Look at the faces in the audience to see what I mean. So clean!


Great concert. I'll update this blog with the video when I have processed it and uploaded to YouTube. Meanwhile, go see either Luc Ducet or James Blunt (and if you are really lucky, both) if you get a chance.

And consider the G10 for your every day shooter. Fits in a (fairly big) pocket and this things rocks!

Panasonic LX3 at High ISO

So DPReview appears to have annoyed some people by giving the Canon G10 a recommended rating instead of highly recommended. I was a bit surprised, since the scuttlebutt (I read a lot of professional photographers) is that this camera is amazing.

Anyway, my fans (how are you both, by the way?) will remember I did a bit of a comparison a while back in hopes of finding the perfect concert camera ... one that I can actually get in (dSLR is out, Fuji F100fs is out, both much too big.) So compacts are my only hope Obi Wan ...

In that comparison, I compared the Canon G10 (leading contender at the time) against the Panasonic G1 (sort of a contender, but kind of big) and the Fuji S100fs (not a contender because of its size.) You can read my conclusions here.

Now ... at the time I didn't think of the LX3 as a contender, and I still don't. The lens simply has no reach. Since I want a concert cam, and since I am not a press photographer, I need something with a little reach.

But the subject keeps coming up, and I realized that I had the perfect basis for comparison of the LX3 to the other three I had already done. So I quickly grabbed the same shot at 800 ISO from the Imaging Resource site (very good images there for this specific purpose) and whipped up a new version of the crops and the 800px web sized images.

So, without further adieu, here are the crops:


My analysis is that the LX3 is tied with the Fuji for being easiest to look at straight from the camera. I think these two have higher sharpening by the way. But no matter, they do a decent job. Still ... none of them avoid the clumping of the hair ... there are simply no individual strands visible ... such is the problem with small sensors, and it is not avoidable with current technology.

To be drive the point home, here again are the crops from the dSLRs I used in the other comparison:


Here, you can start to see individual hairs ... there is far less clumping going on. If you want to be really impressed click over to the other comparison and look at the D700 crops ... mind blowingly clean. Every individual hair is visible.

The other thing to note is the nasty noise reduction artifacts that pepper the LX3's image after a bit of smart sharpening. They are visible in the image from the camera, but obviously are very unfriendly to post processing. The LX3 is a camera you will want to shoot in RAW.

And finally, here are two images at 800 pixels ... they are not labeled, and they are in no specific order. The EXIF is intact for the curious, but frankly I think the G10 and LX3 are quite similar as social cameras. Either takes a usable image 800ISO when processed properly.


By the way ... I bought the Canon G10 yesterday as my concert camera. It was just too tempting. I'll be blogging my first impressions shortly.

Wednesday, November 12, 2008

Fujifilm Finepix F31fd versus Panasonic LX3 for Low Light Supremacy

Ok, these two aren't really in the same league. The Panny is a serious camera with amazing ergonomics and a smoking good lense, albeit way too short (booooooo!)

But the Fuji Talk Forum has been desperately searching for the next great compact Fuji camera for social situations ... the last one was the amazing F31fd. This is a camera that is so smooth at 800ISO that it defies logic. A sensor the size of your little finger nail with noise characteristics better than some of the crappier dSLRs ... (you know who you are ...)

DPReview performed a full review the LX3 and gave it a highly recommended. But they found that low contrast detail, a perennial problem in small sensor cameras, was not handled well. Panny have always had noise issues and over-zealous NR. The LX3 is much improved, but still not where it should be for the price.

I always enjoy Thom Hogan's reviews, and he looked over the LX3 against the stunning Canon G10 and the rather mediocre Nikon P6000 (why Nikon, why?) The LX3 should have won, but Canon has done wonders with their processing with some of the tiniest photosites yet ... and the Canon walked away being the only one Thom thought could do a decent 800ISO. I certainly think it does alright, because it retains a decent amount of detail.

http://www.bythom.com/compactchallenge.htm

Anyway ... back to the Fuji issue. The debate has been raging in a thread over there, based on someone's work on the DPReview sample images. The NR was a bit heavy handed and did not show enough to declare a winner. So I thought I'd apply my Neat Image skills to the problem and see what I could coax out of these two.

The result was, in my opinion, a virtual tie. Kudos to the LX3. Here are the 800ISO crops (click to expand the images):


As you can see, the two are pretty close at 100%. Factor in paper and ink and even fairly big enlargements will look similar. Although the Fuji will look smoother in dark areas. You can see that with the lense crop, the Baliet's bottle crop, and the color card crop.

On the other hand, the Fuji has some weird edge artifacts. That is most obvious on the lense crop with the jaggies all over the little details around the silver parts.

I think the Fuji's NR is a big over-aggressive as well ... this being most obvious on the Bailey's label. The tree in the Panny image definitely has more detail.

Still ... overall, the detail is about the same (see the glove crop) ... leaving one to wonder where the extra 4 megapixels went?

So ... pretty much a tie. If only that LX3 lense were not so darned short :-(


I think these would make fine prints, but the situation would be quite different were there hair or distant foliage in the image. We'd be looking at lots of clumping in the Panny image ... and some in the Fuji image too. But I am pretty sure the Fuji would be a little better.

Sunday, November 9, 2008

Deal of The century! WACOM BAMBOO FUN!

I was poking around on fredmiranda.com's for sale forum and saw a WACOM BAMBOO FUN tablet for sale for $60usd. This seemed quite reasonable, so I took a look around and found out that these are very decent beginner tablets. The kind that non-artists can use for illustration, editing and even navigation. Vista has been pen-enabled, so is quite friendly to the use of a pen instead of a mouse.

I checked the prices here in Canada and found them quite reasonable. Future Shop has the best prices right now, with the basic BAMBOO selling for $69.99cad and the more advanced BAMBOO FUN selling for $99cad in its small form. Note that the small form is perfectly fine for most purposes, and in fact I find it already a bit large for pen navigation as you have to move your arm pretty far to address the edges of the screen.

The BAMBOO FUN comes with extra goodies, which should be quite worthwhile for many people. First, it has a nice looking table, which also comes in three colors. I purchased basic black. With the glowing navigation circle, it looks very cool. It also comes with a mouse, which basic BAMBOO does not. This mouse never needs batteries, yet is wireless when used with the tablet. Very nice.

But the real kicker is that you get very recent versions of Adobe Photoshop Elements, Corel Painter Essentials and NIK Color Effects Pro. Elements is now at version 6 in the package, which is a heck of a deal, as you get Adobe Camera RAW 4.6 with support for the most recent cameras in it. And you get keys that are upgradeable!

So this qualifies in my opinion as an amazing deal. An excellent beginner's tablet plus world class photo editing and organization software for a hundred bucks. And fully upgradeable to the latest version, which has just been announced (Elements 7 with ACR 5.)


Consider giving this a try if you have ever thought about using a table for editing, illustration or navigation. It's pretty cool ...

Saturday, November 8, 2008

Crop Factor affects the apparent Depth of Field

The topic of crop factor and depth of field comes up once in a while in debates on the net. Specifically on certain forums on DPReview.com, where there are people who consider an extremely limited range of depth of field a virtue ...

Some people do not believe in the NxA Rule, something I picked up on a web site that is sadly no longer visible. However, this rule tends to work out, despite its rudimentary approach to the topic. Basically, N is the *crop factor* from the camera's sensor size to a full frame sensor size. Roughly, this corresponds to the diagonals of the two sensors.

A Fuji F11 (my favourite compact until they release something that is truly better feature for feature) has a 1/1.7" sensor, which has a diagonal of 9.5mm. A Nikon D300 (my favourite dSLR until I win the lottery and grab the D700 and a selection of appropriate lenses) has the Nikon APS-C variant, which has a diagonal of 28.4mm. And a full frame camera (any 35mm film, and the majority of full frame digital SLRs like the aforementioned D700) have sensors with a massive diagonal of 43.3mm.

So the crop factors for the Fuji F11 and D300 are 4.56 and 1.47 respectively. Interestingly, this disagrees with Fuji's reported crop factor (FOV factor if you will) of 105mm effective at 24mm actual. That makes it a 4.38 crop factor. No matter, they are close enough.

What this means is that a D300 shot at f2.8 will have an effective DOF (relative to the FF camera) of 1.47(N)*2.8(A) which comes to f4.1. The F11 shot at f2.8 will have an effective DOF of f12.7.

That's some kind of difference. In fact, it makes it nearly impossible to get pleasing bokeh from the F11. Only in extreme macro situations can the background be smoothed out really nicely. This is why the debates rage in the forums ... compact and bridge cameras are considered by many to be unsuitable for any photographic pursuit where pleasing bokeh is a requirement. But they have their defenders, who staunchly suggest that dSLRs cannot get the same DOF and therefore are actually less appropriate for certain types of photography, the primary example being landscape photography.

One problem, of course, is that most bridge cams and compacts have only a few apertures available at full zoom to keep their lenses reasonable in size. The F11 has a range from f5 to f8, which is 2.33 stops. The S100fs bridge cam goes from f5.3 through f8 in automated modes (a hair over two stops) and adds f11 (ok, does this get confusing with the Fuji's model or what?) in manual modes (a hair over three stops.) I.e. they all start pretty high in the range at full zoom.

So what does this mean in practice? Well, it means that the subject isolation and bokeh you will get on the dSLR shot at anything below about f16 is simply unattainable on the small sensor cameras. Whaaaaaaat, you say? No, it's true. The crop factor predicts something close to this, and a demonstration shows it pretty clearly. It also shows that the maximum DOF is pretty close between the two, although in both cases one is reaching into diffraction-limited territory.

I shot a series of images from a tripod placed less than 2 feet from my subject, a Kirk Enterprises D2 L-Bracket lying around from the days when I owned a D2 series camera (eventually I'll get it together and sell the darned thing.) There are boards stacked against the wall between 12 and 15 feet behind this subject, which make a pretty good test. By the time they come into partial focus, we're well into the teens in aperture. At least, at macro ranges.

A note: At macro ranges it is my experience than you can shoot at minimum aperture (f8 for the F11 and f32 for the lense used on the D300) without significant diffraction impact. I presume that this is caused by the magnification of the subject.

When I shoot the F11 at 105mm to match the lense I had on the D300, I start at f5 and shoot at f5.6 and f8 as well. These should line up somewhere around f15 through f24 on the D300, but my experiment shows it to be more like f16 through f32. This probably because the Fuji could not focus as close, even in macro mode and had to be moved back a few inches. This does not invalidate the test because the relationship between subject distance and background distance is pretty vast and is hardly affected by this slight change.

So ... here is what it looks like. (Click on it to see it at its full size.)


And here is a second test, created when challenged by a user on the Fuji Talk Forum. I was extremely careful to match effective focal lengths and subject distances ... and the result was the same. This is also not a macro shot, with the subject distance to background distance ratio being closer to 1:5 this time.


From this experiment, we can conclude two things:
  • Small sensor cams have great difficulty isolating subjects.
  • Large sensor cams are able to pretty much duplicate the wide DOF of small sensor cams because of their much larger range of useful apertures.
And remember that the difference is maintained as subject distance increases in relation to background distance. So dSLRs have to use lenses with much wider apertures to get any subject isolation from a distance. While they have little trouble getting most everything in focus at long landscape distances without resorting to their maximum diffraction-limited apertures.

There is a slight advantage to small sensors when one wants to shoot something very close to the lense (e.g. a flower) while still retaining the field in good focus. This requires decent apertures to maintain shutter speeds yet requires very wide depth of field from close distances. Since this is usually done at wide angle, the problem is not as severe as with the telephoto macro examples shown here, but it still exists. Raising ISO helps (and there is a lot of headroom there in modern dSLRs) .... but what really does the trick is the tilt-shift lense, which is available for all dSLRs. This lense reorients the plane of focus to match the plane of the sensor, allowing stunningly wide apparent depth of field ...

I have to say that I prefer the wide range of options to the rare convenience offered by the small sensor camera. Of course, the solution is to own both and shoot the small sensor camera when it really does have the advantage. The Canon G10 is likely to follow the G9's success as the backup / travel cam for many dSLR owners because of its dSLR-like control and compact size. But I very much hope that Fuji releases a real competitor once again ... rejuvenating the E-series camera line would be a great thing ...

Wednesday, October 29, 2008

Noise Reduction Face-Off -- Neat Image, Topaz Denoise, ACR 5

I've been a heavy user of noise reduction for years now. I latched onto Neat Image pretty early and have been happily using it until very recently. I became a tad disgruntled when I purchased Photoshop CS4 and found that the 32 bit plugins I owned did not work in the 64 bit version of CS4 ... obviously Adobe created no thunking layer to bridge the two worlds.

And only PTLens (excellent lens distortion plugin) was already shipping a 64 bit version, at no extra charge. I got upset because I had not managed to install both version of CS4, so I was unable to use my favourites. Luckily, someone mentioned on a forum that both were installed by default, and I remember having a glitch in my install and having to redo it. So I explored the installer yet again and managed to get everything installed for both 32 bit and 64 bit CS4.

By this time, I had found Topaz Adjust and Topaz Denoise, and although they have no 64 bit versions, the plugins intrigued me. They use a new noise reduction technology (so they say) for Denoise and a cruder, but sometimes nicer, method in Topaz Adjust. Topaz Adjust can do amazing tricks with contrast, detail and color, and creates effects that range from Orton to Dragan. Really arty stuff. With a gentle touch on the controls, it can do a really nice job of simple contrast and detail adjustment.

Topaz Adjust was on sale for $38 usd and Topaz Denoise was thrown in for free, as it was new. This was unresistable to me, so I acquired it. And I have certainly enjoyed the plugin. One example of a fairly tame adjustment to add some pizzaz is this close up of the facade of the Parliament Buildings in London. I shot it from the top of a bus on a tour. The weather was mid-day sun and the image has a rather boring snap shotty look to it.

After a little work with Topaz Adjust, the image seems to become vibrant and detailed. There is just more interest in looking at it. And the balance of colour and contrast is such that it will look much nicer in a print. It almost sparkles now.


Definitely something to look at for the price.

Now, Topaz Denoise is a more interesting beast. It handles details better than anything I've ever seen. You can absolutely hammer a background or sky to smooth plastic and the details in the rest remain almost untouched. It has its issues of course, sometimes it bands smooth areas like skin, but for complex images with lots of noise, it can work magic.

Downside? It's unbelievably slow in its best mode. A 12mp image from a D300 can take 10 ro 15 seconds for Neat Image to process. The same image in Denoise can take 6 minutes!So choose your images with care. Neat Image remains a superb general purpose noise removed.

And what about ACR 5? Turns out that you can get great results with that one too. And there is no time penalty at all. Dial in the noise settings and the conversion does the noise in the same time as everything else. Very impressive.

I decided to perform a simple test on a jpeg from a few years ago. A balloon race late in the evening shot by a D70s at high-ish ISO (800.) There is some noise, but I nailed the exposure and it's not bad. Mostly color noise and a bit of grain.

Here is an image containing four crops at 100 percent ... double click on the image to see the full size. You'll see some grain that is mostly removed by Neat Image and completely wiped out by Topaz Denoise. Denoise is almost too effective. ACR 5 does a nice, balanced job. Note how the trees and leaves in the background are hardly affected at all. I used a bit of Y channel sharpening at high frequency to pull Neat Image back into line. Topaz Adjust hardly touches detail. And ACR 5 is pretty good so long as you control the amount of luminance noise you allow it to touch. I added a touch of sharpening to ACR 5 as well.

Any of these would print very well and I would not presume to choose between them. I plan to keep and use them all. Again, double click on the image to open the large version.

Apple and Rogers ... is data a new street drug?

Ok ... I don't like hate blogs. I have no desire to attack the company to which I pay a small fortune each month for my Internet, three wireless accounts and my digital cable services. And yet ... I am just about ill to see the prices they are suddenly charging for the iPhone.

The iPhone came out on a promotional price for about the same cost as the US prices. $199 for the 8GB unit and $299 for the 16GB unit. For those whose voice plans were under $30, there was an extra gouge, er, fee of $50 as a penalty. (For being a customer I suppose.)

I can live with all that ... my wife purchased one and my son got one at this promotional price. My wife got the $30 per month 6GB data plan, only about infinity less than what you get for that price in the US, but hey ... this is Rogers. My son got it without the data plan and racked up $50 in about 8 hours of light usage before I spent almost 3 hours on the phone with them before they found someone who knew how to disable the 3G network in the phone.

I could not get one, because I had upgraded to the Blackberry from hell last year and had to wait until September.

Well ... I traveled to the UK in the last week of September and didn't get back until the 28th. I didn't even think about the upgrade again until today. I almost missed a dental appointment (they called me 20 minutes into it to ask why I had missed, but I rushed over.) I later realized that this was because my Blackberry had reset the time again to one hour off ... so the alarm went off to taunt me while I was at the dentist. This was the third time something like that happened, the phone has other horrible quirks like radio going off and staying off ... that kind of thing. A junker.

I decided that enough was enough and I would finally go for my upgrade to the 16GB 3G as I also need a new iPod (mine is used as the music device for the car now.) Well ... I walked over to the local Rogers, which is 3 doors down from my dentist, and the fella called up my account and expressed surprise that the prices had just jumped by $100. I was stunned, because I had heard nothing of it.

I left the store steaming mad (like you get when you decide to spend money and someone stops you :-) and decided to call Rogers later to find out what was going on.

I just got off the phone with them after waiting a short 20 minutes (short for Rogers that is) ... and I am stunned at the avarice ... the price jumped $100 after the "promotional" price expired at the end of September. Interestingly, the fella at the store said "I haven't sold a phone for a few days and this is new" ... so who do we believe?

Anyway ... that's the price. We are now officially 50% more expensive than the price of the same upgrade at AT&T.

She also repeated the often used bullsh*t that my $35 rip-off, er, administration fee could not be waived. So I ran out of patience and politely (it's true) asked to speak to her manager. Five minutes later she returned to me with the good news that she could waive the fee. What a shock. I only pay them $350 plus every single fricken month.

And I get a wonderful $50 rebate (assuming I remember to send it in) off my phone charges later ... woopee. So I think about it and decide that a total price of $400 might be tolerable. I ask ... how much for the data plan? Remember, Rogers customers were being ripped off for, er, paying $30 per month for a lousy 6GB and that "promotion" has apparently run out.

The news was grim ... for $25 MB, I could get 500MB. !!!!!!! WTF????? That's the size of a single CD. Yes ... ONE CD ....

The price for 8GB (only 30% more than the 6GB offered during the promotion) is now ... wait for it ... $80 per month! GAK. I swallowed a bug. And choked on my vomit.

Sorry ... enhance your calm ...

The price of the phone rises 50% and the cheapest data plan price rises 1000% ...

Yes, the price of data has gone up by 10 TIMES.

Wow ..... 10 TIMES ... 10 TIMES ... 10 TIMES ... 10 TIMES ... 10 TIMES ... 10 TIMES ... 10 TIMES ... 10 TIMES ... 10 TIMES ... 10 TIMES ... 10 TIMES ... 10 TIMES ... 10 TIMES ... 10 TIMES ... 10 TIMES ... 10 TIMES ... 10 TIMES ... 10 TIMES ... 10 TIMES ... 10 TIMES ... 10 TIMES ... 10 TIMES ...

That's an ORDER OF MAGNITUDE in case anyone is interested.

Ok, I admit. I shouldn't blog when I am in shock.

By the way ... there was one cheaper data plan for $15 per month, I think it was enough to send 5 small images across the net ... I kid you not.

So ... maybe they are trying to align with the pay as you go data prices. After all ... this is pretty expensive, right? Well ... not so, Midas Muffler Breath. The pay as you go prices will take your beath quite literally away.

If you just use the data without a plan at all, the price is a nickel a kilobyte. So on the scale we have been using, that's 200 bytes per penny. Yes, 200 bytes ... or 0.0002MB per penny ... that's one person's really long name. And now we are at 1000000% ... yes, 4 orders of magnitude over the "promotional" price. That's actually quite a lot ...

Things are looking rather grim .... let's summarize these options:

"Promotional" price for 500MB at $30/6GB ... comes to $2.50 ... Not bad, although AT&T charges effectively 0 for high volume users so this is pretty high.

Current price for 500MB: $25 Hmmm ... that seem a bit stiff to anyone else?

Pay as you go price for 500MB: $25,000 Huh? Can this be right? $.05 per kilobyte times 1000 times 500 ... yup ... works out. If you look at images online for a few hours, you could end up buying Rogers a brand new car.

So ... what was I to do? I hung up of course. I couldn't even articulate my displeasure any more. Words utterly failed me.

Is there any industry in which it is legal to offer a promotional price that is 10 times cheaper than the real price? I don't think so. But I understand (from literature and television) that there is a thriving industry that regularly gets customers "hooked" on their product and then raises prices to exorbitant levels ...

Sunday, October 26, 2008

High ISO comparison Canon G10, Panasonic G1, Fuji S100fs

I've been agonizing over a couple of issues over the last 6 months.

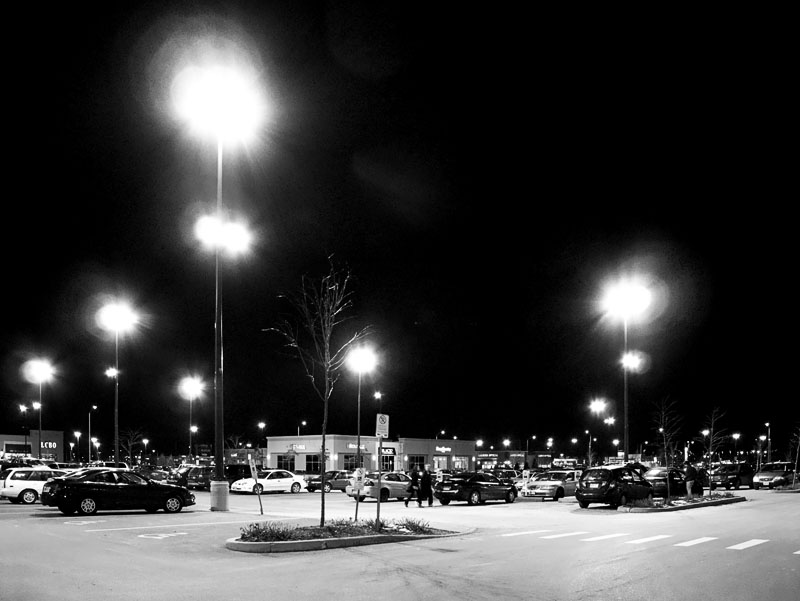
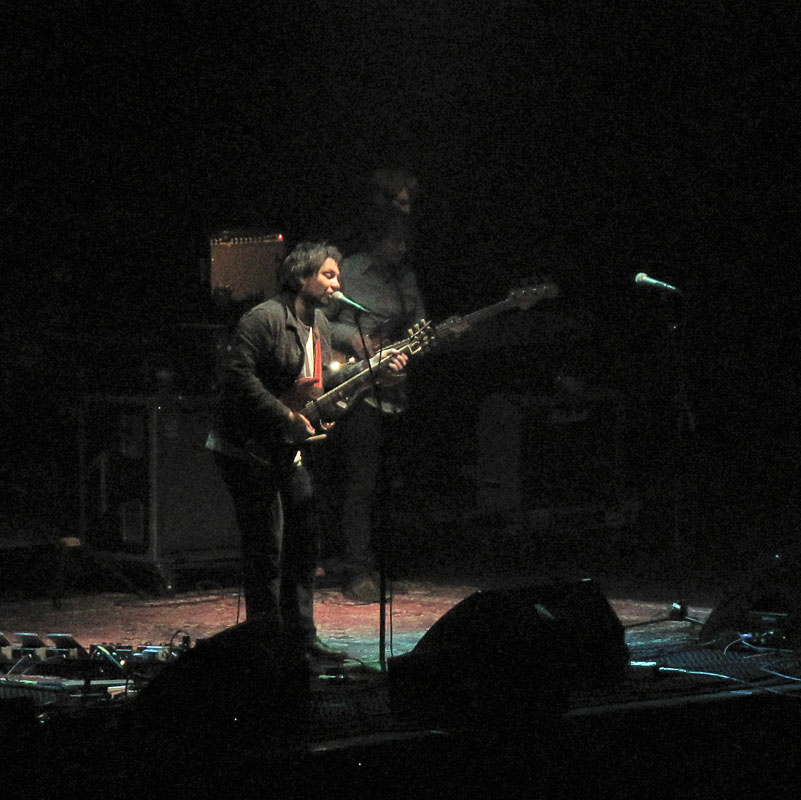
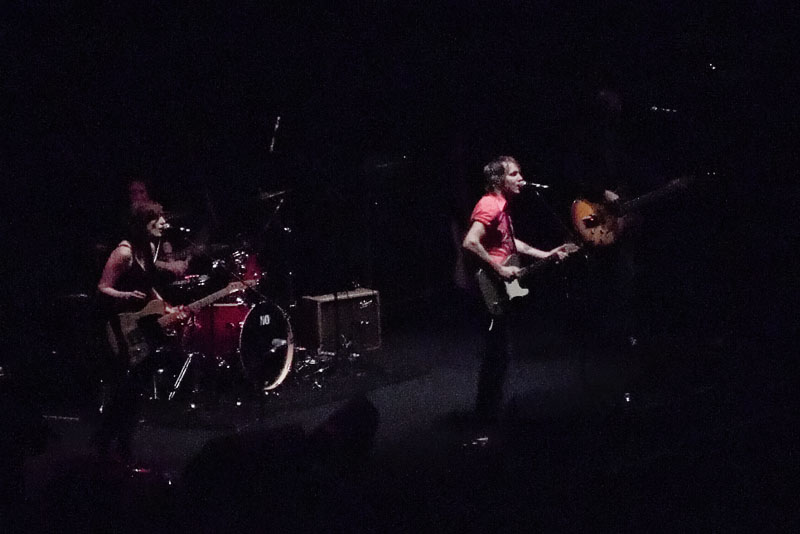
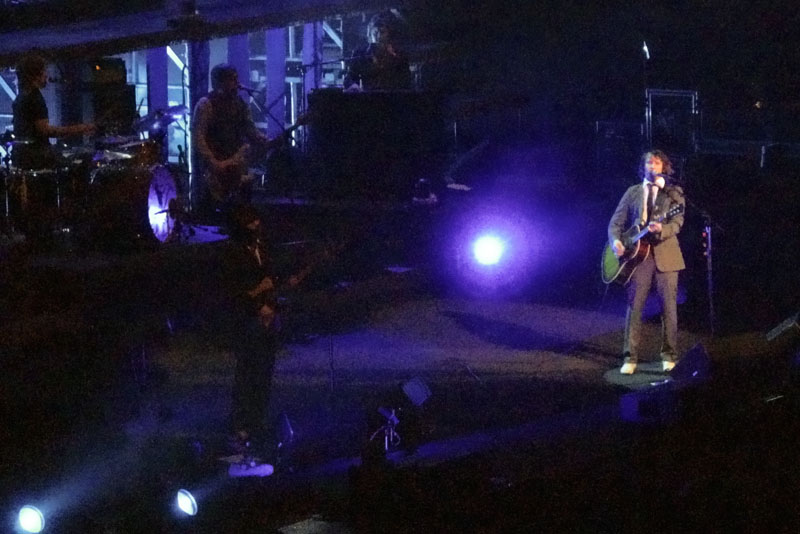
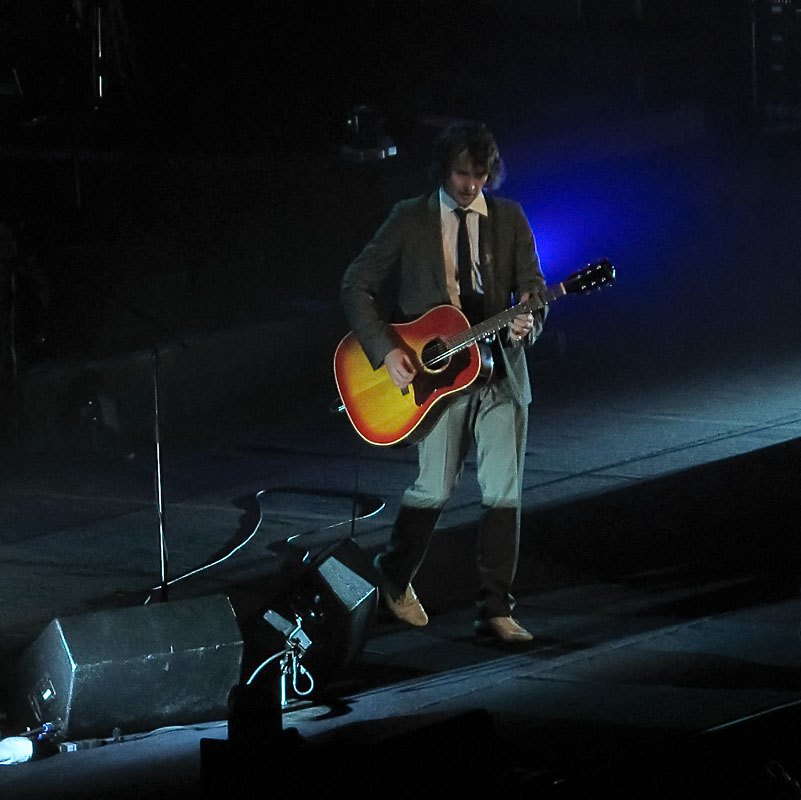
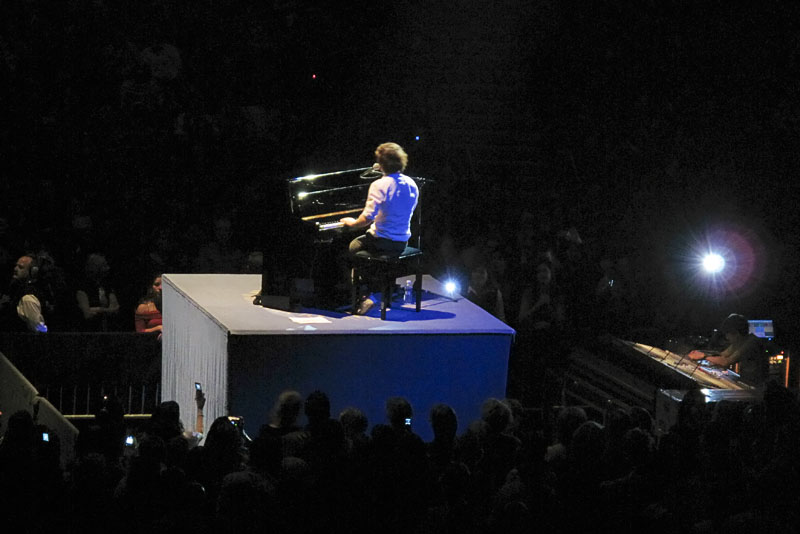
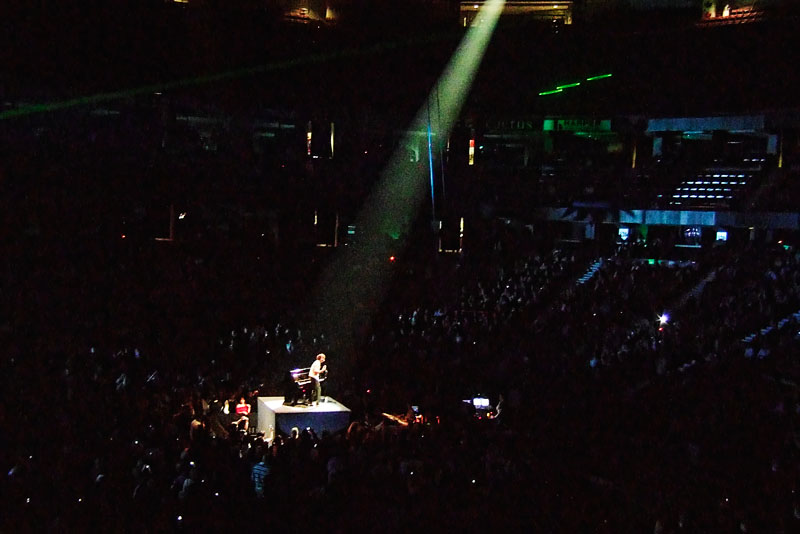
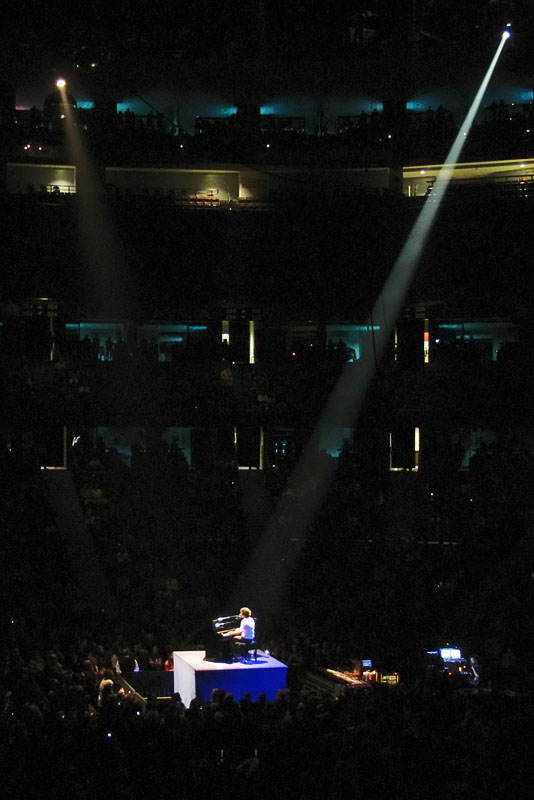
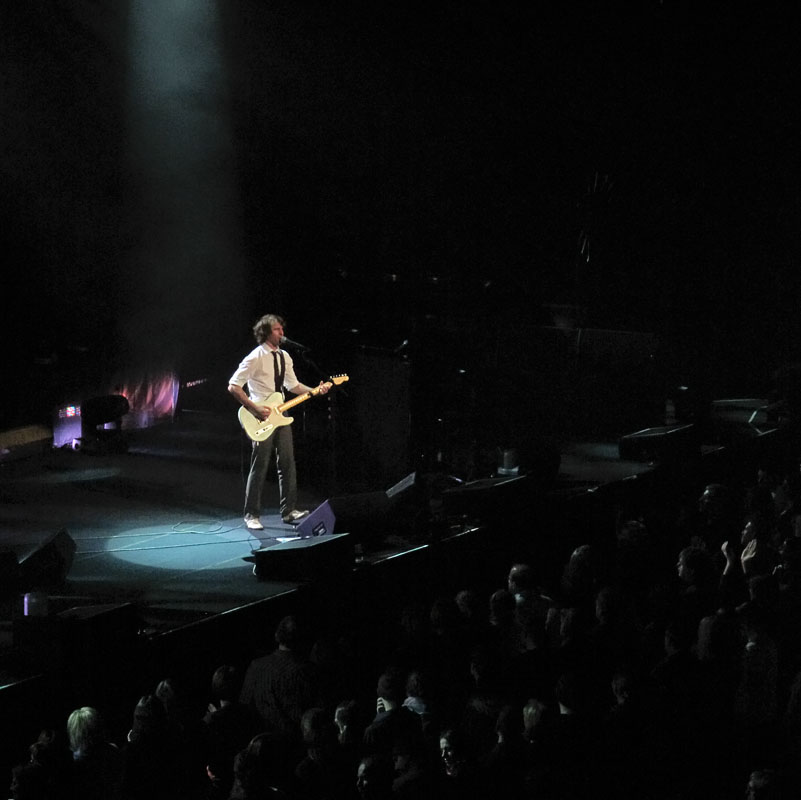
First, I need a new concert camera. The F11 still works very well, but its video mode uses too much card space and its audio input is easily overwhelmed by heavy bass, making clips sound like they were recorded under water. Candidates for this position must be small enough to wear at the belt or carry in a jacket pocket. I.e. they must be sneakable into concerts here in Ottawa. None of the local venues allow anything that is or resembles a dSLR. Small is beautiful ...

Second, I would love to be able to travel with a smaller kit. I have been vacillating between the D90, which is smaller than my D300 but quite expensive, the D60, which is really small and still provides superb image quality, and a compact cam ... which has the advantage of size. The F11 is definitely not enough cam to take as my only capture device. The G9 grabbed me for a while, but the high ISO performance was pretty ordinary as low as 400. An excellent bridge camera like the Fuji S100fs would have sufficient high ISO to be useful and it has IS. But alas, it weighs as much as the D60 and my 18-200VR and is about the same size and more expensive! I'd need my head read if I took that route. The new G10 has improved the high ISO picture somewhat and apparently fixed a lot of what ailed the G9. It dropped some range unfortunately, but gained true wide angle.

The G10 actually looks like a serious contender. It is certainly small enough to carry into a concert. It would be a dream to travel with. What's not to like? Well, high ISO ... it's better, but is it good enough?

I like to shoot in churches when I travel. That means I shoot at 1600 or higher, even with stabilization. The G10 won't quite cut it. But I do carry a mini tripod now, so maybe I could use that (or a Jobo Gorillapod) to make up the difference. But I'd still need 800 ISO. For concerts, I have developed a style that works at 400 to 800 ISO, so testing at 800 covers both.

By the way, Panasonic has brought a new contender to the table as well. No, it's not the LX3. It's high ISO is nice, but not quite in Fuji's league in my opinion. More importantly, the lens's range is a joke. Good enough for street shooters and reporters ... maybe. No, I'm actually talking about the new hope, the micro-4/3" G1. A large(ish) sensor with a 2 crop factor, as opposed to the S100fs's 4 and the G10's 5. This gives the Panny a significant advantage in pixel size, since they kept the megapixels under control ... unlike the G10. That body and processor with the G9's megapixel count would have helped high ISO ... but oh well.

So the contenders so far are the G10 and the G1. I want to test them against the best small sensor camera at 800 ISO, so that would be the S100fs. It's not a contender for the role, but it's the benchmark for high ISO in a small sensor camera. (We'll see later how they all stack up to the dSLRs ...)

Since I do not have access to all of them, I need a source for some test images. The obvious choice is the test site 
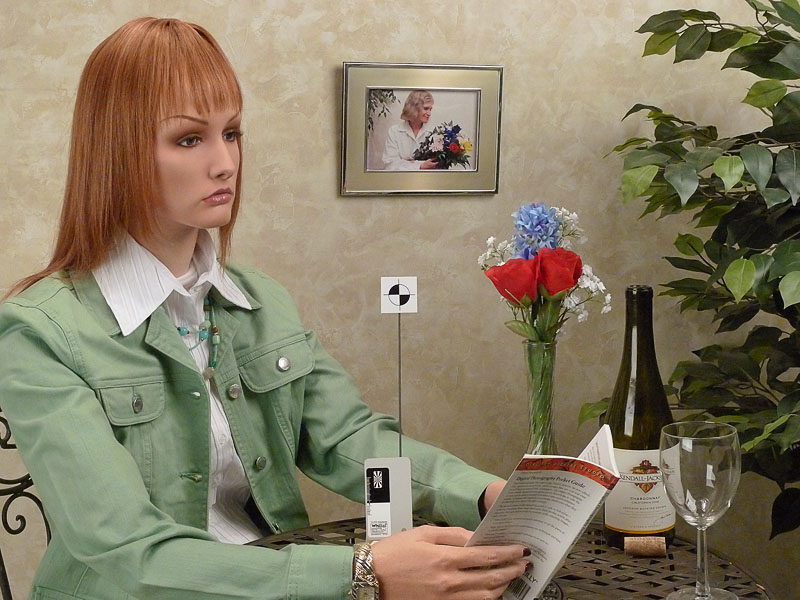
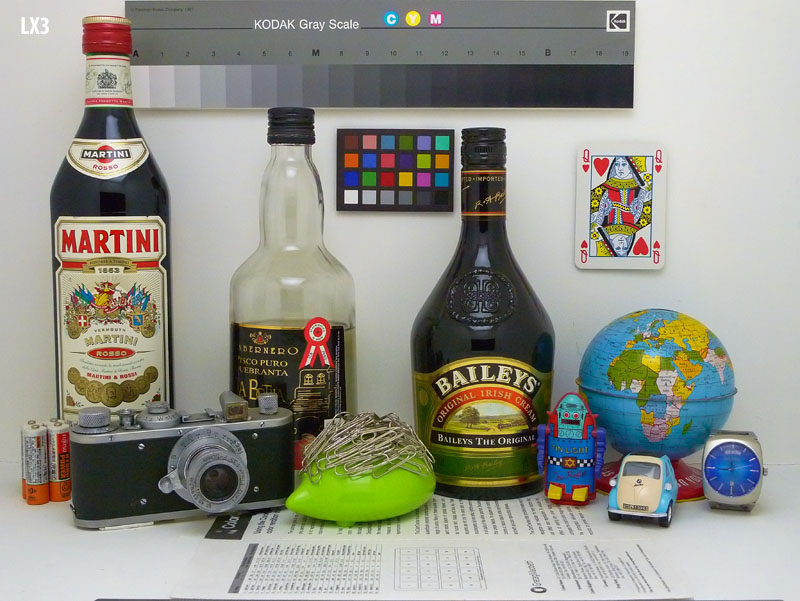
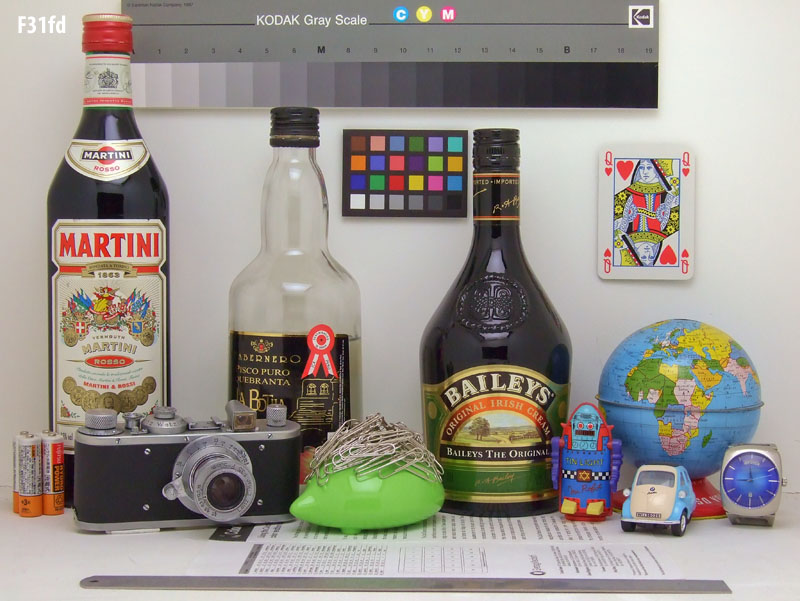
Imaging Resource. I used to have some misgivings about the consistency of their lighting and focus, but these days they tend to use the same setups and lighting and they have a focus target in the specific series that I like to use for high ISO. I will show derivatives of these test images under fair use provisions for their copyright. Check out their site and try their comparometer ... it's very cool.

First off, what do I value in high ISO performance? I.e. what should I compare? Well, detail retention is the biggy. Smooth noise is trivial to accomplish, but do it while retaining detail ... that's the challenge. Many small sensor cameras are known for their difficulty in retaining low contrast fine detail in such things as hair, fur and grass. These tend to turn to mush because of noise processing, and many cameras start this degradation surprisingly early. Some at base ISO!

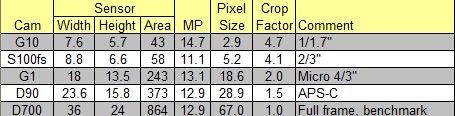
To explain this a bit further, here is a table that shows a few important parameters for the test. The G10 should really suck based on its photosite size. These suckers are tiny. The G1 has much larger photosites than the Fuji, and should easily beat it. But the Fuji jas dual advantages: the SuperCCD sensor, and Fuji's very nice jpeg engine.


Since I want to keep this fairly short, these three will be compared at 800 straight from the camera, and then with some limited processing -- a shot of Neat Image noise reduction and a shot of smart sharpening to pull out the most detail each can give 
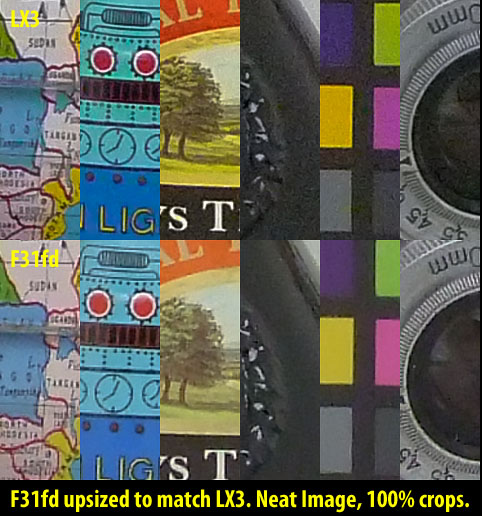
without creating sharpening artifacts, like halos. In the interests of fairness, I upsized the Panny and the Fuji to match Canon's staggering resolution before processing them all to extract maximum detail.

So here is the first crop. All my processing was performed in the 32bit CS4, which I have had now for about 4 days. I'll try and blog what I like about it later ... but so far I really enjoy it. GPU features like bird's eye view and smooth and accurate scaling are worth the price of the upgrade alone (to me) but YMMV of course.

NOTE: For all of the images on my blog, click on the image to see a larger version. This is especially important for all the images in this specific post, as the second set of equalized crops are invisible until you open the image up to full size.


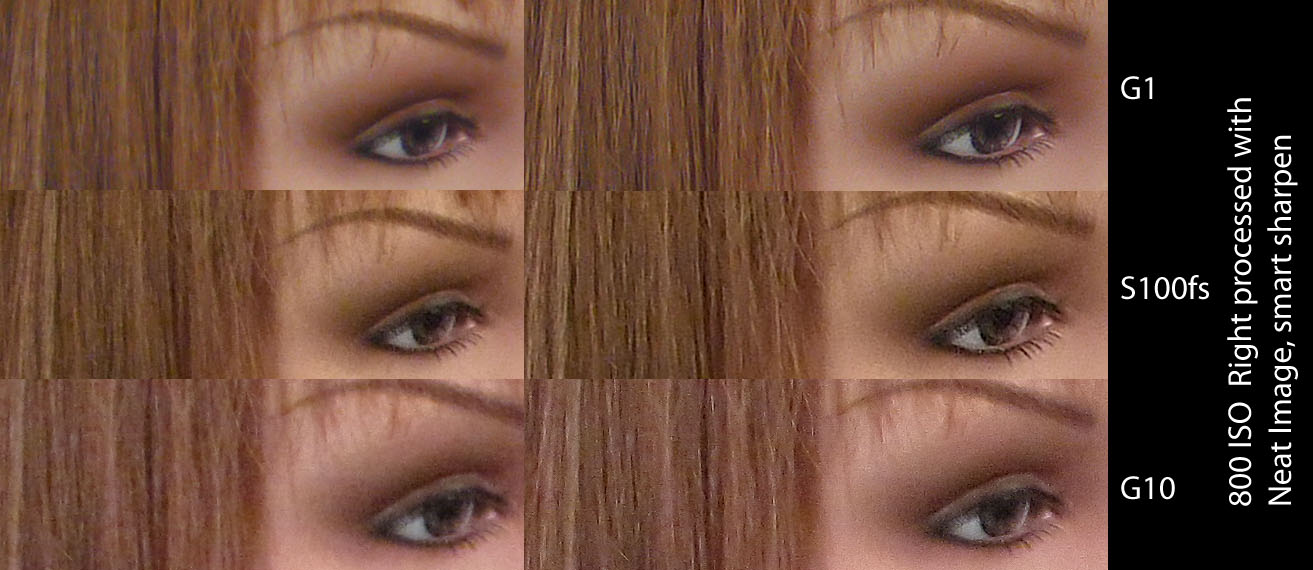
At 100% and straight from the camera (left hand crops), the G1 should stomp the others. But the Fuji is the winner before processing. Although the Fuji has grain, the Panny has a lot of color noise in very large blotch sizes, which is much uglier. It also has fairly low sharpening (which can no doubt be turned up in camera.)

The Fuji has some color noise, notably a big yellow blotch between the eye and the brow and some in the hair, but otherwise it has reasonably fine gran and reasonable detail in the hair. Note ... Fuji applies a lot of sharpening in camera, so this is just about all it's got, but it's good.

The G10 brings up the rear with disappointing color noise and severe loss of saturation. However, in the full sized images, it actually has the nicest tone curve. Much lower than the others, leading to a very open look. I actually had to add contrast to the G10, something I've never seen in a compact camera jpeg image before.

On the right side crops, you will see that the G1 and S100fs now appear tied. There is really nothing to choose, and if I'm being choosy, the nod would go to the G1 for less grain and fewer artifacts. Also, the G1 has a much finer appearance to the hair, the Fuji is still clumping while the Panny is showing much better detail now that a bit of sharpening was applied.

The Panny has one more advantage, it has almost no CA. In fact, none of the cameras have any significant CA in these images except one ... and some of you may have already guessed who the culprit is :-).

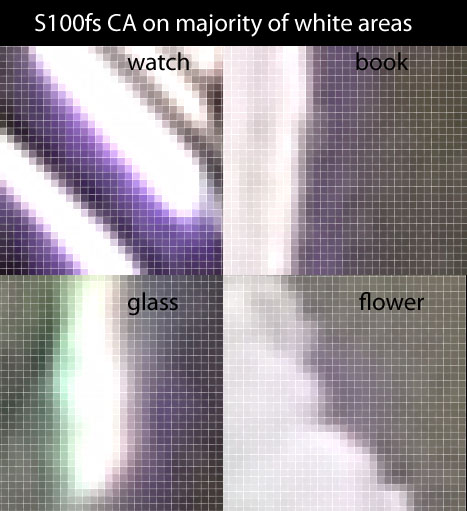
If you scan around the S100fs image at 100%, you will see that there is CA on almost every highlight. Some of these fringes are quite dark and rather wide. The following crops show the new individual pixel frame feature in CS4. These are high magnification so you can see what I am talking about ... 6 to 8 pixels is a little much. Doesn't show much at web sizes, but enlargements must be repaired before printing.


Anyway, the S100fs has never been a threat to join my dSLRs and compacts anyway, so back to the test. The Panasonic has the obvious edge over the G10. But once the saturation is bumped for the G10, and the detail is enhanced a bit further, say, using a plugin like Topaz Adjust (my new favorite toy), things equalize a bit further.

Just downsizing to web sizes makes a hug difference, as shown here:


You can see here that the Canon is slightly less detailed (but I've not done the secondary processing yet) and the saturation is lower, but otherwise it looks like the rest. Since I post the majority of my concert stuff on the web, I consider it at least in the game.

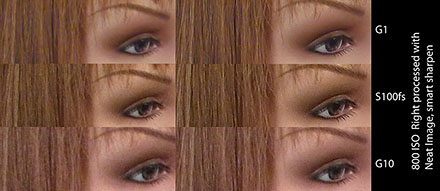
So let's see how the three of them look when fully processed, downsized for the web and sharpened.


I'm deliberately not identifying which is which. They are all just fine in my opinion. So, at web sizes, it's a draw. And that makes the G10 the winner by a mile ... cheapest, most compact, tons of resolution, full manual, TTL flash, what's not to like?

I have further investigation to go though ... printing this 800 ISO image at 12x18 is an interesting test. I'll blog the result some day ... assuming I get the time to perform the test.

So ... we already know that images at web sizes are all pretty much the same. Can't tell anything at these sizes, which is a good thing. This makes all compacts useful for general purpose snap shooting. But just for shits and giggles, let's see how a real benchmark looks. Something that should perform superbly at 800 ISO ... the APS-C dSLR and the full frame dSLR. By lucky happenstance, the Imaging Resource site has a full set of these same images for the Nikon D90 and the Nikon D700. The D300 unfortunately does not use this same setup for its ISO series, so the D90 will have to do, despite its lower acuity (according to DPReview in this review.)

First, two sets of crops. The before and afters for the two dSLRs. I thought of adding these after the primary test was complete, so each gets it own little file.


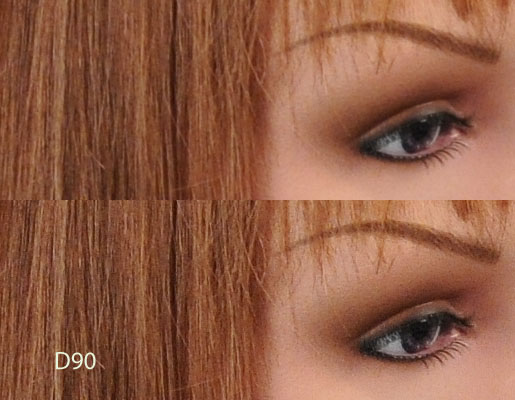
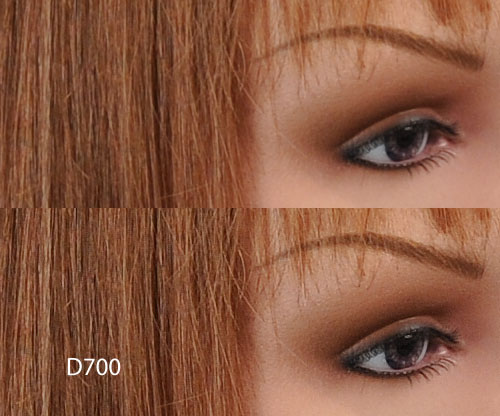
Note, no extra noise processing here at all. It's just not needed on either of these. The crops really show the differences as sensor size increases. Every hair is visible, no longer blending into clumps. Even the Panny, which has a fairly large sensor, clumps the hair a little. The Fuji does it a fair bit and the Canon does it aggressively.

But the dSLRs can't come to concerts and are heavier for trips. Still ... I carry the D300 when I travel because the images I get are well worth it so far. And I carry the F11 into concerts because these other contenders just aren't better enough to make me jump. Yet. But we'll see how the G10 fairs when I print. If it looks decent, it might be the one.

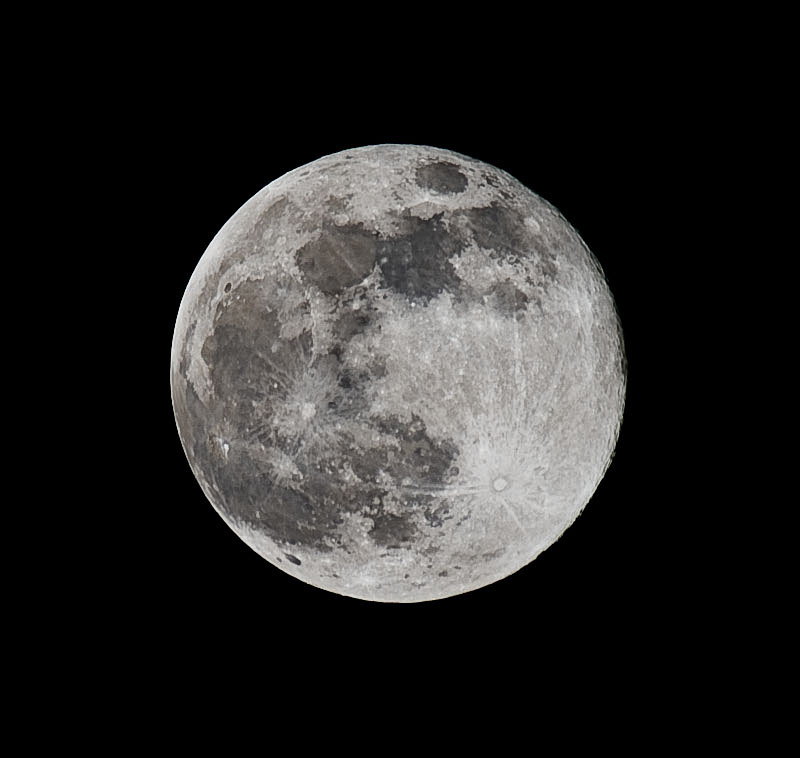
If you want some real fun, have a look at the D700 3200 ISO image at 100% ... wow. Far better detail retention than the smaller sensor cameras at 800 ISO. Even the 6400 ISO image retains better detail than the three smaller sensor cams at 800, although with considerable grain.

As good as these compacts are getting, they still disappoint a little at higher ISO. Perhaps we'll see a new APS-C compact from Nikon, something that Thom Hogan has speculated about (an educated guess I believe.) With Nikon's jpeg engine, this would open the door to some serious competition in the compact sector. I'd pay quite a premium to get real dSLR image quality in a compact body with lens compatibility. Here's hoping ...