Just reading the latest Movie Entertainment magazine, where the Toy Story column discusses all the cool new toys coming this year ... OLED TVs, big flash drives for laptop, that kind of thing. But a little sidebar grabbed my attention ... it was cleverly titled Text-tube Babies.
Text messaging poses a threat to "traditional conventions in writing," says a recent Irish report, and warns that schoolchildren seem "unduly reliant on short sentences, simply tenses and a limited vocabulary."
Well, duh.
So perhaps all school children should be issued a BlackBerry (or any phone) with full keyboard, and all such phones should be locked into grammar checking mode, forcing the kids to use proper sentence structure and complete sentences or phrases. Simple ... effective ... and it'll never happen :-)
This blog is my personal space. Do not confuse this with statements or opinions on behalf of any employer I have ever had, have now, or will ever have in the future.
Sunday, December 30, 2007
Saturday, December 29, 2007
John Cleese on my TomTom ...
Ok, so I'm not much of a blogger. I tried to get enthused about sharing my thoughts throughout the Christmas season, but mostly just felt exhausted ...
The weather turned from constant storming to warm and wet, melting perhaps half the snow we had on the ground. That still leaves a lot of snow, but the worst is that we just got hit by several inches of very heavy, sticky snow. I don't look forward to dealing with it ...

Meanwhile, to the real subject of this blog entry. Future Shop and Best Buy have superb prices on TomTom's excellent TomTom One 3rd Edition, a portable GPS with an array of standard features. These don't have the latest capabilities like Blue Tooth (presumably for phone calls in car), music storage and playback, and text to speech so you can hear street names.
I don't see much point in many of those features, but that's how it goes in any industry. Once all the critical features have been built they start adding in extras that might be useful to much smaller groups. Then they play check box tag with each other. The phone industry passed that point a long time ago. [The computer industry is also there, but they actually concentrate on constantly improving performance and providing more integration for less money. That, I like. A lot.]
The TomTom One 3rd Edition is a terrific little unit for a tiny sum. I got a couple of them for $149 each before Christmas (at Future Shop) and Best Buy has them right now for $139. That's so cheap, it's silly.
Installation and setup is a breeze. After creating an account on the TomTom web site, you download and install TomTom Home, which then attaches the device to your account and lets you manage it easily. You can download and install extra voices, and you can keep your map up to date. They seem to have a guaranteed latest map feature, which presumably means you never have to pay for map updates. We'll see ...
A few other nice features, as shown in the image above, include optional traffic reports for those of you who slog through a nasty commute every day, and map share so you can benefit from others' map updates. This is quite configurable, allowing you to use updates that have been approved by TomTom, or updates that have simply been submitted by lots of people or even a few. You choose your level of trust. Nice feature I think.
One thing to note is that you can only associate one TomTom with your account, and you can only change it once every 6 months. So, for a second TomTom, you need to create a second account. First thing I learned. Second thing is that they have different accounts in different regions, but all regions know about all your accounts, so you cannot reuse your favourite email address anywhere else. How annoying.

Why would you want a second account in a different region? Because their web site developers completely bungled their account and commerce management. TomTom Home happily shows me the superb voices available from the UK site, which include the brilliant John Cleese of Monty Python and A Fish Called Wanda fame. But try to buy from my Canada site, and it says that it cannot find my account details. TomTom Home says to update my account and make sure I include a valid VAT number (which is not actually necessary, but I only found that out when I eventually got there.)

What the heck? It took me a lot of poking around to realize that the UK site could see my North American account (which they call my NL account) ... but that they could not simply fish out my credit care details to let me download John Cleese's voice. After poking around for a while, I was able to get TomTom Home to download a couple of free voices directly into my device, and I even found out that, once you have downloaded any voice onto your computer, TomTom Home knows it is there and can push it to your device.

Note that TomTom says that these voices are encrypted to my device code. Not so ... I downloaded the Ken voice (Australian accent) and an English girl's voice to my computer, but never installed them from there. When I later connected the other TomTom One under a different account, TomTom Home happily used those same voices (which it had tagged as local instead of online or device) on the second unit and it works perfectly fine. Maybe it re-encrypts them for the second device code, or maybe it's just smoke and mirrors, but this is a very nice feature. Still ... it is possible that it would only work on identical devices. Be warned.
Meanwhile, the problem of how to get John Cleese still stood irritatingly in my way. I finally decided to take a shot at creating a fake address and downloading the voice from the UK site. Turns out it worked fine. I created yet another email account (since I have my own domain, this is pretty easy.) Then I created a new account on the UK site with a fake address (I used my city, province and country in the city field and I mangled the postal code to fit) and gave it my real phone number and credit care details. Even though the address was mangled, it still verified my MasterCard which was news to me. I thought there was better online protection than that ...
Anyway, the transaction went through, I downloaded the voice from the UK site by going to my voices, and then connected the TomTom again. It saw the new voice and happily uploaded it to the device. All done.
 It also asked to upload the latest satellite positions, which apparently is why these devices find the satellites so quickly. I find the unit sees them immediately, even from 6 feet inside my living room. TomTom recommend that you update the device as frequently as possible, but at least once a week. They forecast satellite positions in your area one week ahead. Impressive ...
Note that the John Cleese voice listed in my voices is followed by (MTR) while the one shown above in TomTom Home (not yet purchased) is followed by (YRD) ... the Americans reading this would probably want the one expressed in yards (Mr. Scott might say how quaint to that) but Canadians and Europeans will want the one expressed in meters.
I even got an email from them the next day, showing me where to get the download. But as mentioned, it was available to me only minutes after I bought it on TomTom Plus, so I already had it in the device.
In summary ... their web site kind of sucks. It is a little convoluted and has silly regional restrictions. You cannot get John Cleese from the North American site, even though he shows up, even in TomTom Home.
But with a little perseverance, you can have John Cleese talking to you all day as you drive :-)
The weather turned from constant storming to warm and wet, melting perhaps half the snow we had on the ground. That still leaves a lot of snow, but the worst is that we just got hit by several inches of very heavy, sticky snow. I don't look forward to dealing with it ...

Meanwhile, to the real subject of this blog entry. Future Shop and Best Buy have superb prices on TomTom's excellent TomTom One 3rd Edition, a portable GPS with an array of standard features. These don't have the latest capabilities like Blue Tooth (presumably for phone calls in car), music storage and playback, and text to speech so you can hear street names.
I don't see much point in many of those features, but that's how it goes in any industry. Once all the critical features have been built they start adding in extras that might be useful to much smaller groups. Then they play check box tag with each other. The phone industry passed that point a long time ago. [The computer industry is also there, but they actually concentrate on constantly improving performance and providing more integration for less money. That, I like. A lot.]
The TomTom One 3rd Edition is a terrific little unit for a tiny sum. I got a couple of them for $149 each before Christmas (at Future Shop) and Best Buy has them right now for $139. That's so cheap, it's silly.
Installation and setup is a breeze. After creating an account on the TomTom web site, you download and install TomTom Home, which then attaches the device to your account and lets you manage it easily. You can download and install extra voices, and you can keep your map up to date. They seem to have a guaranteed latest map feature, which presumably means you never have to pay for map updates. We'll see ...
A few other nice features, as shown in the image above, include optional traffic reports for those of you who slog through a nasty commute every day, and map share so you can benefit from others' map updates. This is quite configurable, allowing you to use updates that have been approved by TomTom, or updates that have simply been submitted by lots of people or even a few. You choose your level of trust. Nice feature I think.
One thing to note is that you can only associate one TomTom with your account, and you can only change it once every 6 months. So, for a second TomTom, you need to create a second account. First thing I learned. Second thing is that they have different accounts in different regions, but all regions know about all your accounts, so you cannot reuse your favourite email address anywhere else. How annoying.

Why would you want a second account in a different region? Because their web site developers completely bungled their account and commerce management. TomTom Home happily shows me the superb voices available from the UK site, which include the brilliant John Cleese of Monty Python and A Fish Called Wanda fame. But try to buy from my Canada site, and it says that it cannot find my account details. TomTom Home says to update my account and make sure I include a valid VAT number (which is not actually necessary, but I only found that out when I eventually got there.)

What the heck? It took me a lot of poking around to realize that the UK site could see my North American account (which they call my NL account) ... but that they could not simply fish out my credit care details to let me download John Cleese's voice. After poking around for a while, I was able to get TomTom Home to download a couple of free voices directly into my device, and I even found out that, once you have downloaded any voice onto your computer, TomTom Home knows it is there and can push it to your device.

Note that TomTom says that these voices are encrypted to my device code. Not so ... I downloaded the Ken voice (Australian accent) and an English girl's voice to my computer, but never installed them from there. When I later connected the other TomTom One under a different account, TomTom Home happily used those same voices (which it had tagged as local instead of online or device) on the second unit and it works perfectly fine. Maybe it re-encrypts them for the second device code, or maybe it's just smoke and mirrors, but this is a very nice feature. Still ... it is possible that it would only work on identical devices. Be warned.
Meanwhile, the problem of how to get John Cleese still stood irritatingly in my way. I finally decided to take a shot at creating a fake address and downloading the voice from the UK site. Turns out it worked fine. I created yet another email account (since I have my own domain, this is pretty easy.) Then I created a new account on the UK site with a fake address (I used my city, province and country in the city field and I mangled the postal code to fit) and gave it my real phone number and credit care details. Even though the address was mangled, it still verified my MasterCard which was news to me. I thought there was better online protection than that ...
Anyway, the transaction went through, I downloaded the voice from the UK site by going to my voices, and then connected the TomTom again. It saw the new voice and happily uploaded it to the device. All done.
 It also asked to upload the latest satellite positions, which apparently is why these devices find the satellites so quickly. I find the unit sees them immediately, even from 6 feet inside my living room. TomTom recommend that you update the device as frequently as possible, but at least once a week. They forecast satellite positions in your area one week ahead. Impressive ...
Note that the John Cleese voice listed in my voices is followed by (MTR) while the one shown above in TomTom Home (not yet purchased) is followed by (YRD) ... the Americans reading this would probably want the one expressed in yards (Mr. Scott might say how quaint to that) but Canadians and Europeans will want the one expressed in meters.
I even got an email from them the next day, showing me where to get the download. But as mentioned, it was available to me only minutes after I bought it on TomTom Plus, so I already had it in the device.
In summary ... their web site kind of sucks. It is a little convoluted and has silly regional restrictions. You cannot get John Cleese from the North American site, even though he shows up, even in TomTom Home.
But with a little perseverance, you can have John Cleese talking to you all day as you drive :-)
Monday, December 17, 2007
We were spared the full force ...
We only got 35cm, about a foot and a half. Apparently , Montreal got the full force at 60cm.
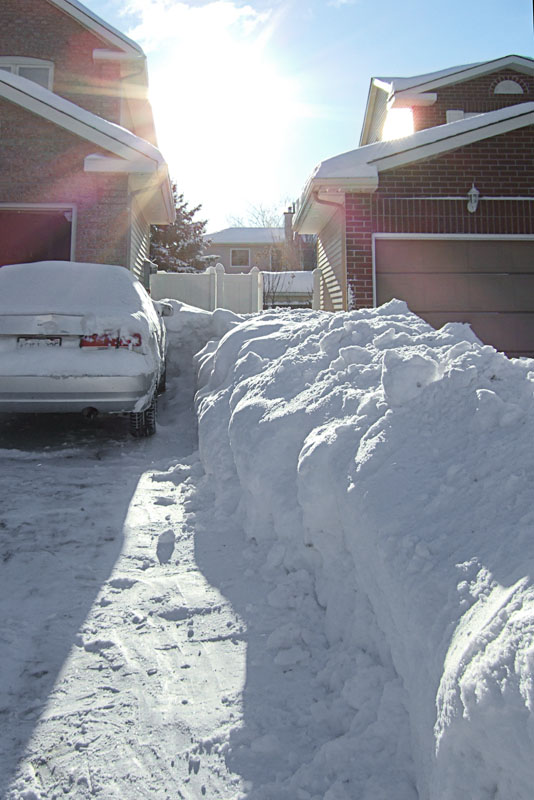
When the snow plow went by mid-afternoon today, we ended up with 6 foot piles of snow along the edges of the driveway. Yuck.
Here are a few images I shot with my trusty Fuji F11 compact while shoveling this morning after it was all over ... having shoveled drifts several feet deep from around the cars last night. My friendly next-door neighbour had mercy on me and blew about half of the snow into my front yard using his new-fangled snow throwing technology ...
The driveway and my son's buried car.
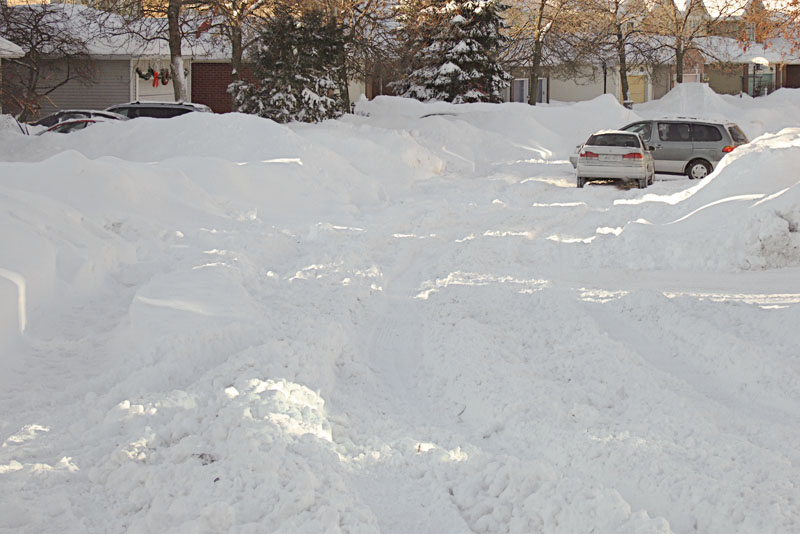
Our front street ... a hill covered in deep snow.
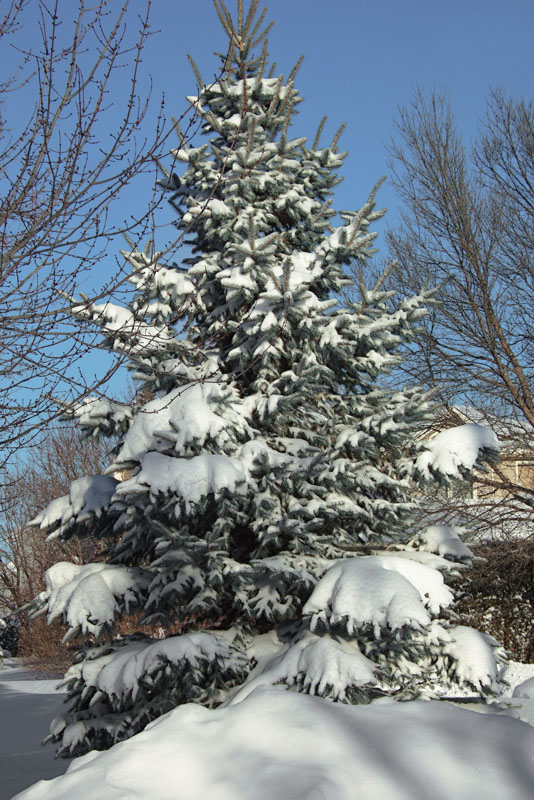
The neighbour across the street has this spectacular conifer ... I love capturing it with fresh snow on it.
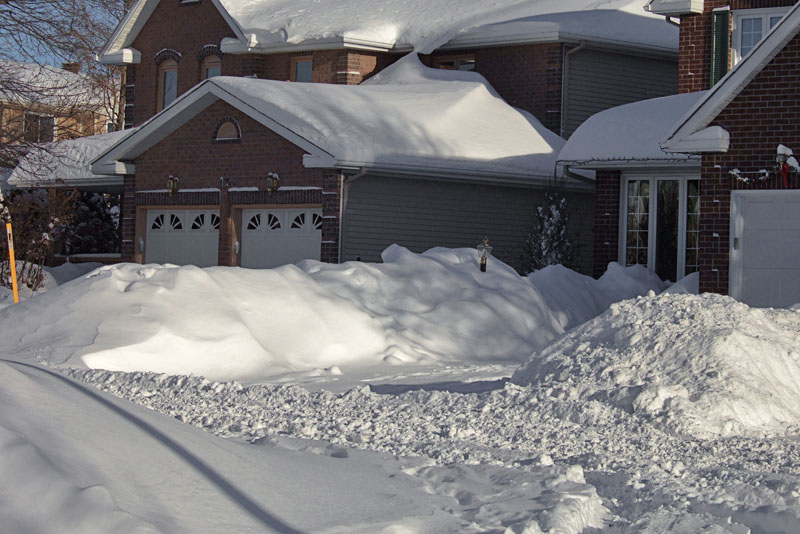
The corner in front of my house, where the front and side streets meet. A real disaster ...
Close up of the Honda ... redundant, but I like this image. Gives a sense of the fresh air.
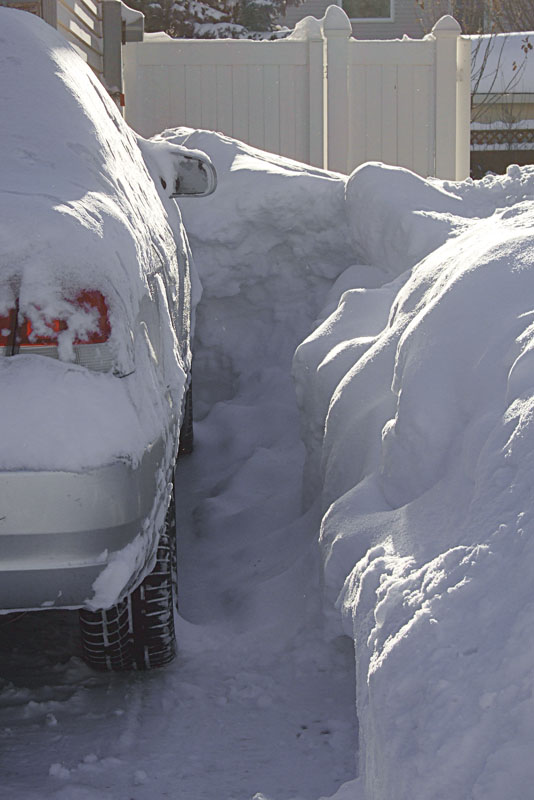
The Acura was buried pretty deep as well.
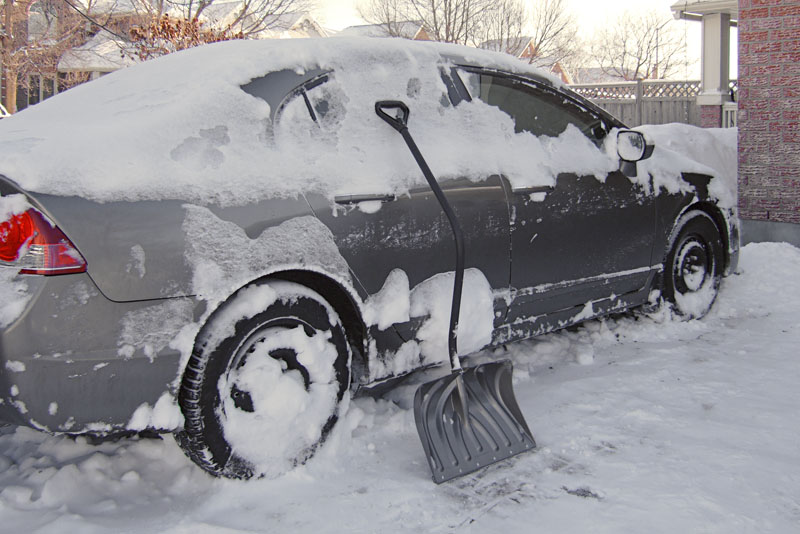
I have to say that the kids were articulating amazement that we still live where this happens. I pointed out that every location has its bad side. Didn't really fly while we were shoveling for 30 minutes just to get rid of the plow's droppings :-)
When the snow plow went by mid-afternoon today, we ended up with 6 foot piles of snow along the edges of the driveway. Yuck.
Here are a few images I shot with my trusty Fuji F11 compact while shoveling this morning after it was all over ... having shoveled drifts several feet deep from around the cars last night. My friendly next-door neighbour had mercy on me and blew about half of the snow into my front yard using his new-fangled snow throwing technology ...
The driveway and my son's buried car.

Our front street ... a hill covered in deep snow.

The neighbour across the street has this spectacular conifer ... I love capturing it with fresh snow on it.

The corner in front of my house, where the front and side streets meet. A real disaster ...

Close up of the Honda ... redundant, but I like this image. Gives a sense of the fresh air.

The Acura was buried pretty deep as well.

I have to say that the kids were articulating amazement that we still live where this happens. I pointed out that every location has its bad side. Didn't really fly while we were shoveling for 30 minutes just to get rid of the plow's droppings :-)
Sunday, December 16, 2007
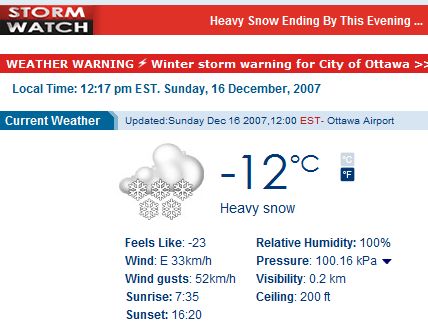
Yup ... getting pounded right now ...
The snow is falling so thick you can barely see across the street. New predictions are between 40 and 60 cm from last night to this evening. That's about 2 feet of snow and should do a lovely job of snarling traffic :-)
If you don't believe me ...
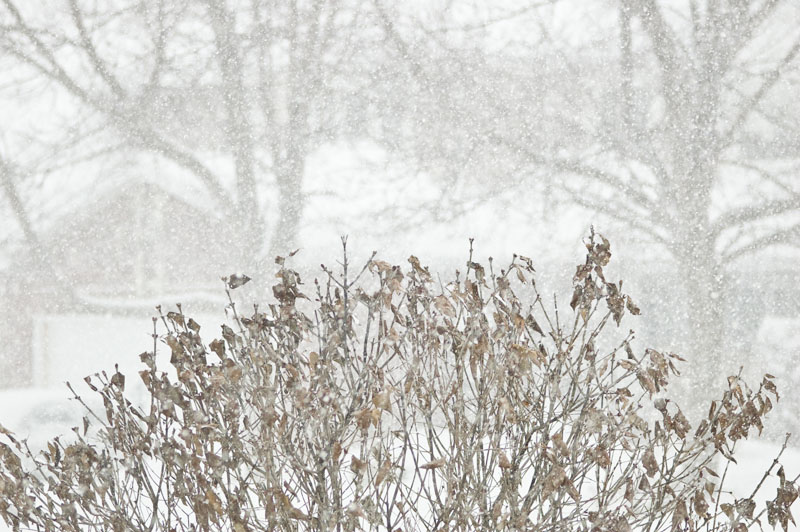
I shot a few images from inside my front door just to have a record of the thickness of this snow fall. There is a small (6 feet high) Lilac bush in my front yard, which I included in the first two images. The last two images I shot pointing at my neighbours' houses across the street ...
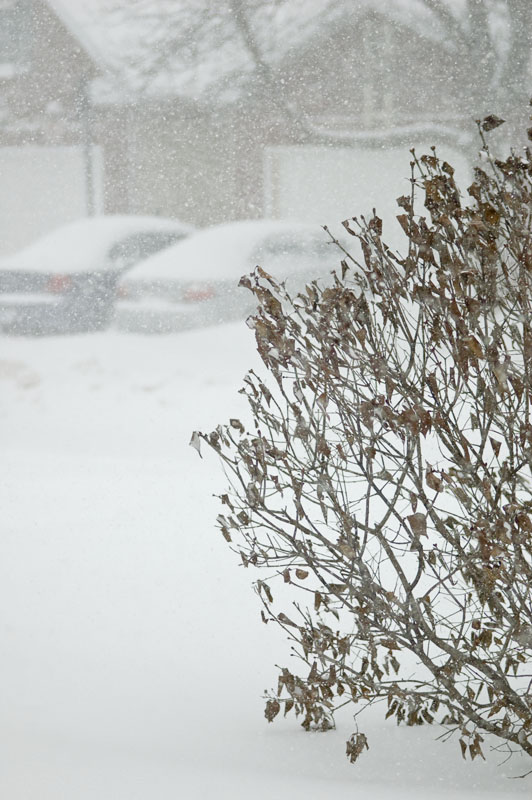
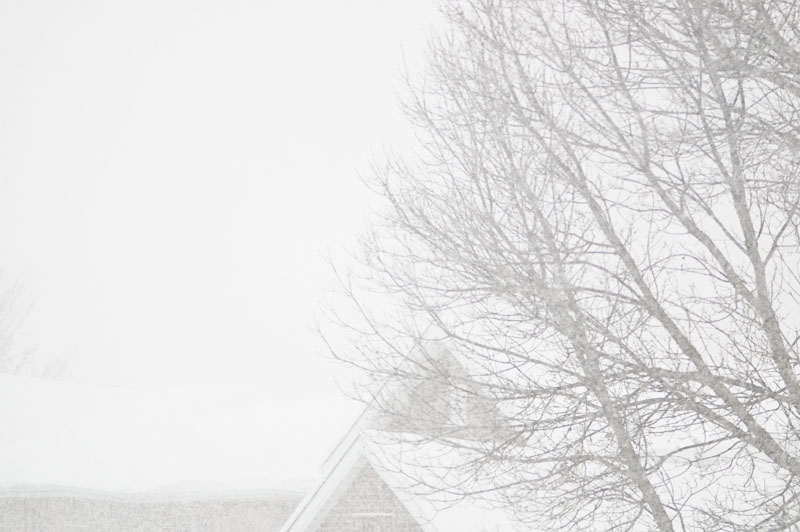
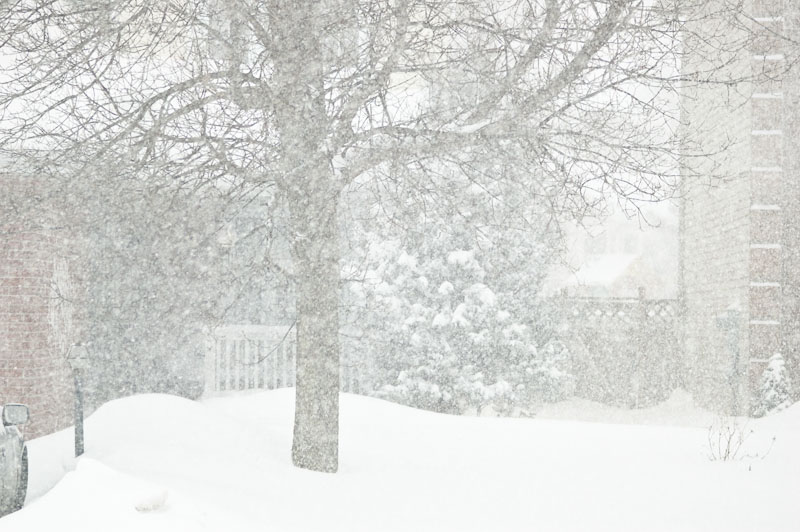
If you don't believe me ...

I shot a few images from inside my front door just to have a record of the thickness of this snow fall. There is a small (6 feet high) Lilac bush in my front yard, which I included in the first two images. The last two images I shot pointing at my neighbours' houses across the street ...


OMG! More snow on the way ...
We've been pounded this year since November. I've shoveled the driveway twice a day for several days ... more than once this year. And there are ... get this ... 30-40 cm of snow on the way in the next 24 hours. Sheesh ...
I've been trying to capture the look of the fresh snow this year. Something I've not done before. The big challenge, of course, is to get some texture into the snow and not have it just lay there like a featureless white blanket.
 The first session followed several days of snow on a cloudy day. The problem with overcast is the lack of shadows ... a wonderful thing when you want to shoot flowers, but a real drag when you want to shoot snow. I went for a fairly low contrast presentation, and was perhaps somewhat successful.
I used the D2Hs and the 18-200VR. I like to shoot that lens at max aperture and full zoom ... I find it adequately sharp.
 But the low contrast really did make it difficult to get some sort of detail in the snow. Even rolling mounds would be better than the fairly featureless look I had here.
I did find that including more of the branches from the conifers helped. Getting a pine cone in the shot on the left was a bonus little detail with a different colour. But what is really needed is sunlight to cast shadows.
 The next session occurred after dropping my son at school a while later ... I noticed how nicely the snow was sitting on the field and on the trees so I shot several scenes on the way to work.
The extra texture, or at least rolling contrast is obvious in the image above. The needles are more obvious and there are sparkles in the snow. An altogether much more satisfying image.
 There's a nice trail on the way to the office where I like to shoot scenes on the trail or even at the entrance. I couldn't get into the little parking lot because the snow was too deep against the highway, but I stopped and shot the gate to the main trail to capture the pretty foot trail left by someone who had walked in anyway.
 The most recent session occurred just a couple of days ago ... again after dropping my son. The snow was especially nice looking and I happened to have my Tamron 180 on the camera. This thing is wicked sharp and has lovely bokeh wide open (f3.5) so I was looking forward to seeing what it would do. I was not disappointed at all ...
The sun was a bit of a challenge, as it created a lot of contrast with the long shadows, but I sure like how it looks.
 And the soft backgrounds really add to the look for me. I especially like the background on this one ... the sign and fence stand out so very well against the soft look of the woods.
If you'd like to see the whole collection or follow along as I add to it through the winter, please pop into my fresh snow album.
I've been trying to capture the look of the fresh snow this year. Something I've not done before. The big challenge, of course, is to get some texture into the snow and not have it just lay there like a featureless white blanket.
 The first session followed several days of snow on a cloudy day. The problem with overcast is the lack of shadows ... a wonderful thing when you want to shoot flowers, but a real drag when you want to shoot snow. I went for a fairly low contrast presentation, and was perhaps somewhat successful.
I used the D2Hs and the 18-200VR. I like to shoot that lens at max aperture and full zoom ... I find it adequately sharp.
 But the low contrast really did make it difficult to get some sort of detail in the snow. Even rolling mounds would be better than the fairly featureless look I had here.
I did find that including more of the branches from the conifers helped. Getting a pine cone in the shot on the left was a bonus little detail with a different colour. But what is really needed is sunlight to cast shadows.
 The next session occurred after dropping my son at school a while later ... I noticed how nicely the snow was sitting on the field and on the trees so I shot several scenes on the way to work.
The extra texture, or at least rolling contrast is obvious in the image above. The needles are more obvious and there are sparkles in the snow. An altogether much more satisfying image.
 There's a nice trail on the way to the office where I like to shoot scenes on the trail or even at the entrance. I couldn't get into the little parking lot because the snow was too deep against the highway, but I stopped and shot the gate to the main trail to capture the pretty foot trail left by someone who had walked in anyway.
 The most recent session occurred just a couple of days ago ... again after dropping my son. The snow was especially nice looking and I happened to have my Tamron 180 on the camera. This thing is wicked sharp and has lovely bokeh wide open (f3.5) so I was looking forward to seeing what it would do. I was not disappointed at all ...
The sun was a bit of a challenge, as it created a lot of contrast with the long shadows, but I sure like how it looks.
 And the soft backgrounds really add to the look for me. I especially like the background on this one ... the sign and fence stand out so very well against the soft look of the woods.
If you'd like to see the whole collection or follow along as I add to it through the winter, please pop into my fresh snow album.
Saturday, December 15, 2007
How to print an image very large ...
I was asked on a DPReview forum to describe how I print large images from my Nikon D2Hs, which shoots 4.1 mp images. That sounds like a paltry resolution, but in fact it is enough to print lovely 12x18 images, and people report printing poster-sized images successfully.
This works because, at poster sizes it is possible to print with as low as 100 pixels per inch and still get a decent image when viewed at an appropriate distance (i.e. not with your eye inches away.) This is true for several reasons ... one is that your eye can only see so much detail from a distance, and the other is that many people cannot really distinguish between 150 and 300 ppi.
I like to take my images right up to the actual size of the print at the appropriate ppi for the output device, which for most inexpensive labs like Costco and WalMart is 300ppi -- the native resolution of the Frontier or Noritsu machines they use. I do this because I want to be able to sharpen correctly for the final output medium. This gives me the best sharpness possible without giving me the annoying digital look of sharpening halos and crispy edges.
I use three techniques to ensure quality large prints:
My upsizing plugin of choice comes from Digital Outback Photo. It can be downloaded from their web site by scrolling to the bottom of this page. I won't pretend that I performed a full tests of all the methods. But I've looked at a lot of what has been published about upsizing, for example tests of bicubic versus fractal versus whatever. And I see similar excellent results from the very easy to use DOP Upsizer.
My sharpener of choice is PKSharpener from Pixel Genius. I bought this after reading Bruce Fraser's (r.i.p.) book Real World Image Sharpening. This is an excellent reference on all things related to sharpening, smoothing, noise removal, and related issues. He defines a three stage sharpening protocol:
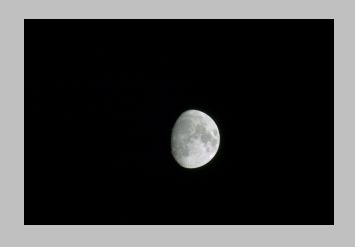
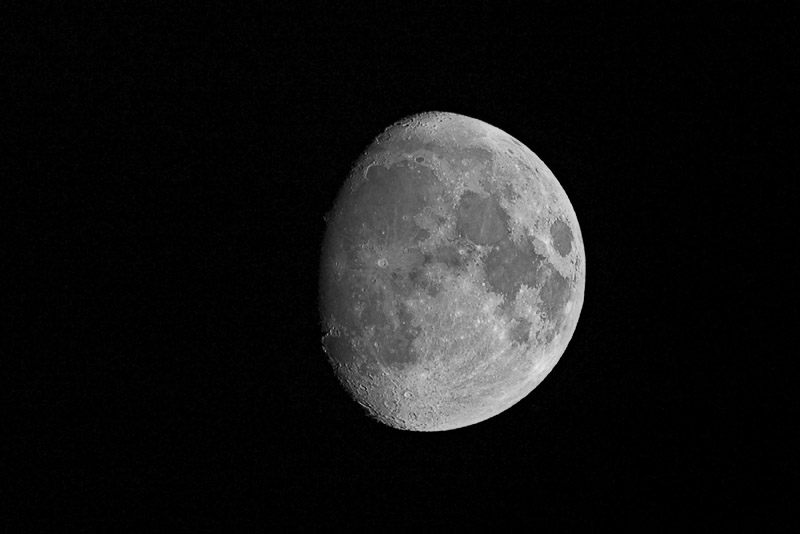
This is a nice enough shot, but not all that dramatic. What is needed is a closer crop, so we'll cut out a small portion in the middle of the frame, which looks like this:
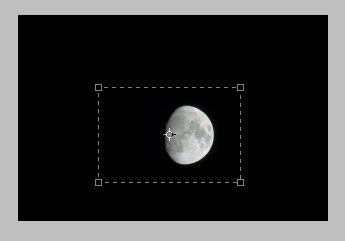
So ... the steps.
Capture Sharpen
As mentioned earlier, I use PKSharpener (PKS) to perform this step. But I will also show the step performed using Photoshop CS3's smart sharpener.
With PKS, I select the appropriate capture sharpen level from CS3's automation menu (PKS is bound in as automations, not filters ... same effect though.)
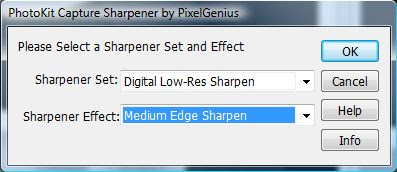
Medium seems like an appropriate level for this capture. You can run it in several flavours and compare them, but I know that medium will do the job. PKS always leaves your result in grouped layers so you can change or delete the effect.
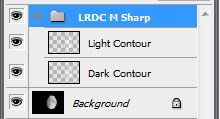
You can actually tune the light halo and the dark halo separately to really hone the apparent sharpness and remove any digital look from the image. Very powerful.
It is also possible to do this using CS3's smart sharpening.
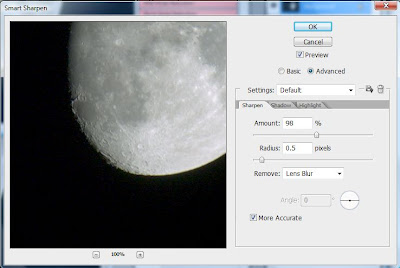 The difference between these two is essentially non-existent in this case ...

The reason I like the PKSharpener tool is that I don't have to think about it and can easily switch between cameras. My D70s (6mp) needs medium resolution capture sharpening, and should I get a 10 or 12 mp cam later, I will need high resolution capture sharpening. This alleviates the need to watch the result carefully or to create my own actions. I also can choose the kind of subject in PKS ... fine, medium or coarse grained. It makes a subtle, but real difference in the long run.
Processing for Tone and Contrast
I did a bit of work on tone curves and fringing (I used Shay Stephens' manual fringe remover action):
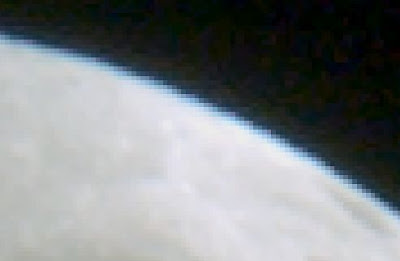
The after version (not shown) has no colour fringe left at all. Perfect removal.
The s-curve I used to boost the contrast on this image has left the detail much better defined. But it can still be better if I boost local contrast a bit.
Creative Sharpening
The linked tutorial shows how to adjust local contrast across the whole frame, but I want it to be selective ... so I use PKS's creative sharpening brush called hazecutter bush medium edges. PKS always give you a layer on which you can adjust opacity to strengthen ot weaken the effect, but they also give you a mask with which you can paint the effect only onto specific areas. In my case, the only place that looks better with this adjustment is the dark areas. The result is quite noticeable:
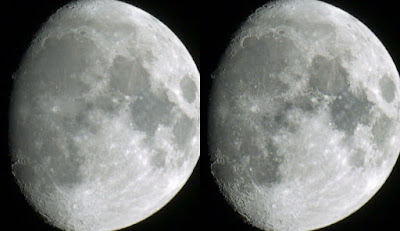
This should certainly be enough detail for this image.
Upsizing
As mentioned previously, DOP Upsizer is a free plugin that is also easy to use. There may be better upsizers out there, but I doubt that they are vastly superior. This is not necessairly the right image for that sort of test ... people often use ultra close-ups of an eye, which can really show some fine detail.
So I upsized the image twice, first using the DOP plugin:

... and the second time using the recommended bicubic smoother method ...
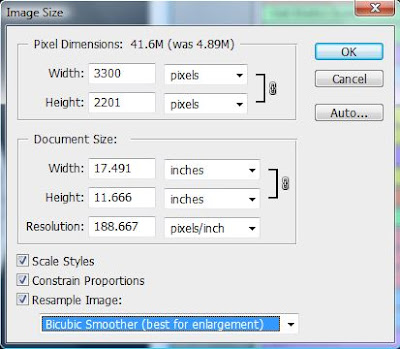
I typed in the size of the image based on the numbers DOP Upsizer had used. The end result is pretty similar again, but with DOP Upsizer, I can see a hint of more detail and better contrast retention. Just a hint, but it is there.
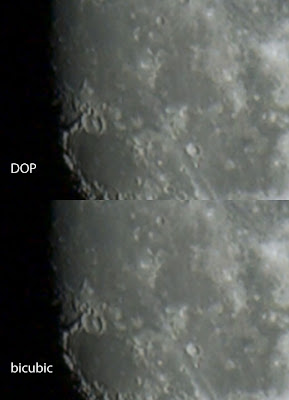
And, as you can see above, DOP Upsizer is dead easy to use. You choose the width of the image, of course taking into account whether the image will be portrait or landscape, and you choose the pixels per inch, for which I always use 300 for continuous tone output (Costco, WalMart) or inkjet output (my Epson R340 photo printer.)
Output Sharpening
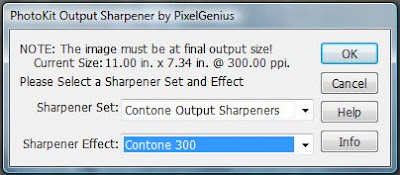
The last step is to sharpen for the output medium. When sending to the lab, you would normally use continous tone 300. So I'll use that option here ... again looking through the automate menu to find PKS's output sharpener.
Again, I duplicated the image and sharpened using smart sharpen with these settings:
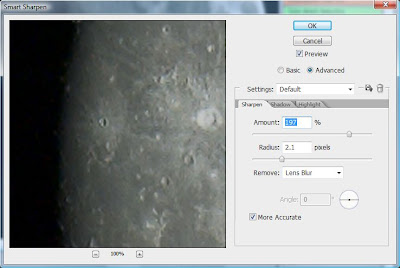
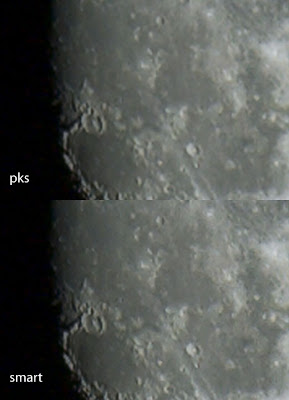
The settings were to taste ... not too sharp, but sharp enough. The result is quite a bit different in this case:
Now, in order to test these, I cut the moon out from both and pasted them into one 11 inch wide image for printing on my inkjet.
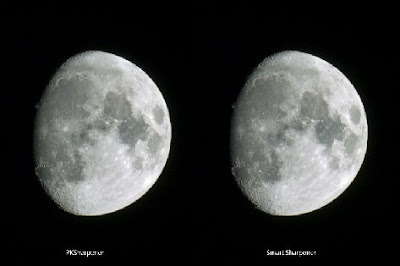
The final result is that the smart sharpened version is actually a bit more contrasty and is the one I would choose between these two ... but, of course, I should have used PKS output sharpen settings of inkjet 300, not contone 300 ... I was, after all, testing on the home printer and not the Costco lab I so often use for larger prints. Duh.
So there you have it ... I use techniques like this to get my prints quite large and must say that careful sharpening and upsizing will give you excellent results. I save the final image as jpeg at fairly high quality (9 typically), and the images come out quite stunning at 12x18. I've actually used this technique to double the resolution of an image for a stock agency, and they accepted it despite the rule of no upsizing.
Last Word
Since Costco only charges about 3 bucks for this size, I encourage you to just give it a try. Smaller sizes are even cheaper ... 8x10 and 8x12 about a buck and a half.
I shot the image using the Nikon D2Hs with the Nikon 300 F4 AF-S and the Nikon TC17e 1.7x teleconverter. I used the Feisol 3471 tripod with the Markins M20 ball head. I used long lens technique, as I learned on Moose Peterson's site. Note that I used mirror lock-up and released using a cable release.
Another image from this series is also online in my gallery, processed somewhat more aggressively. I think it also started very slightly sharper:
Updated on 11 October 2009: You should read Thom Hogan's excellent article on how big you can print, as it explains the relationship of your camera's resolution to print size ... the results will almost certainly surprise you.
This works because, at poster sizes it is possible to print with as low as 100 pixels per inch and still get a decent image when viewed at an appropriate distance (i.e. not with your eye inches away.) This is true for several reasons ... one is that your eye can only see so much detail from a distance, and the other is that many people cannot really distinguish between 150 and 300 ppi.
I like to take my images right up to the actual size of the print at the appropriate ppi for the output device, which for most inexpensive labs like Costco and WalMart is 300ppi -- the native resolution of the Frontier or Noritsu machines they use. I do this because I want to be able to sharpen correctly for the final output medium. This gives me the best sharpness possible without giving me the annoying digital look of sharpening halos and crispy edges.
I use three techniques to ensure quality large prints:
- A very sharp image. This cannot be emphasized enough.
- An excellent upsizing algorithm.
- An excellent sharpening algorithm.
My upsizing plugin of choice comes from Digital Outback Photo. It can be downloaded from their web site by scrolling to the bottom of this page. I won't pretend that I performed a full tests of all the methods. But I've looked at a lot of what has been published about upsizing, for example tests of bicubic versus fractal versus whatever. And I see similar excellent results from the very easy to use DOP Upsizer.
My sharpener of choice is PKSharpener from Pixel Genius. I bought this after reading Bruce Fraser's (r.i.p.) book Real World Image Sharpening. This is an excellent reference on all things related to sharpening, smoothing, noise removal, and related issues. He defines a three stage sharpening protocol:
- Capture sharpening, where you get rid of the softening effects of demosaicing and anti-aliasing.
- Creative sharpening, which actually includes selective sharpening, local contrast enhancement, smoothing, and noise removal.
- Output sharpening, which sharpens the entire image to compensate for the output device. Inks run and bleed, so the image usually needs to be sharper than you expect in order to remain sharp on paper.

This is a nice enough shot, but not all that dramatic. What is needed is a closer crop, so we'll cut out a small portion in the middle of the frame, which looks like this:

After cropping the image, we have a much more interesting presentation, but are left with only 0.8mp! This is pretty darned small ... but let's see how it goes anyway. To make it fair, we'll take the 0.8mp, which is less than 1/4 the size of the original 4.1mp and take it only as far as an 11 inch wide print. Still, that's larger than 1/4 of the 12x18 we originally were targeting, so if this works, we know a 12x18 is well within reach.
Capture Sharpen
As mentioned earlier, I use PKSharpener (PKS) to perform this step. But I will also show the step performed using Photoshop CS3's smart sharpener.
With PKS, I select the appropriate capture sharpen level from CS3's automation menu (PKS is bound in as automations, not filters ... same effect though.)

Medium seems like an appropriate level for this capture. You can run it in several flavours and compare them, but I know that medium will do the job. PKS always leaves your result in grouped layers so you can change or delete the effect.

You can actually tune the light halo and the dark halo separately to really hone the apparent sharpness and remove any digital look from the image. Very powerful.
It is also possible to do this using CS3's smart sharpening.
 The difference between these two is essentially non-existent in this case ...
The reason I like the PKSharpener tool is that I don't have to think about it and can easily switch between cameras. My D70s (6mp) needs medium resolution capture sharpening, and should I get a 10 or 12 mp cam later, I will need high resolution capture sharpening. This alleviates the need to watch the result carefully or to create my own actions. I also can choose the kind of subject in PKS ... fine, medium or coarse grained. It makes a subtle, but real difference in the long run.
Processing for Tone and Contrast
I did a bit of work on tone curves and fringing (I used Shay Stephens' manual fringe remover action):

The after version (not shown) has no colour fringe left at all. Perfect removal.
The s-curve I used to boost the contrast on this image has left the detail much better defined. But it can still be better if I boost local contrast a bit.
Creative Sharpening
The linked tutorial shows how to adjust local contrast across the whole frame, but I want it to be selective ... so I use PKS's creative sharpening brush called hazecutter bush medium edges. PKS always give you a layer on which you can adjust opacity to strengthen ot weaken the effect, but they also give you a mask with which you can paint the effect only onto specific areas. In my case, the only place that looks better with this adjustment is the dark areas. The result is quite noticeable:

This should certainly be enough detail for this image.
Upsizing
As mentioned previously, DOP Upsizer is a free plugin that is also easy to use. There may be better upsizers out there, but I doubt that they are vastly superior. This is not necessairly the right image for that sort of test ... people often use ultra close-ups of an eye, which can really show some fine detail.
So I upsized the image twice, first using the DOP plugin:

... and the second time using the recommended bicubic smoother method ...

I typed in the size of the image based on the numbers DOP Upsizer had used. The end result is pretty similar again, but with DOP Upsizer, I can see a hint of more detail and better contrast retention. Just a hint, but it is there.

And, as you can see above, DOP Upsizer is dead easy to use. You choose the width of the image, of course taking into account whether the image will be portrait or landscape, and you choose the pixels per inch, for which I always use 300 for continuous tone output (Costco, WalMart) or inkjet output (my Epson R340 photo printer.)
Output Sharpening
The last step is to sharpen for the output medium. When sending to the lab, you would normally use continous tone 300. So I'll use that option here ... again looking through the automate menu to find PKS's output sharpener.

Again, I duplicated the image and sharpened using smart sharpen with these settings:

The settings were to taste ... not too sharp, but sharp enough. The result is quite a bit different in this case:

Now, in order to test these, I cut the moon out from both and pasted them into one 11 inch wide image for printing on my inkjet.

The final result is that the smart sharpened version is actually a bit more contrasty and is the one I would choose between these two ... but, of course, I should have used PKS output sharpen settings of inkjet 300, not contone 300 ... I was, after all, testing on the home printer and not the Costco lab I so often use for larger prints. Duh.
So there you have it ... I use techniques like this to get my prints quite large and must say that careful sharpening and upsizing will give you excellent results. I save the final image as jpeg at fairly high quality (9 typically), and the images come out quite stunning at 12x18. I've actually used this technique to double the resolution of an image for a stock agency, and they accepted it despite the rule of no upsizing.
Last Word
Since Costco only charges about 3 bucks for this size, I encourage you to just give it a try. Smaller sizes are even cheaper ... 8x10 and 8x12 about a buck and a half.
I shot the image using the Nikon D2Hs with the Nikon 300 F4 AF-S and the Nikon TC17e 1.7x teleconverter. I used the Feisol 3471 tripod with the Markins M20 ball head. I used long lens technique, as I learned on Moose Peterson's site. Note that I used mirror lock-up and released using a cable release.
Another image from this series is also online in my gallery, processed somewhat more aggressively. I think it also started very slightly sharper:

Updated on 11 October 2009: You should read Thom Hogan's excellent article on how big you can print, as it explains the relationship of your camera's resolution to print size ... the results will almost certainly surprise you.
Friday, December 14, 2007
First Post
Time to join the blogging generation I suppose ... add my own lame thoughts to the lame thoughts of thousands of others that clutter (pollute?) the Internet.
Something interesting happened today ... my son sat a Mythology exam and had his bag -- containing his laptop, iPod, headphones, several text books and some other stuff -- ripped off from a sea of bags sitting in the gym.
It is slightly possible that it was moved or picked up accidentally and will be in the lost and found at some point in the next few days ... but I'm not holding my breath as the thief made a phone call to a friend on my son's phone right away, in my opinion confirming that it was taken intentionally.
If it is really gone, then I can only say that humanity never quite fails to disappoint.
Update: We made a report and this was apparently one of several such incidents. Imagine taking advantage of students at their most vulnerable right at Christmastime. What an incredibly sad statement on society ...
My son is beside himself ... last night he repeated over and over that he couldn't believe that this sort of thing can happen at a sacred institute of higher learning! He thought he had left all that kind of thinking behind years ago ... I suppose its nice that some in this generation are able to take such a generous view of our society.
Subscribe to:
Comments (Atom)
