We’ve seen a lot of night shots posted in reviews and on the forum, and many of those show severe ORB action … the worst of those images being shot at ISO100, which necessarily requires a great deal of light to fall on the sensor in order to get a good exposure.
So last night (Christmas Eve) I went out shopping just before the stores all closed and just before leaving I shot some images as a test of the effects of exposure compensation. Basically, I wondered how differently the images would render at 0ev and –2ev. It is, of course, good practice to shoot lights with exposure compensation at –1 or –2, but many seem to shoot at 0ev anyway, perhaps expecting a miracle.
I shot these in RAW, as this camera is so fast that I consider it wasteful to shoot jpeg. The traditional disincentive (time) is just not there. Of course, some will say that they don’t want to process RAW and that’s fine. Just realize that this is a choice you make that reduces the potential of your imagery.
I will shoot some tests in jpeg of course, but for my own general shooting, I use RAW. This camera can be treated like a dSLR because it has the speed and control of one. (Don’t get too excited, my D7000 still stomps it easily where image quality counts.)
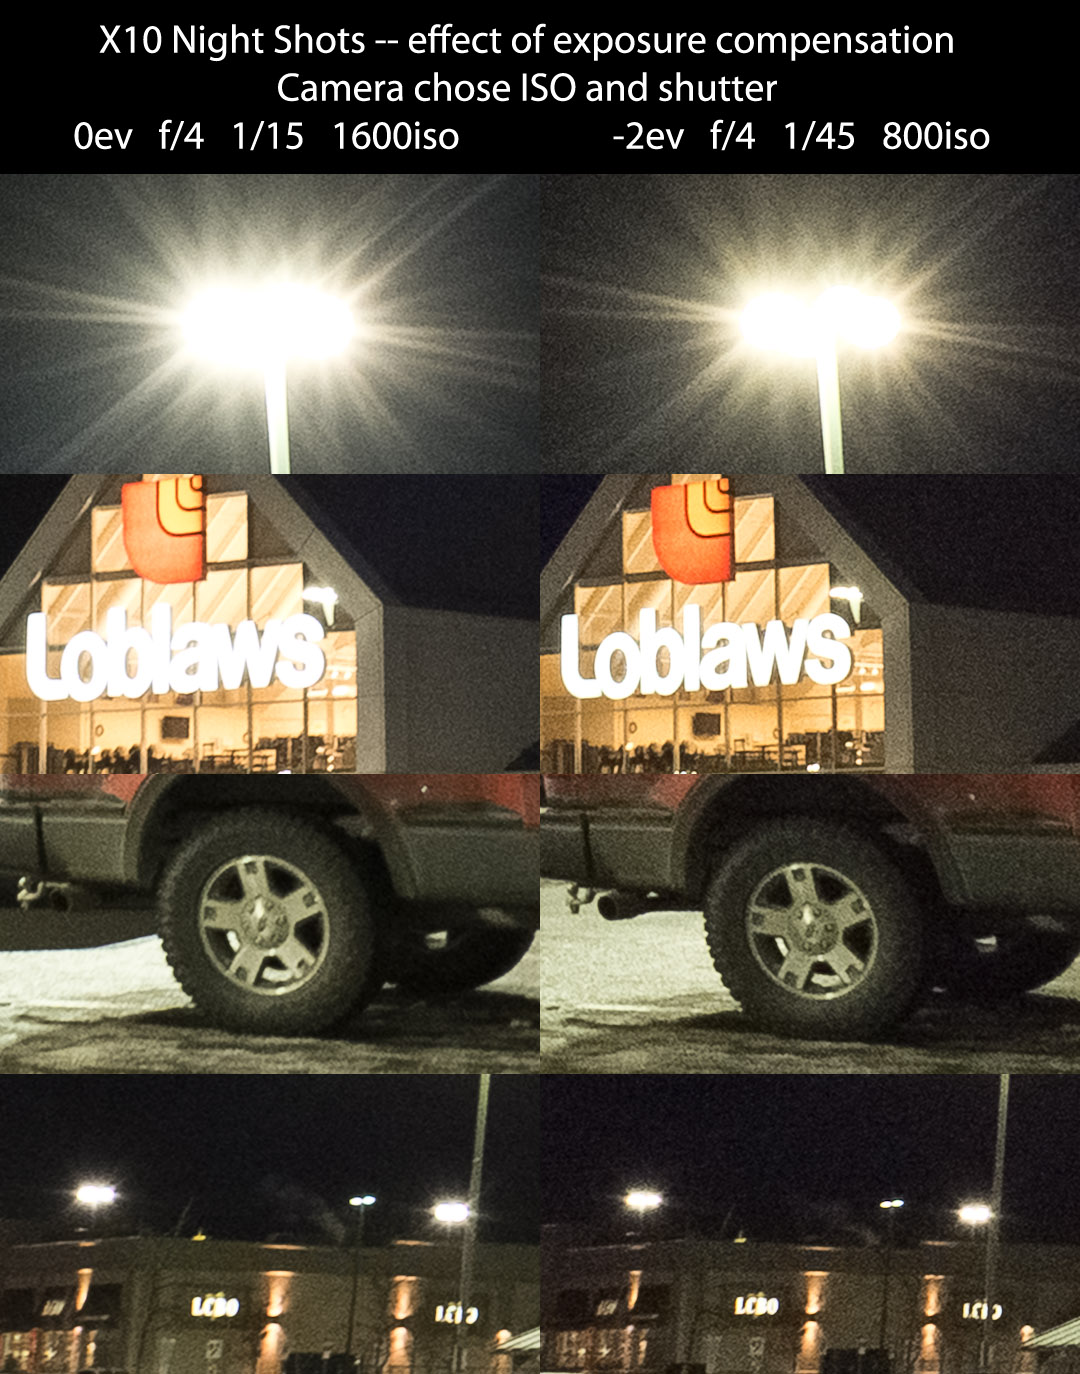
The 0ev shot had to be processed in ACR by dramatically reducing the exposure and upping the contrast a bit. I dropped the saturation a bit, as that often helps at higher ISO. The camera chose 1600 ISO and 1/15s at f/4. I was shooting A-prio, so I obviously fixed the aperture.

The –2ev shot was processed in ACR by adding fill light and upping contrast a bit, again with some drop in saturation. The camera chose 800iso and 1/45s at f/4. Now, the mathematicians out there have already figured out that the camera chose a darker exposure than –2 demanded. One stop of ISO plus 1.5 stops shutter. Since I did not shoot from tripod, there is no way to make a direct comparison, so we have to ignore slight differences like that.
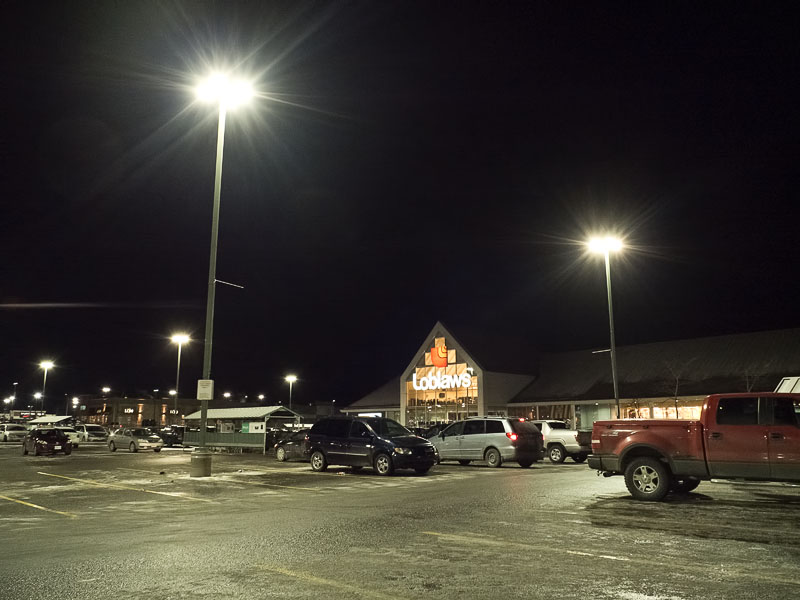
Just looking at these images, a few things becomes obvious. Even though I equalized the exposures as best I could, the massive increase in light hitting the sensor for the 0ev shot made quite a difference. The lights are more blown out, the definition around the Loblaws sign is almost non-existent. There is just too much light. Had this been shot in jpeg, it would have been a disaster, which of course is what we see on some review sites, frankly.
But let’s look at some crops to really see some differences. These are shown after conversion with no noise reduction performed during conversion or thereafter.
Now, you really need to click through that set of crops to get the full-sized version. You will then be able to see what I am about to describe.
My observations:
- FLARE! As with many recent Fuji lenses, this thing flares at the drop of a pin. The first image has obvious circles of flare and the second has that weird streak that is so common at night with the F550EXR. *sigh*
- Despite being shot at 1 stop less ISO, the requirement to add fill light strengthened the grain in the –2ev shot. This is normal and Topaz Denoise 5 had no trouble with either shot to create the posted images.
- There is more definition to the lighted areas with –2ev.
- Detail is lost (3rd crop) at 0ev. The parking lot under the tail of the truck is a good example.
- At 0ev, there is enough light to begin forming ORBs. These are far enough in the background to be irrelevant, but of course we have seen examples where they were not irrelevant.
- Despite the large-ish sensor, there is grain in both images. There is no free lunch and sensor area counts.
Conclusion
Follow good shooting procedure at night. –1ev at minimum and –2ev is even better. Jpeg shooters might have to bracket to get a decent exposure. RAW shooters have more flexibility and I would always recommend –2ev. The results are perfectly usable.