Friday, December 30, 2011

Fuji X10 – Review Part 9 – Low Light ISO Ladder – Really poor quality light …

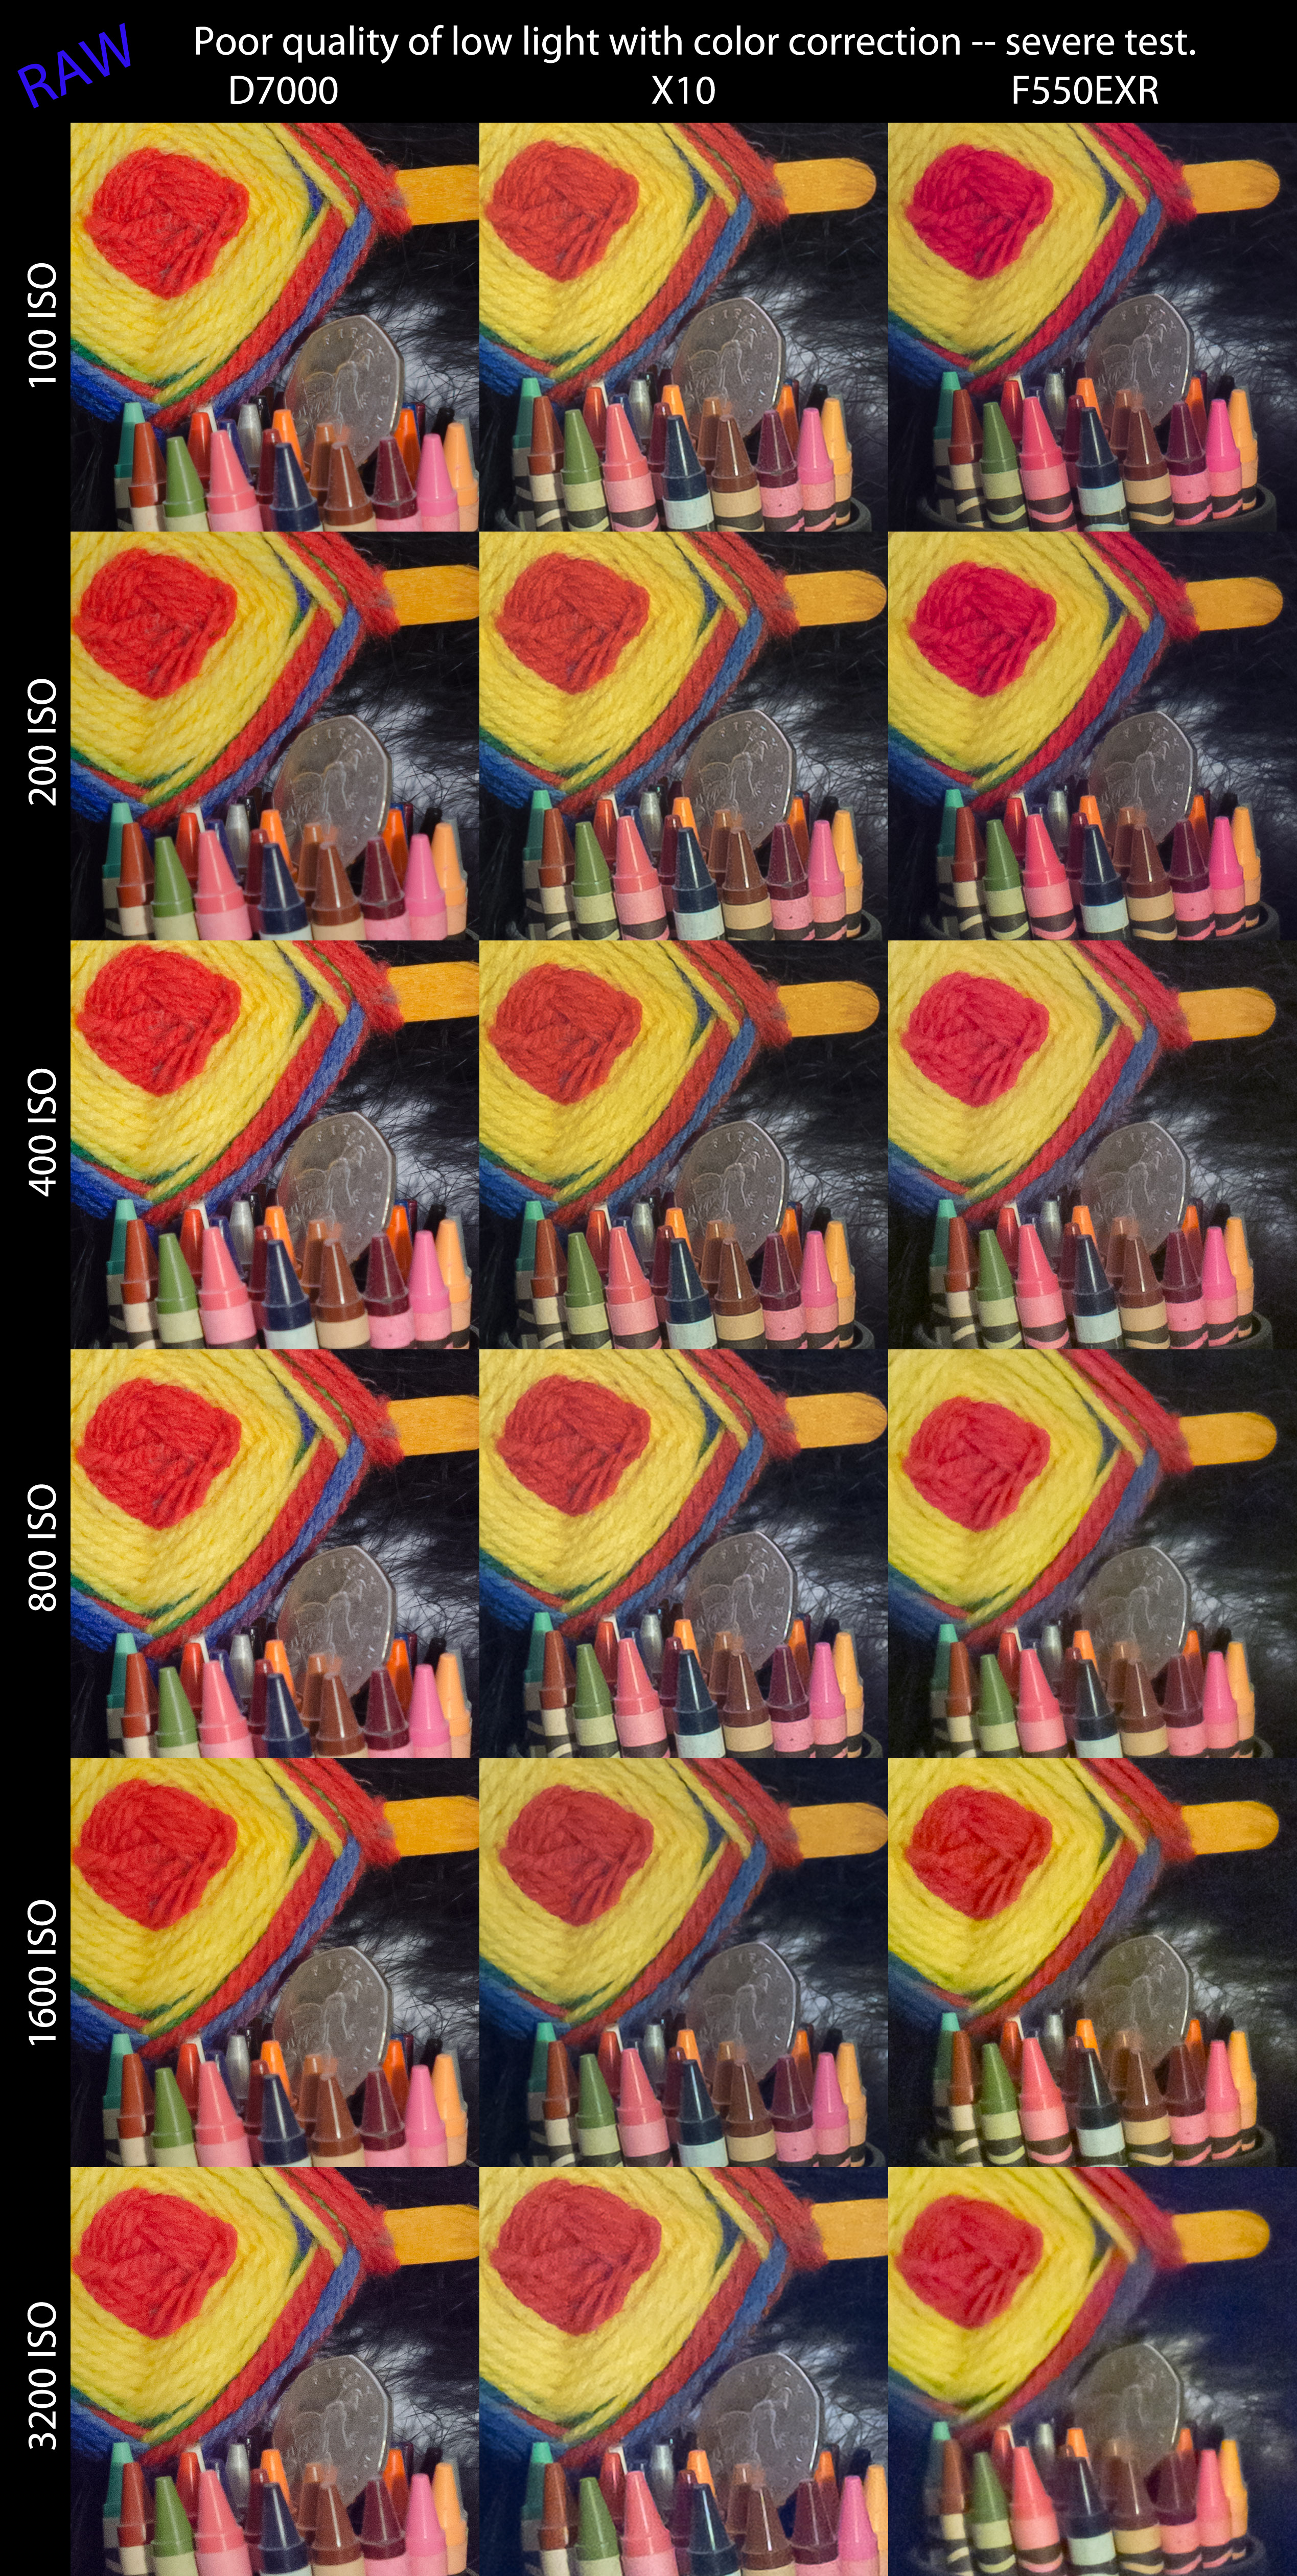
So what qualifies as really poor quality light? Try compact fluorescent bulbs at about 10 feet, giving exposures in the range of f/5.6 at 1/25s at 6400 ISO … dark bar territory.

This test is shot from tripod with the cameras at the same distance and all shooting somewhere around 75mm effective focal length (EFL.) Timer release of course. The exposures were set based on the camera’s own meter and I am happy to say that the metering between the two Fujis was much better this time than for the outdoor shots. Although that does still seem perplexing in retrospect.

The D7000 managed shutter speeds about twice as fast as the Fujis, something I have noted in the past. So there is advantage number one … or perhaps it is more accurate to speak of the Fuji disadvantage that it meters for more light, which is a real problem. The X100 is simply terrible in this respect.

I shot my usual target at 100 through 3200 ISO and I converted in ACR. I tried sticking to the defaults in ACR as much as possible but here are things I tweaked:

  • I adjusted white balance to the white letter I on the book on which the target sat, it is not visible in the crops
  • I applied capture sharpening for each image individually to the point where it looked sharp, but not “crispy”
  • I applied small amounts of NR starting around 800 ISO in order to kill the rather large grain the Fujis show
  • I warmed shadow color a touch starting at 400 ISO for the F550EXR, as it started turning blue really early
  • I added about +15 red saturation to the F550EXR right from 10 ISO as the tiny sensor gets overwhelmed by blue light when the white balance is corrected
  • I upsized the X10 to match the other two cameras

So please note that this is the kind of thing you will see when you take your camera into the house or bar and just without flash. These cameras do very well if you don’t correct the colors, but this is a torture test, so I am correcting them here …

Warning: This is a huge file … you should click through, but give it a moment as you are sucking in 2.4MB of data …

Observations

  • The D7000 handles this easily
  • The D7000 has oversaturated reds, a known Nikon issue
  • The Fujis have unpleasant sized grain, but it is controlled
  • The X10 retains detail quite well to 400, but by 800 ISO, fine details are smoothing over
  • The F550 is not really competing and yet it does not suck
  • By 800 ISO, the reds are suffering in the X10
  • By 3200 ISO, the black background has gone blue on the X10 and really blue on the F550, despite the shadow warming still being applied

So the obvious lesson here is that the X10 can shoot at these extreme ISOs in this light, but you won’t want to play with the white balance much.

Fuji X10 – Review Part 8 – Reach versus pixel clarity …

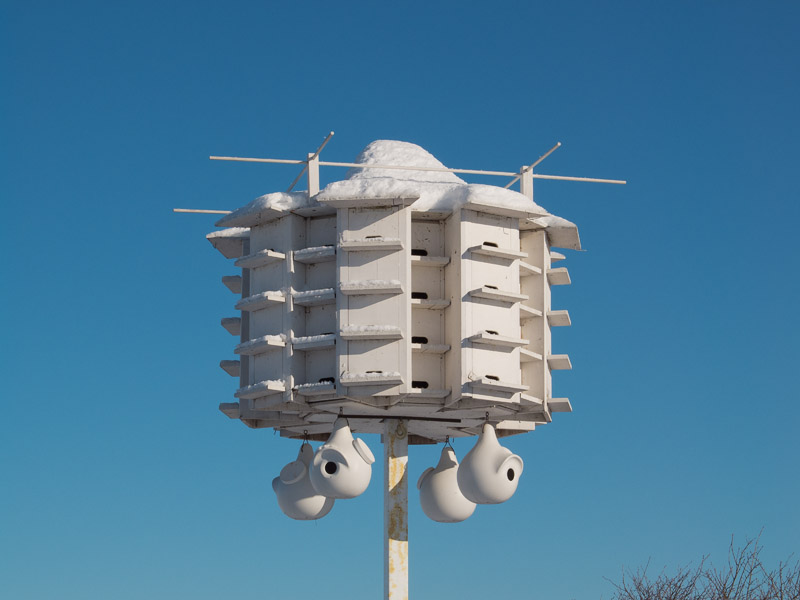
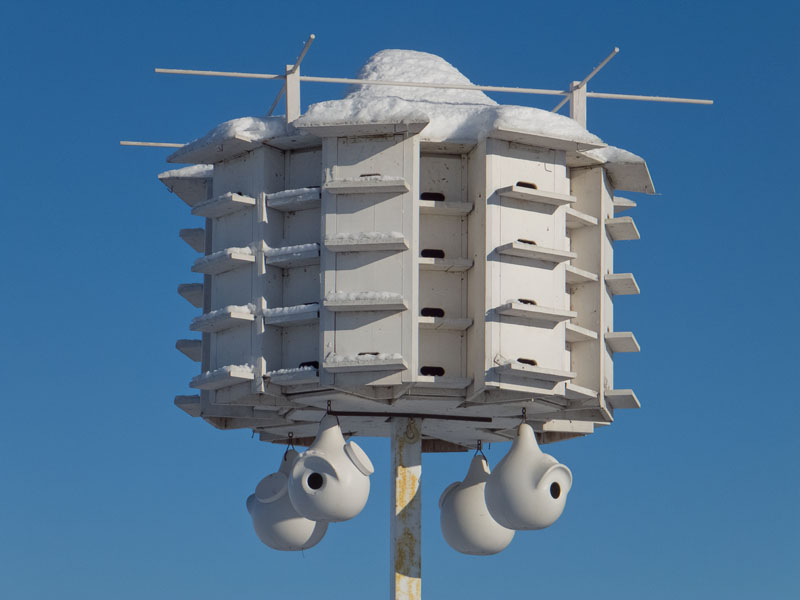
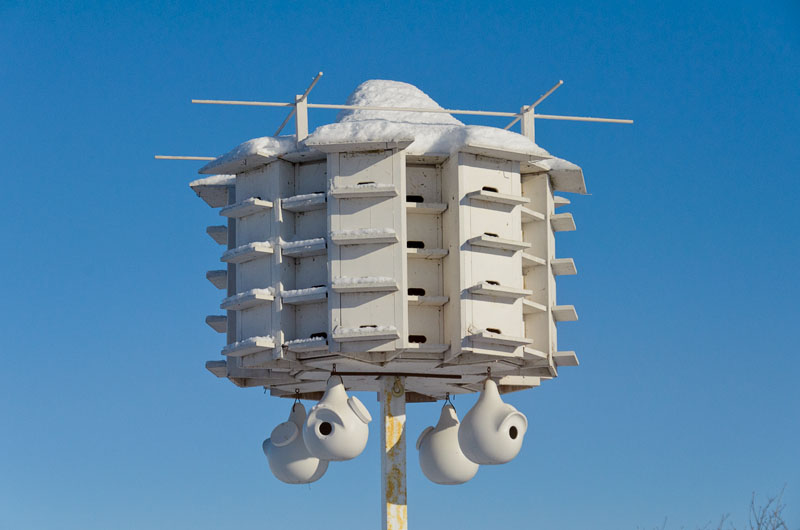
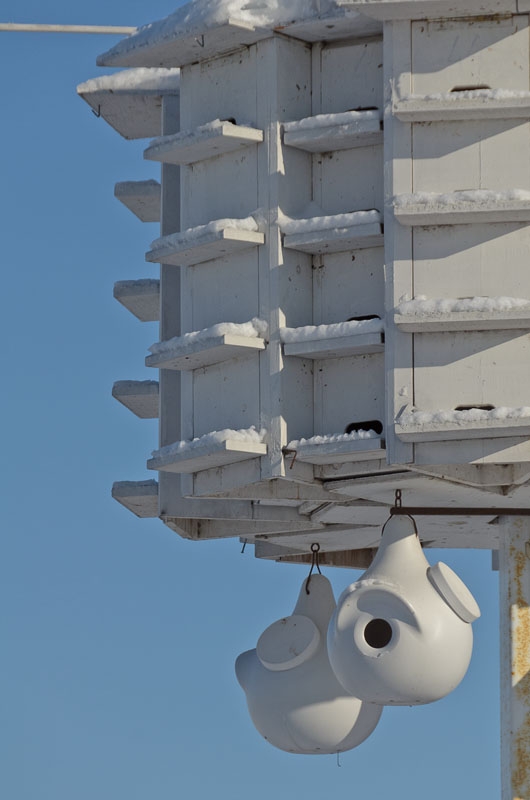
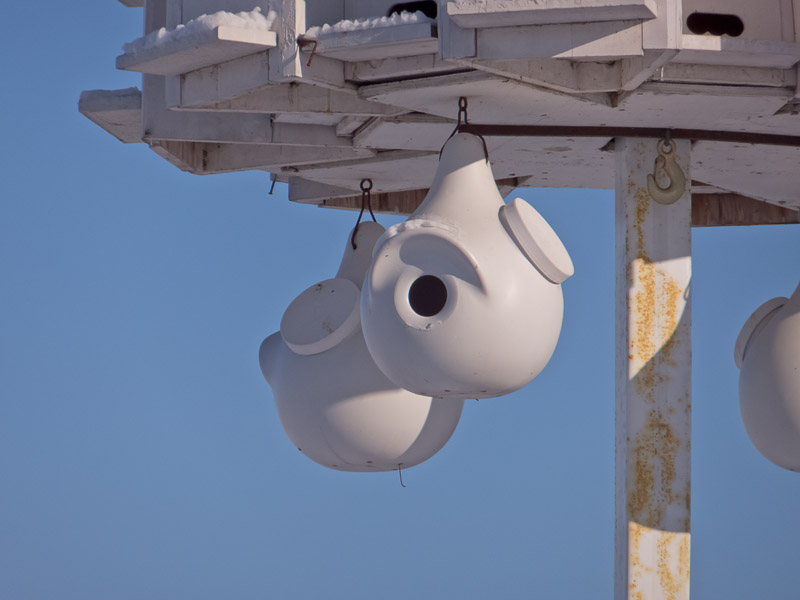
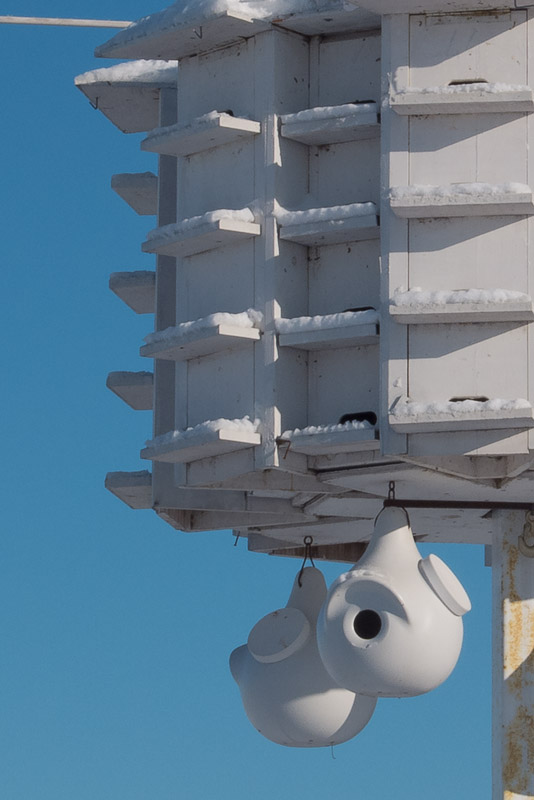
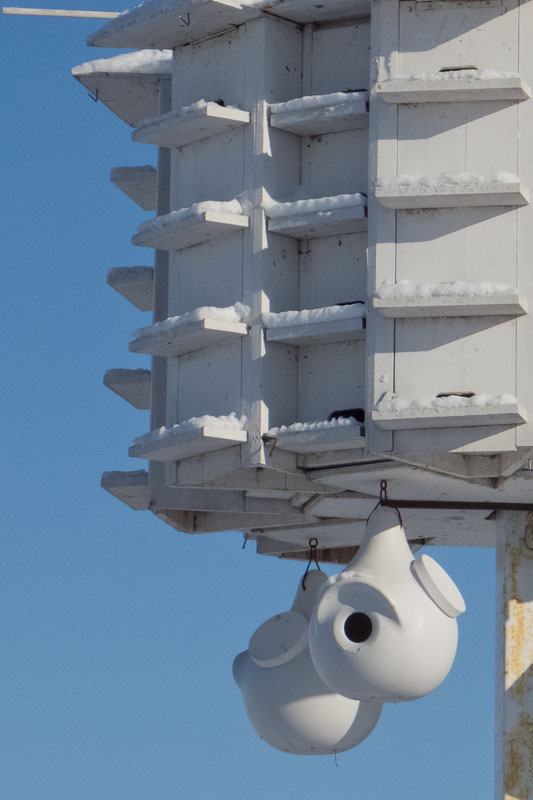
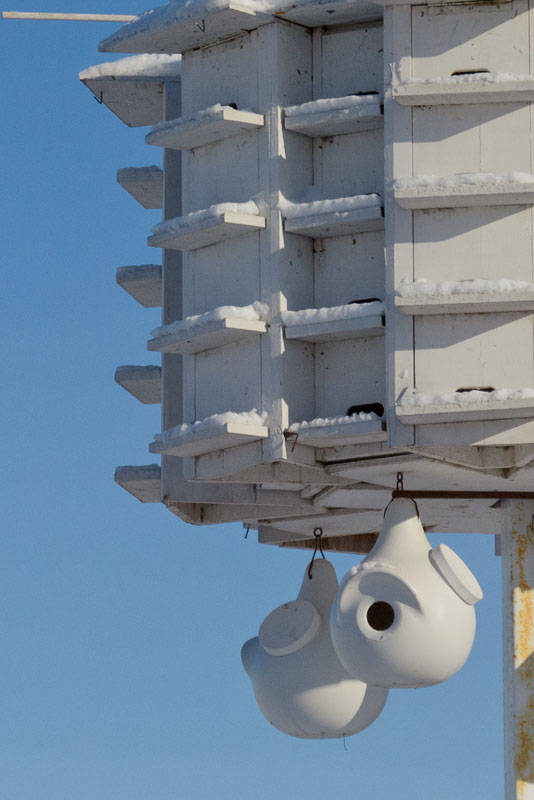
Yesterday’s walkabout in the frigid air produced a number of images laced with white. A very good test of metering and of the high protection of various sensors and such. I came upon a pair of Martin houses that had these four pods hanging underneath. Talk about the perfect subject for an examination of 3-dimensionality.

Those who have read this blog for a while know that I have this “thing” … I can’t stand the breaking down of clarity and edges when it affects the dimensional feeling I get from an image. I find that images fairly quickly feel like they are 2-D sketches instead of captures of 3-D life. It really bothers me when I feel like I am looking at a comic …

This happens a lot with smaller sensors. It is a real problem when people overexpose. Some do not seem to realize how much damage flat spots in an image do to is overall sense of dimension. I’m not saying that it is fatal every time, just that it should be prevented when it can. Like in images where the whole subject is white.

Now, reach plays into this since you might be trying to isolate a detail or two (with Martin Houses, that can be those cool little pods) and your choice will always be to zoom or crop. My walkabout included three cameras: the X10 with 28-112 lens, the F550EXR with 24-360 lens, and the D7000 with 27-300 effective focal length lens. A kit lens of course.

So … advantage to the X10 over the F550 for sensor size. Advantage to the F550 over the X10 and D7000 for reach. Advantage to the F7000 over the X10 for reach and over both Fujis for sensor size.

This should kame things interesting.

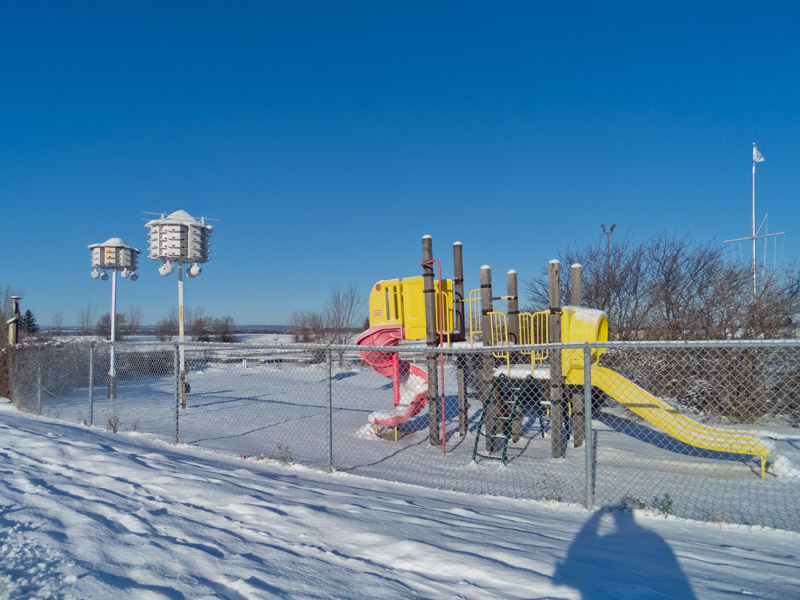
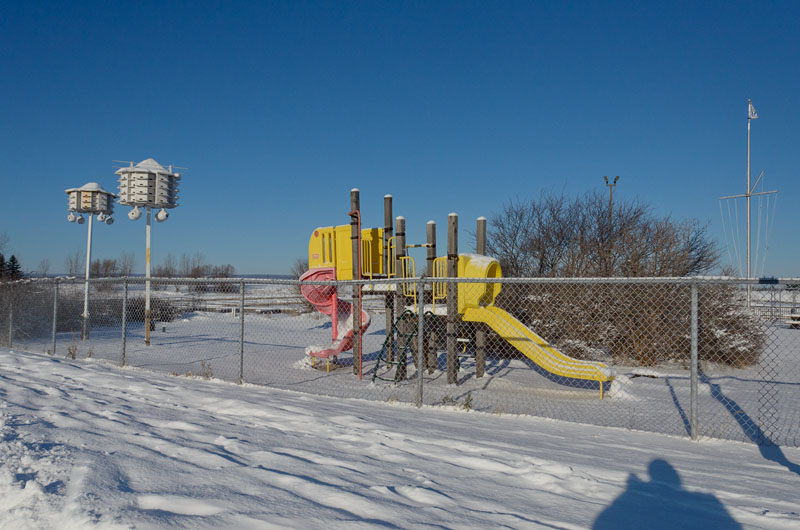
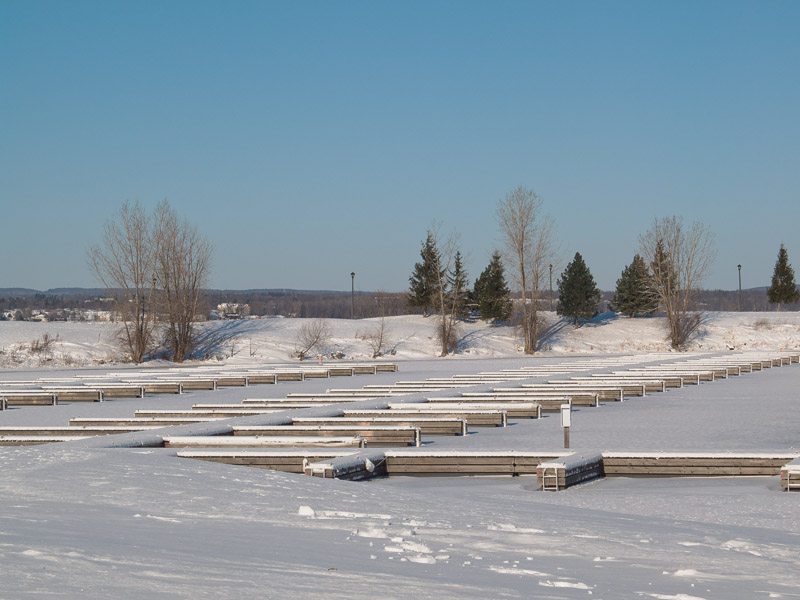
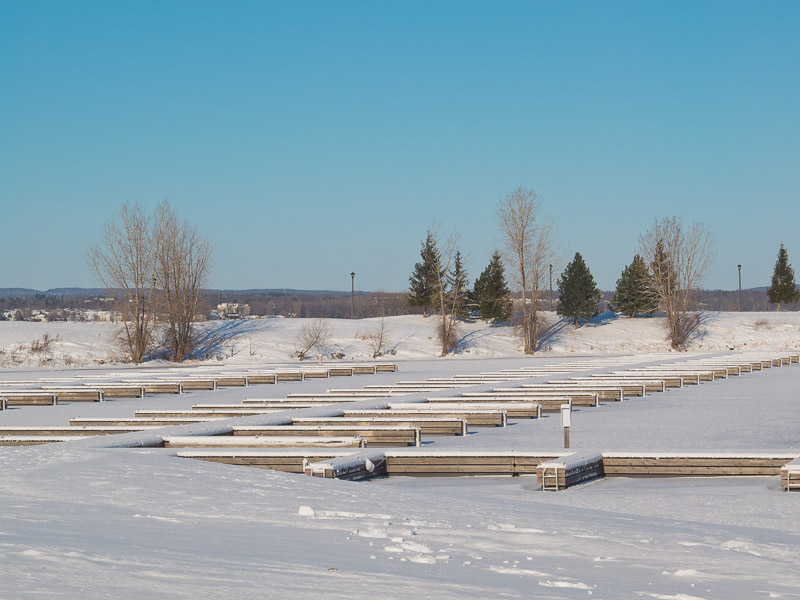
This is the scene from about 15 or 20 feet away I suppose … I later walk parallel to the houses and shoot from about 10 feet.

X10  f/10 1/420s  100ISO  0EV
F550EXR (zoomed in a bit from a few feet closer)  f/3.5  1/2000s  100ISO  0EV
D7000  f/8  1/8000s  800ISO  -.67EV

Since these are all processed from RAW, it is impossible to speak of Fuji color versus Nikon color. But I do prefer the ease with which I can get good tonality with the D7000. That may simply be the latitude of the pixels, they being huge by comparison.

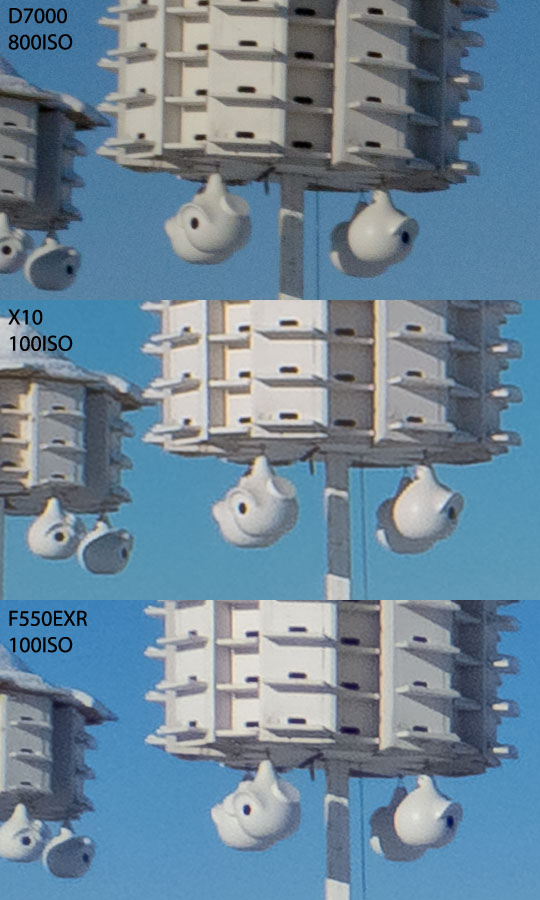
So let’s take a closer peek at the Martin Houses from this distance. I was curious as to pixel clarity in wide angle. I upsized the X10 to make for similar crops at 16mp equivalence.

The order we should see here is D7000, X10, F550 with the distance between the Fujis about one stop of detail retention. I.e. we should see a noticeable difference in clarity for the X10.

And yet …

I’m not sure what to say … the D7000 is far cleaner, despite giving up 3 stops of ISO. The F550 gives up nothing to the X10, which actually shows visible CA and edge destruction. I am tempted to pin this on the diffraction at f/10 … but I’ll have to test that before I declare this a problem with the aperture I chose. Note, though, that at small print sizes this is invisible, as you can see in the 800px versions above.

By the way, details at long distance has long been the EXR Achilles heel, so this performance should surprise few who been following this blog. Landscapes are really not its thing …


The Martin House that I chose to shoot closer was the taller one on the right side in the above images. As you can see, I was standing on the pathway looking across the fence directly.

X10  f/10  1/420s  100ISO  0EV
F550EXR  f/5.9  1/1200s  100ISO  0EV
D7000  f/8  1/6400s  800ISO  -.67EV

This is the kind of image and presentation size that makes people declare that “there is no difference between dSLRs and compacts at base ISO” … because sometimes you cannot see it, as in these shots. In fact, because of a bit of extra zoom and a slightly more subtle conversion, I would choose the F550 image here. This is also what makes statements based on images from two different people so unreliable.

Since this is the limit of the X10’s range, we would have to crop to go any closer. The D7000 and F550 can get closer by zooming. So let’s continue exploring the relationship between optical and digital zooming.

At 300mm, the D7000 can frame half the Martin House like so:

This is the very definition of pixel clarity. 16mp of sharp pixels sized down to .4mp for web. The F550 gets even closer, and at that kind of magnification, it too looks pretty clear.

There’s not much doubt that optical magnification works pretty well. Even on the 1/2” sensor, the magnification make things look pretty clean.

So let’s compare crops from the wider shots now …

X10

That’s not bad. At these sizes, you can get away with crops that are reasonable. Same for the F550:

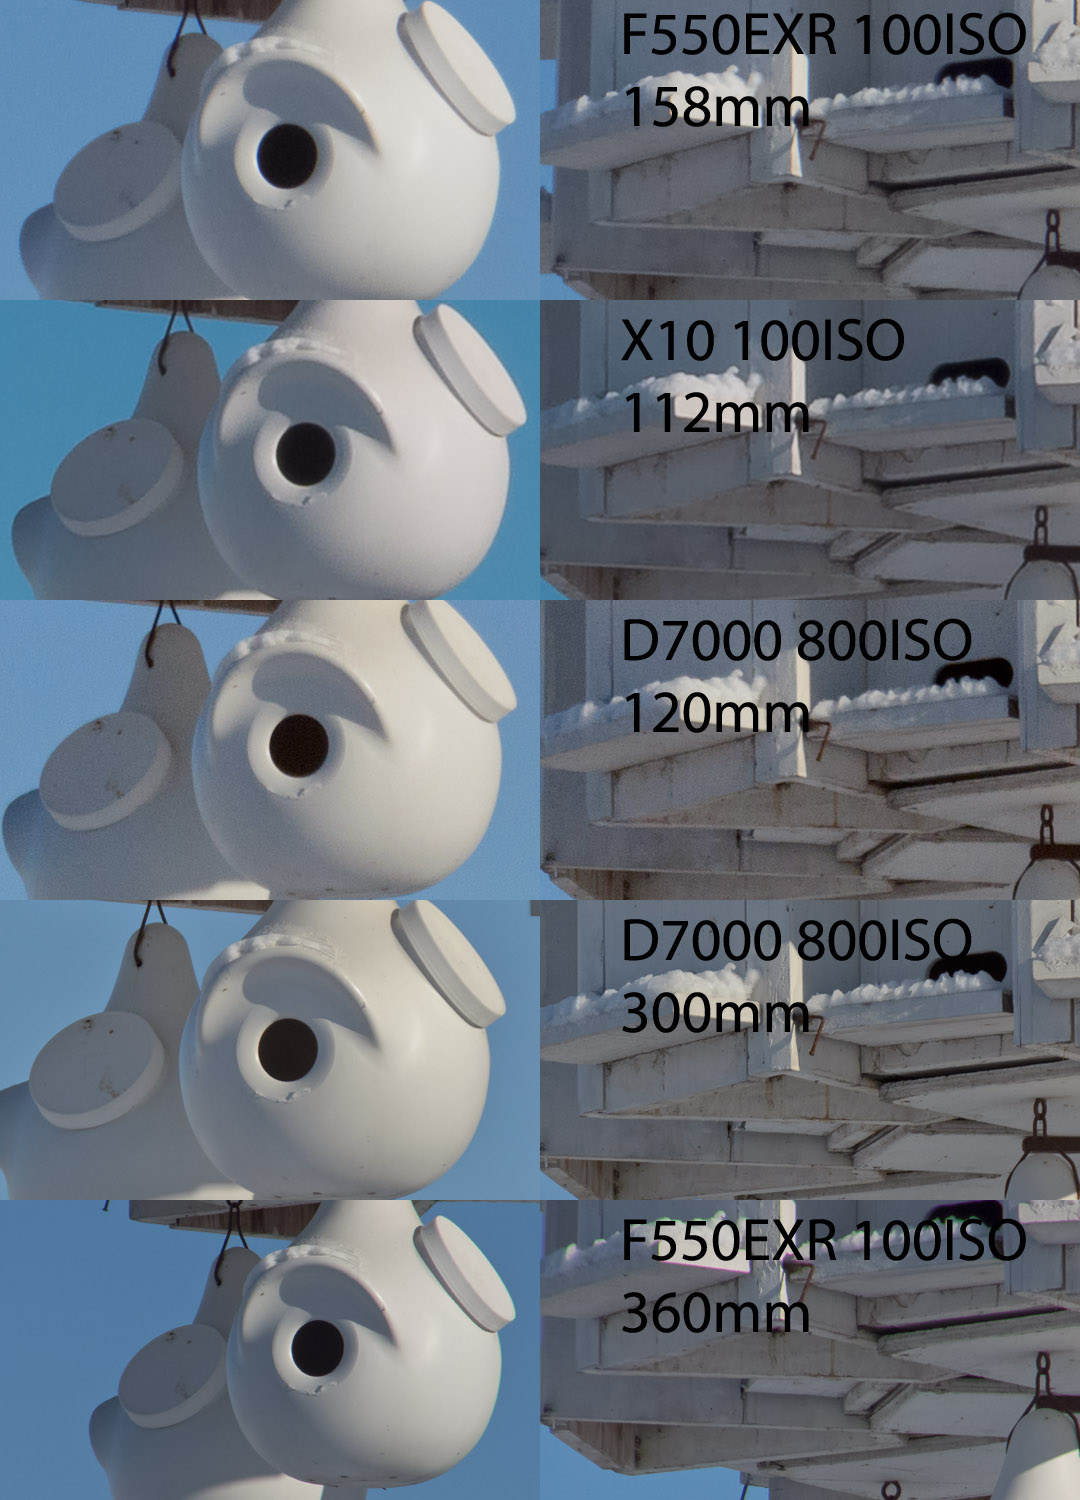
… and the D7000 and kit lens at 120mm:

They are all acceptable, with details and edges that do not break down and with good tone right into the shadows.


But what if we decided to print these as posters?

Well, we might want to search out the right lens. Because as prints get bigger, clarity gets more and more important and so does sensor size.

Click through to see it full sized and you will note that the X10 beats the F550 at similar focal lengths, but the longer focal lengths win without breaking a sweat.

Conclusion

So … if you like isolating your subjects, optical wins over small increases in sensor size. Sometimes over big increases in sensor size.

The X10 looks like a big sensor when the tones matter most … but so does the F550. When fine details matter, the X10 and F550 shoot like small sensors. Can’t be helped.

The X10’s meter was already documented as wonky in part 7 of this series. So I won’t pound the drum, but I cannot help but feel that the F550EXR is easier to shoot in bright light. I’ll have to spend some more time trying to parse out the differences.

So the X10 does not have the reach, that is obvious from the crops. But the wide angel crops nearer the top also make pixel clarity an issue. I’m trying to find the image quality strengths of the X10 and so far it is eluding me.

Thursday, December 29, 2011

Fuji X10 – Review Part 7 – Capture Sharpening and a wonky meter

I went out today to shoot some winter scenes. Nothing too fancy … I started at Dick Bell Park, the home of the Nepean Sailing Club. I parked and wandered about a bit … it was –14C, so a bit nippy. But no wind.

I shot the berths as they sat empty and frozen over. There were trees at the back of the berths and they should be perfectly sharp and crisp.

The first problem I encountered was blown exposures. My new protocol is to pop into playback mode and look at the blinking lights, and I got a lot of them for the first three images. I started at 0EV and ISO100 and got 1/1300s with heavily blown highlights. I later confirmed that these could not be saved in ACR. I then set –1EV and reshot. I got the same shutter speed and the same blown highlights. Third try was –2EV … same shutter speed and you know the rest. So this convinces me that I have hit a shutter limitation.

The next step it to move aperture higher. I land on f/10 and try again at –2EV. I get 1/1700s this time … and the image is a full stop under exposed. I was too cold to process the fact that this was approximately 1/3 stops darker for shutter plus 2 and 2/3 stops darker for aperture, so all I needed to to was back off the aperture about one stop to f/7.1 and set –1EV and I would have been fine.

I incorrectly backed off the –2EV to zero EV and left f/10 (did I mention that I was cold?) to end up with 1/450s shutter speed. And again it was cold so I moved on to shooting at this new setting.

But since the shutter I got three times would not go above 1/1300s at f/4 but jumped right away to 1/1700s at f/10 and –2EV, I don’t understand why just setting more –EV would not boost shutter on its own for those first three shots … why was there a limitation, or is the meter really this wonky?

Now there is the possibility that I have ended up with a series of images that are plagued with diffraction issues … which is the price of wonky meters I suppose. You react and you shoot. Maybe next session I will stay at f/5.6 and find a way to make the camera behave in bright light. The saving grace is that the exposures are now nearly perfect …

image


Since the exposures are fine, I don’t have to do a lot of fooling around in the exposure panel of ACR. But I should look at the sharpening panel. To start with, the image with zero sharpening dialed in is pretty soft ….

image

You cannot take it to where things look really sharp because the noise will get obtrusive very fast.

image

For me, the best compromise has been to dial in a bit of masking (surface protection) and dial down sharpening a bit. The goal for capture sharpening is to remove AA filter and diffraction effects without adding halos. You expect to continue processing, so this is usually a light sharpening.

image

And that’s acceptable, if not actually sharp. The final result, after minor tweaking and shadow work (for the conifers) is acceptable as a small print, but would be difficult to print large.

I redid this image with a slightly different approach to tonality and ended up in about the same place, but with a bit more brightness.


I checked out an F550 image I shot at the same time but at much longer focal length. There was some brush in that image and the basic sharpness profile and technique was the same.

So the aperture makes less difference than the mosaic pattern that EXR uses. My guess is that the AA filter is strong enough to handle the large pixels in 6mp mode, so 12mp mode takes a real beating. The JPEG engines hide such things, but RAW shows all.

Conclusions

  • The meter continues to act strangely in my opinion … wonky
  • Shutter limitations act like they are tied to aperture as well as ISO
  • Stop down in really bright light, don’t forget 
  • Continue to actively look for blown out highlights, despite some peoples’ tolerance for them, they never look as good as smooth gradients
  • The X10 can be shot in snow, but it seems labour intensive when compared with the F550EXR, which nailed the exposure first shot
  • The EXR sensor seems unsharp as neither the F550 nor the X10 are anything to write home about at 100%

But that does not mean that you can’t get nice prints. It’s just that you should probably look elsewhere for your posters.

Wednesday, December 28, 2011

Fuji X10 – Review Part 6 – Saving highlights, is it always possible?

The answer is unequivocally no

In some situations, where the light is uniform, an over exposure might be saved. On others, where the range of light is very dramatic, highlights might not be saved. Over exposure is usually a mistake (unless you intended the effect.)

Following are three shots. One indoor shot and two outdoor shots.

The indoor shot was at the settings I favour – RAW, ISO00, DR100 – while the outdoor shots are at settings I do not favour, but which worked fine because of the lack of real shadows in the image. Very uniform light allows you to use those settings, although I will explain in a minute why I managed an overexposure in easy light.

The indoor exposure was of my son sitting on a black leather couch with his computer. He is the tolerant one, the other would have blocked his faced with his hand or flipped me off. :-)

I had a few choices and I decided to go with fill flash but also chose to go with 0EV. This was fatal to the scene outside the window. As shown in the following screens shots of ACR with the highlight alert on (press ALT and the exposure slider), first at 0EV and second at –4EV. Lots of blown red channel and blue channel, and the white means totally blown out RGB.

image

image

This leaves me with three choices:

  1. chuck it
  2. process it for the subject and ignore the blown sections
  3. process it high key to make the blown sections look like they belong

So, we’ll view these attempts in order. First, the image when I chuck it.

That was not very interesting, so let’s move to the image processed for the subject. Here, I cloned out a minor flash shadow and did basically nothing else to it after ACR. I had set auto ISO since it was very dark in the room (doesn’t look like it, I know) … the exposure was ISO1250, f/2, 1/30s … the exposure was chosen by the X10 and since it likes 1/30s it chose ISO 1250 …

Well, I have no problem with a memory like that. I would certainly counsel someone who posted that shot to also try –2 ev with +1ev of flash to see how that looked. But this is ok …

Now, what about making that window just disappear … here, the processing is more extensive. Starting from the same edited version (without the flash shadow I mean), I run my threshold action to increase contrast, which darkens the mids and lows and lightens the highs. Then I run my glow action, which adds a blurred screen layer, which has the effect of lightening the image and adding an ethereal glow to everything. I did this a couple of times each. I also added a little dodging and burning to clean up remnants of the window and to bring back my son’s hands a bit …

I’m ok with both versions. This one takes speculation about the background out of the picture. It is obviously meant to isolate the couch and my son, but does leave open why?

Of course, everyone has different taste. These are just ideas.


So switching to the outdoor shots.

They were shot at what I thought were my fave settings. RAW, ISO100, DR400. Brain fart. When switching from jpeg to RAW, DR400 raises ISO to 400. Way too easy to forget. I was on A-Prio and thus took the aperture out of the picture. I was poking my head out the patio door and there was no doubt glare on the LCD. I have no sensitivity to tiny letters turning red, so I missed the exposure warning. And of course f/2 and 400 ISO slams into the 1/1000s limit and exposure is too high.

image

The white areas are totally blown. The rest in the channels represented by their colors. blue, red, green, blue-red (purple/magenta), blue-green, red-green (brown) …

So … what a mess. Had this been at DR100, I am screwed as I was with the indoor shot. But the precise reason I missed this was that I was on DR400, and that has some kind of Fuji trick involved in RAW, even L size RAW.

So here is the result when I dial it back appropriately … this is exactly what I loaded into CS5 … note the image size at 4000x3000 …

image

Quite adequate latitude for sure. Here is a 100% crop from the shadow area … I added a pretty heavy capture sharpen … remember that this is shot wide open and this camera probably behaves like the X100 … lots of pretty bokeh wide open but sharpness and contrast take an obvious dip.

image

Still, pretty good. In this kind of soft light, raising ISO is acceptable. I think I’ll amend my main article to recommend DR100 only when there are a lot of shadows that will be opened. The grain gets pretty bad. But when the shadows are secondary, the extra protection of the DR400 can be useful.

However … I am still staunchly in favor of competent metering. And this was not that. I over exposed because I did not notice the warning. I have since changed my display mode to show me blinking lights for blown highlights, and I review that when it matters. I will get much better at shooting this specific camera over the next few weeks and I encourage others to choose between the two methods based on your preferences.

So, the final product. Both shots I took and processed about the same.

One more point to make … snow looks gorgeous to me when it is freshly fallen and can be made to look like fondant icing.

Here is an example of the 3-dimensionality I look for in snow images. And wedding cake images of course. This is the F550EXR at ISO 500 …

It’s the subtle curvy surfaces and the play of shadows that emphasizes the 3 dimensions. And since snow falls exactly that way, clinging to and curving around edges and surfaces, you can get a similar effect. Even on flat ground, you can emphasize shadows cast under tables and bushes.

And again … without further ado …
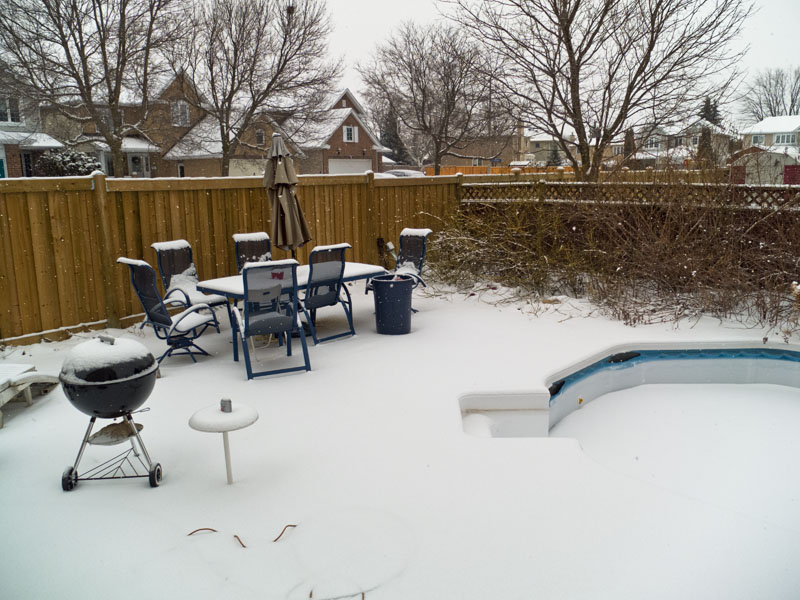
Note the impressive vignetting of the lens. Very common wide open, so don’t fret. But you will have to address it if you don’t like it.

Note: If your monitor fails to show the 3D effect and vignetting, your white point is too low. Meaning that you are losing quite a bit of the top stop, it is all showing as one color. This is very common on TN panels … I’ve calibrated mine and it still shows these much more poorly than my calibrated IPS panel. Of course, I edit and examine images on the IPS panel and use the TN panel for other stuff (Bridge, etc.)

Conclusions

  • You will make mistakes. If you don’t want to be a slave to the exposure then shoot the settings for JPEG exactly as I recommend them in the master EXR document. You can shoot RAW, but you should then go against my current recommendations (soon to be updated again) and shoot DR400 and auto ISO.
  • However, if you want to eliminate these brain farts, pay attention to the exposure warning signals and dial in compensation. You can then shoot ISO100 in RAW, which forces DR100. Shadows great, less protection (with apologies to Miller Lite.)
  • The camera is soft wide open so far as I can tell. Sharpening helps.
  • Vignetting is high wide open. This is normal.
  • Excellent highlight protection at DR400 in RAW. Poor at DR100 at any ISO. You might as well allow DR to track ISO. If you set DR400 and Auto ISO, you will never see 200  or 100. I don’t like that. I want DR100 at 100, DR200 at 200 and DR400 at all other ISOs. Perhaps it is buried in there somewhere. If anyone has found such a setting, let me know.
  • Some highlights are pretty much impossible to save. Either skip the shot or process around it. Note: If you are posing people, then there is l ittle excuse for bad backgrounds or lighting. But candids are a different story.

Your choices, as always, will be driven by your experience, desire for more or less responsibility on every shot, and your preference or not for processing.
Monday, December 26, 2011

Fuji X10 – Review Part 5 – RAW and DR400 – Versus F200EXR and F550EXR

Fuji manipulates the heck out of their RAW files. The inconsistencies we see in all sorts of metering ways on the X10 are probably there because Fuji are not just capturing the usual data any more. They are capturing hidden data (metadata I presume) about the exposure and perhaps even performing some split sensor antics. It is really hard to tell.

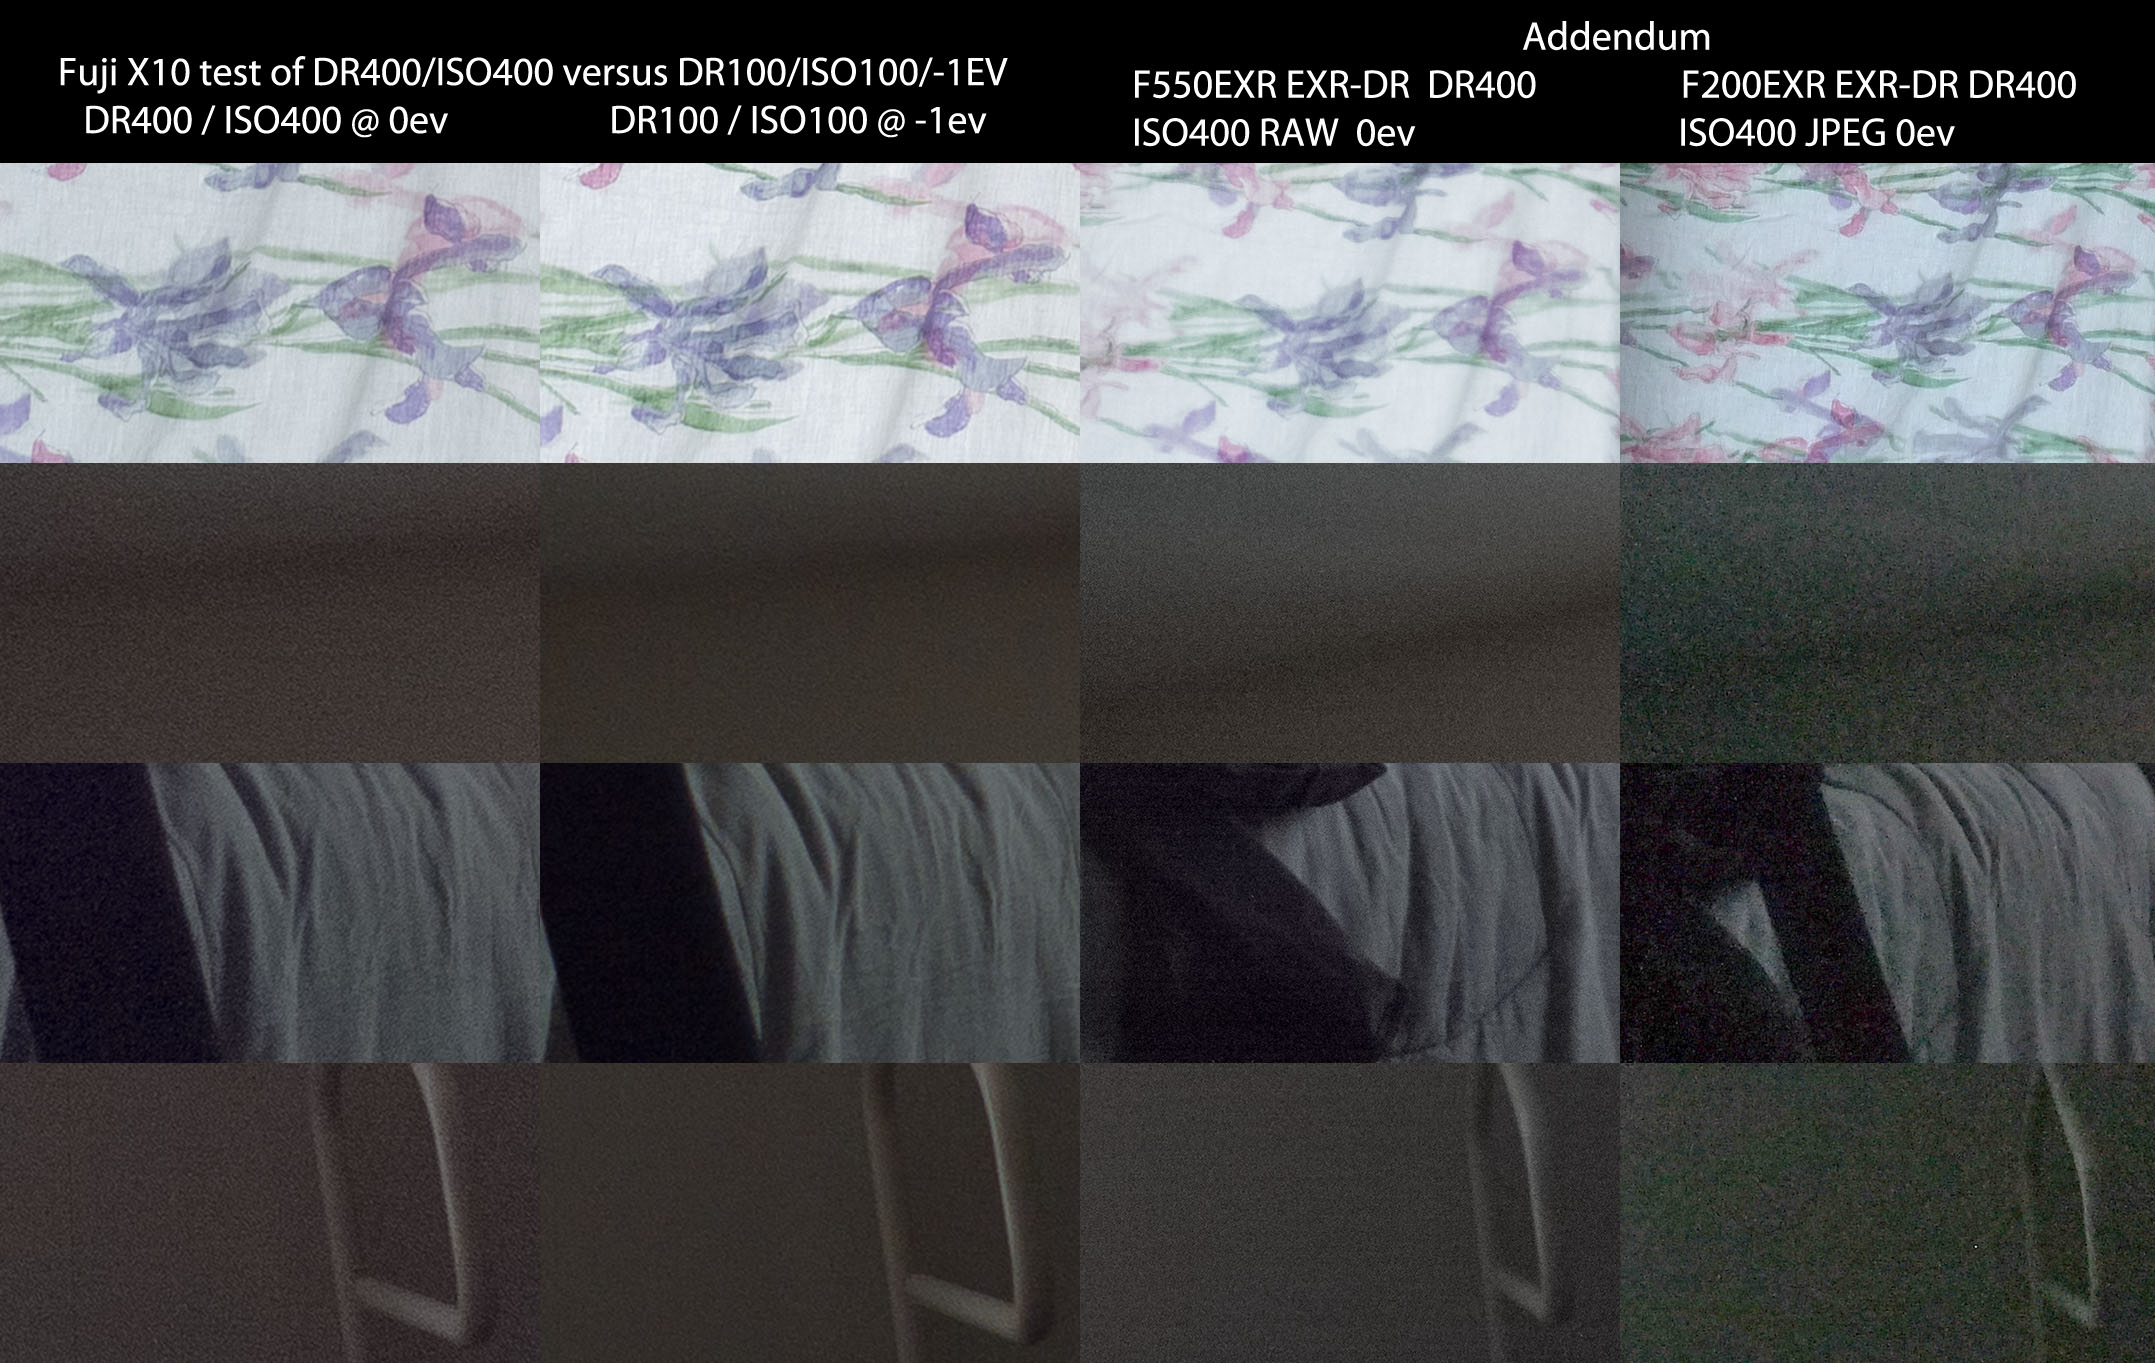
So … my X10 examples. I shot an ugly area of my house (under construction, but has the virtue of a translucent window covering that is much brighter than the walls beside it.) These images shall remain unseen, but crops from them are gathered together along with all the metadata from Bridge, ACR, CS5 and the Camera. So let’s compare notes …

Obviously, you simply must click that image to see the huge one … and remember to expand further if your browser shrinks it to fit the window (most do when loading.) It will open in a separate window so you won’t lose your place.

Now … from left to right:

  • Shadow area. 400 ISO causes color shift and large increase in noise.
  • Highlight area. By default ACR sees both exposures as blown out.
  • CS5 histograms shows identical data in file. Bridge says both are 4000x3000 (12mp.) But CS5 sees a larger file for 400 ISO / DR400! WTF?
  • Camera shows much different histograms, yet identical exposures overall. WTF? Note: Both show some flashing overexposure, but it is extreme with DR100.
  • After pulling exposure slider all the way left in ACR for both images, CS5 shows completely different results. DR100 file still blown. DR400 file actually underexposed now by 1 full stop.

I went back and played with the compensation dial and was surprised that –2EV created a perfect exposure at DR100 … no blown highlights flashing at all. This leads me to consider that DR400 offers something like 1.66 stops of protection. However, the shadow color shift and the excess noise is the price for preferring to shoot without dialing in compensation yourself.

I doubt that we’ll ever get told the secrets of Fuji’s RAW files for EXR. But it certainly helps to understand why Fuji think they might be able to fix the ORBs in firmware. The sensor is probably in good shape, but their processing of the RAW file is quite aggressive …

Update

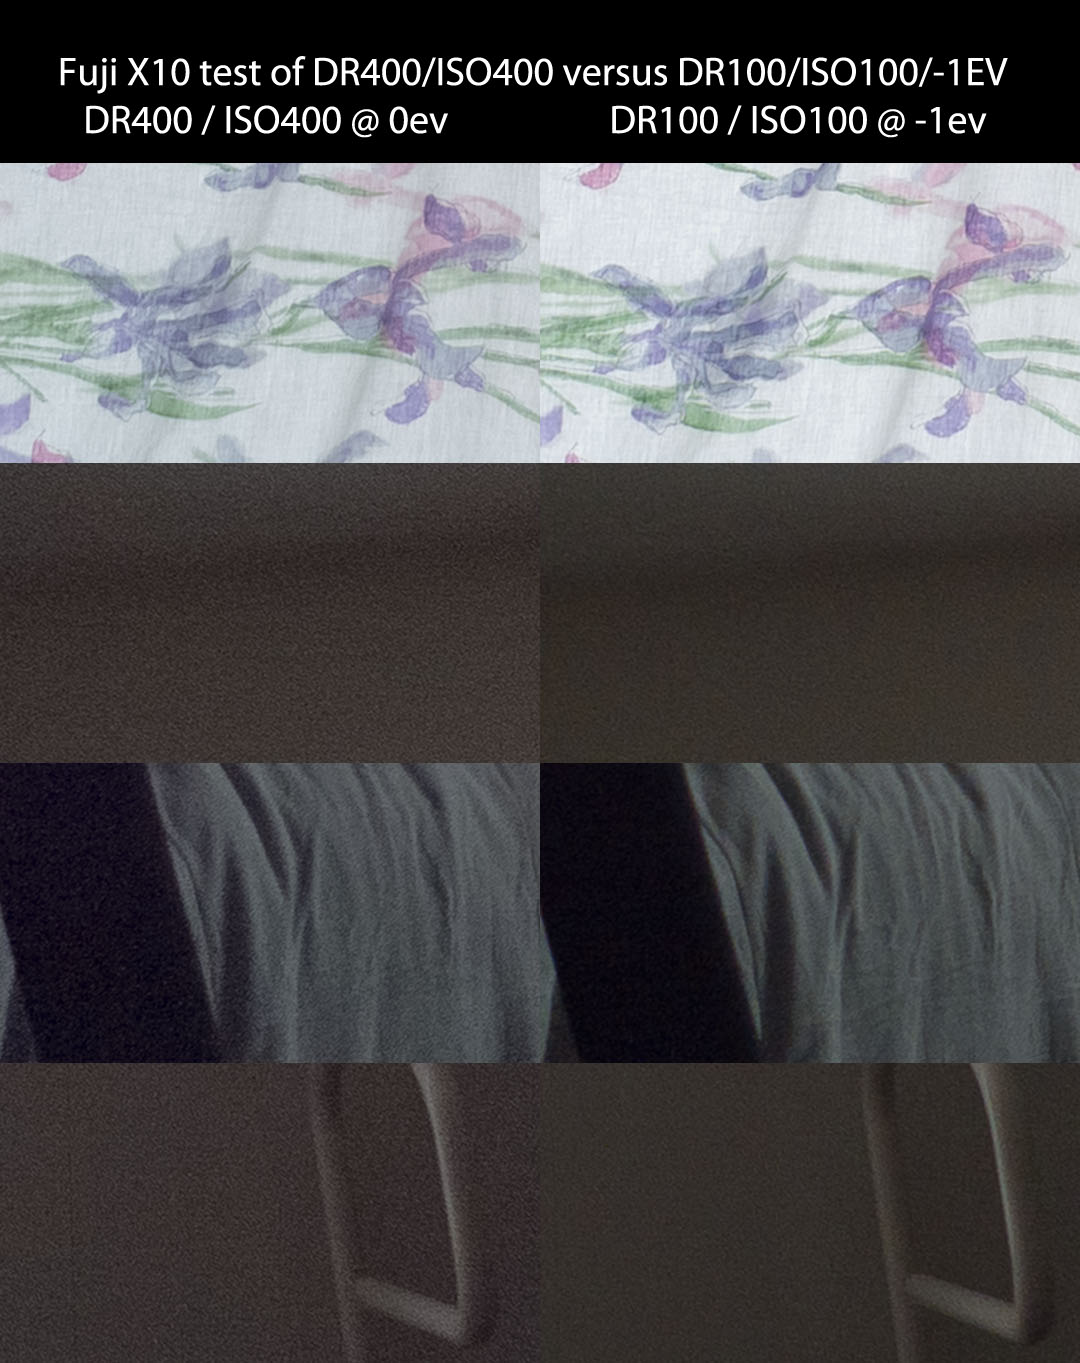
I could not contain my curiosity … would  400ISO at 0ev pulled down in ACR be better than 100ISO at –1ev pulled up in ACR?

The obvious answer is that they should be close. Underexposure is never your friend … but 2 stops of ISO is a lot on such a small sensor. And for those of you who think this is a large sensor, well, I think you’ll see in a moment that this is just not true.

Again, click through to see a clear view of the damage that raising ISO has done. Here is my summary:

  • Color shift toward blue. Classic small sensor issue. But starts early on the X10 for its sensor size.
  • Tons of extra noise. Much more than on the underexposed 100 ISO image.
  • Details destroyed. Crop 3 shows small fabric folds lost and crop 4 shows edge details lost.
  • I see a vertical line of darker pixels across the left side of crop 4. More pronounced at 400 ISO but still slightly visible at 100 ISO.

My bottom line: I would not shoot DR400 on this camera when there is dark shadow detail that matters. I would choose instead to properly expose for the subject and the highlights in the frame, then pull up in post. All done in RAW of course.

Those who might want to believe the endless commentary about how great 400 ISO is and how cool it is that you can over expose with no ramifications would be far better served by:

  • learning how to meter a scene (try some of these)
  • exposing to the right
  • using the lowest possible ISO for the available light, which means 100 for most daytime shooting
  • shooting RAW and processing in ACR


Compared to the F550EXR and the F200EXR

The former has RAW but a really tiny sensor at 1/2” … the latter has a large sensor (a fraction smaller than that of the X10) but has no RAW and uses older CCDEXR technology. So what does that all mean?

Again … CLICK THROUGH.

The F550 is really quite good. It fails to resolve the detail on the first crop but has finer grain than the X10 on the second. Same color shift at the same ISO. Third crop is again about the same as well. The fourth crop shows two differences: the smaller sensor cannot quite hold the edges and there is some minor banding. If you see a lot of banding, consider monitor calibration. I see a lot on my TN panel, but my IPS panel shows minimal. So all in all, a surprising performance for a sensor that is a full stop smaller.

Now, how about that big sensor in the F200? Well, looks like bad news. No RAW and its conservative meter (it set an exposure about 3.25 stops less than the F550’s meter) has really tanked it. You have to be very careful with the F200 if you want to hold highlights and see some shadow detail. The first crop is nice and the rest are a mess. The last is a legitimate disaster. The F200 protects highlights better than the others, but it appears that its trick is mainly hyper conservative metering.

Addendum for JPEG Shooters

This article is all about RAW and the tricks Fuji uses when shooting in pure RAW. You get some protection, but I consider the price overly high.

I just shot a JPEG file in EXR DR / DR400 mode on the X10 and the image was only slightly overexposed. I could still pull back the blown out sections and open the shadows and I observe that the image is much nicer than the RAW DR400 image. EXR DR chose 125 ISO and did not shift colors, nor did grain overwhelm the detail. Of course, it is a jpeg file and therefore there is subtle smoothing in a lot of places and of course there is some compression. Still, it is a better alternative than RAW DR400 on the X10.

Conclusion(S)

Fuji is manipulating RAW files very significantly with the X10. Nothing quite adds up, and ORBs are coming from somewhere. But there are some obvious conclusions from this test:

  1. You can shoot DR400 and pull back a lot of overexposure (almost 2 stops) in RAW. But you pay a big price in shadow noise and color shifting.
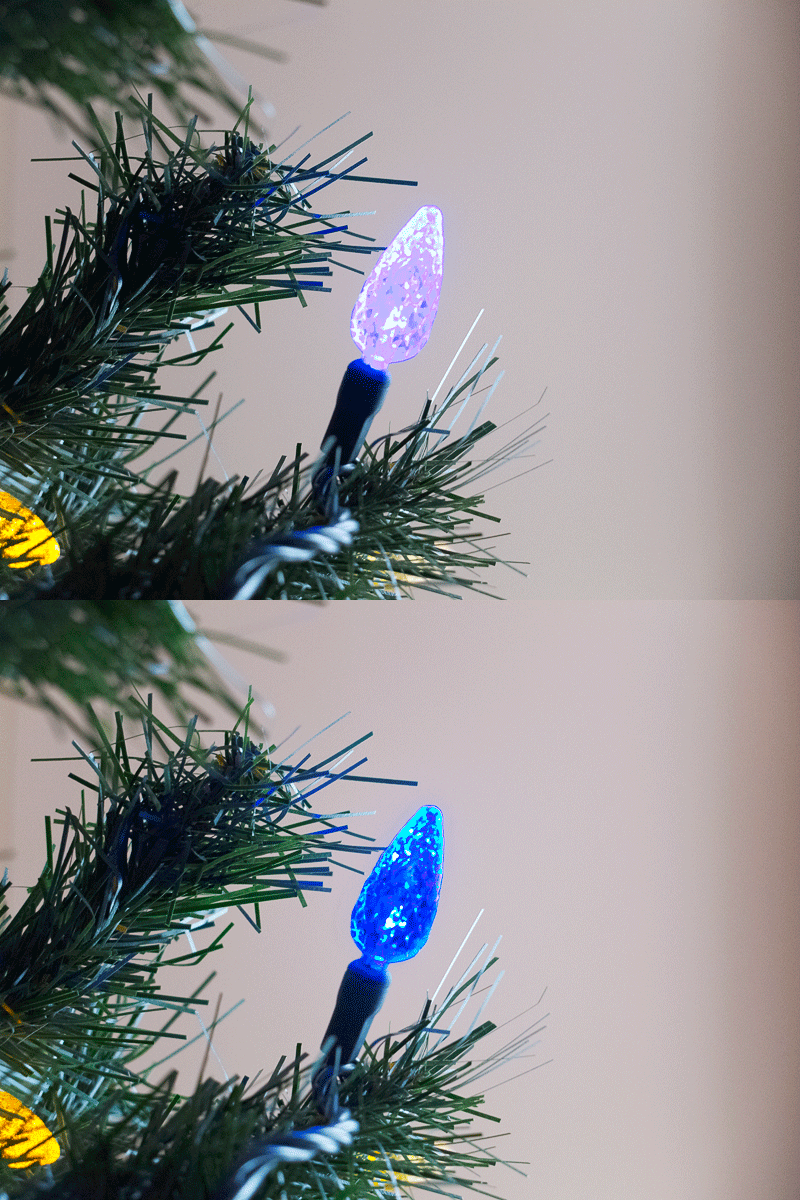
  2. You can dial in compensation yourself and raise shadows and mid tones. This looks much better in practice.
  3. JPEG EXR-DR DR400 ISO100 does a better job than RAW DR400 ISO400 when there is dark shadow detail that matters (and therefore must be lifted.) RAW ISO100 DR100 –1EV does an even better job.
  4. The F200EXR is out of its league when the light falls badly in the shadows. This was a surprise to me.
  5. The F550EXR has the same sensor technology without some of the weird quirks. For a much smaller sensor, it remains quite competitive.

Fuji X10 – Review Part 4 – Shooting the Christmas Tree – ORB Hunt

So can you or can you not shoot your Christmas tree with the Fuji X10? Has the ORB issue been blown completely out of proportion? Or is it very real?

The short answer is …

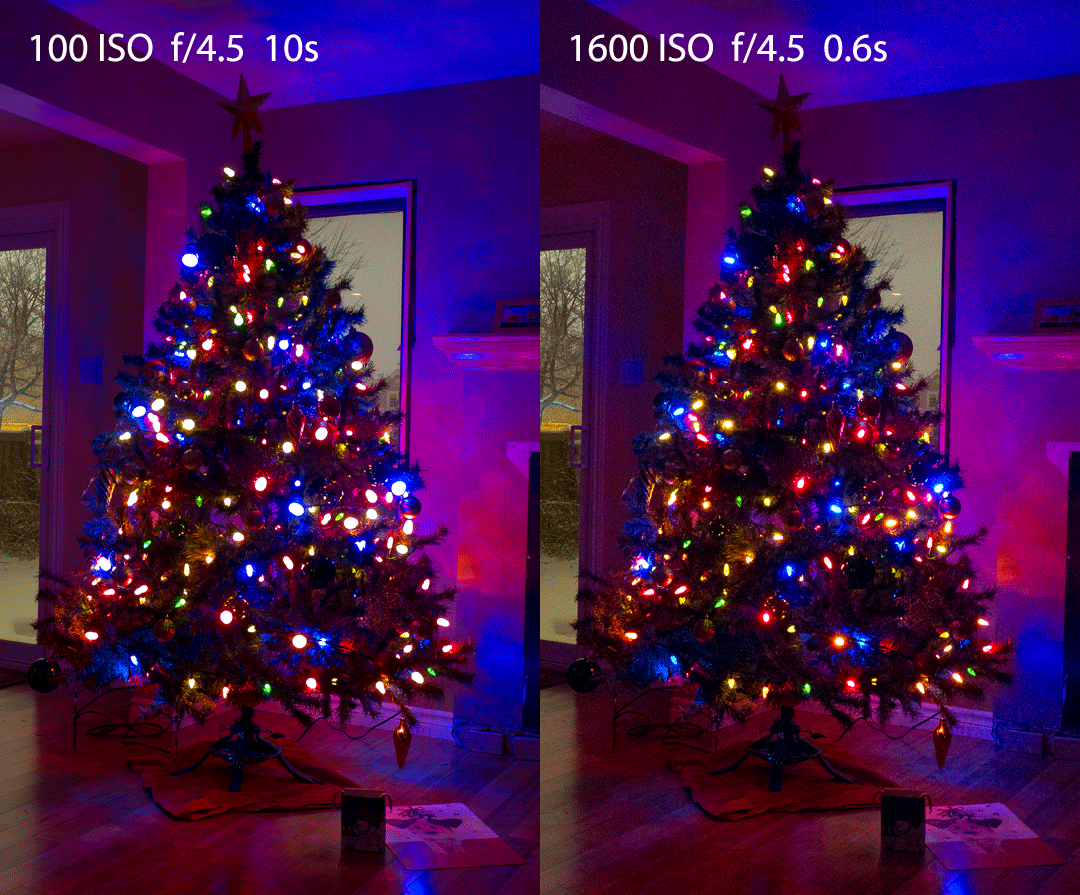
Yes, you can shoot it. No, you cannot shoot it noise free. Sorry, but this sucker is very sensitive to too much light. By its standards of course … you won’t find any other modern cameras that hate excess light this much.

Should I say the word? You are seeing the perfect demonstration of ORBs …

But hey, this camera is actually quite good at 1600 ISO, so I would not despair were I you. If you think you will be shooting in situations that have glaring lights, crank the ISO. Now, this is quite difficult in bright sunlight, but there is always stopping down. And adding ND filters if you have to.

Anyway, for the Christmas tree, there is little wrong with the 1600 image above. In fact, here is how I like to process Christmas Tree images. A touch of Topaz Denoise if necessary and Topaz Adjust with the dramatic filter which is then dialed down either with layer opacity or with the edit option to adjust the last action (basically the same thing as layer opacity for a single operation.)

Now that’s not bad. However, the opening of shadows has exposed noise in the upper left quadrant. There is also some posterization in the floor. The chip really does not have a tone of headroom. It is likely that you will have to stay within the limits of what you capture or accept this little flaws.

Here is what I prefer to do … shoot the tree with the D7000. At 100 ISO.

Everything is better, as it should be. As I write this, I see these side by side for the first time and I am struck at the extreme color cast the Fuji shows. I suspect that this is the rather extreme amount of light the Fuji got? Let’s compare exposures …


Aperture

Shutter

ISO

X10

f/4.5

0.6s

1600

D7000

f/8

8s

100

+/-

-1.66

+3.6

-4

Total is 3.6-1.66-4 = –2 stops for the D7000. Now, I shot both in matrix mode and relied on the meter to show me –1ev by hitting the center and then dropping shutter until I got –1ev.

Conclusions

  • Forget 100 ISO with the X10 for shooting the tree. Try 800 and above and do underexpose, then bringing up the shadows and mid tones. This applies to images shot of the tree with it being the only light source. If you have lights in the room, you will be in good shape with 800 or 1600 anyway because the total light will drive shutter higher and the hot spots on the tree will be less hot relative to the overall light.
  • I see some issues here with Topaz Adjust, but will not make any real observation as I’ve had success with the F80 so the X10 should smoke that. I’ll try it again.
  • The meter is pretty wonky it seems. I don’t really understand how it added 2 stops to the exposure over the D7000. Beats me since the only light in the room was the tree and the framing was pretty similar. If you are shooting lights, start at –2 and consider bracketing from there. Note: The two Fuji images above were shot from tripod and they are also rather differently metered. So the camera is not all that consistent with itself either.


Addendum

Forgot to add that you can also shoot isolation shots for fun. The tree is interesting in the day time too …

But even in the day time … there is that thing with the lights … here I show a shot with the original being the washed out light and the darker light having been adjusted in ACR and CS5 …

Happy holidays to you and yours.

Daddy’s Christmas Surprise

I’m still suffering an illness that robs me of life force at times, so this Christmas season has been a real gong show around here.

When they got home late on Christmas Eve, I was lying there on the couch watching reruns (Netflix.ca is awesome) of Buffy the Vampire Slayer, as I have been doing for a number of days by now. Nick was rather disappointed but since he has not been well either this holiday season, we agreed that no one was going to be bothering with a tree.

So it was with great delight that I came downstairs this morning at 11:30am (finally got some sleep around 4am) and saw this …

Fuji X10  f/2  1/80s  ISO 400  -1EV

I got a couple of pretty nice kids if you ask me …

And if anyone wonders what that piece of paper is that hangs from the mantle beside the tree, that’s Jonathan’s “paper tree”, which stood in for the real thing for several days …

Merry Christmas to all …. even though it is officially Boxing Day here in Ontario as I write this. If you are wondering where the name came from, it probably has to do with a skill needed to make hay during all the crazy sales …

Sunday, December 25, 2011

Fuji X10 – Review Part 3 – Night shots and the effects of exposure compensation

We’ve seen a lot of night shots posted in reviews and on the forum, and many of those show severe ORB action … the worst of those images being shot at ISO100, which necessarily requires a great deal of light to fall on the sensor in order to get a good exposure.

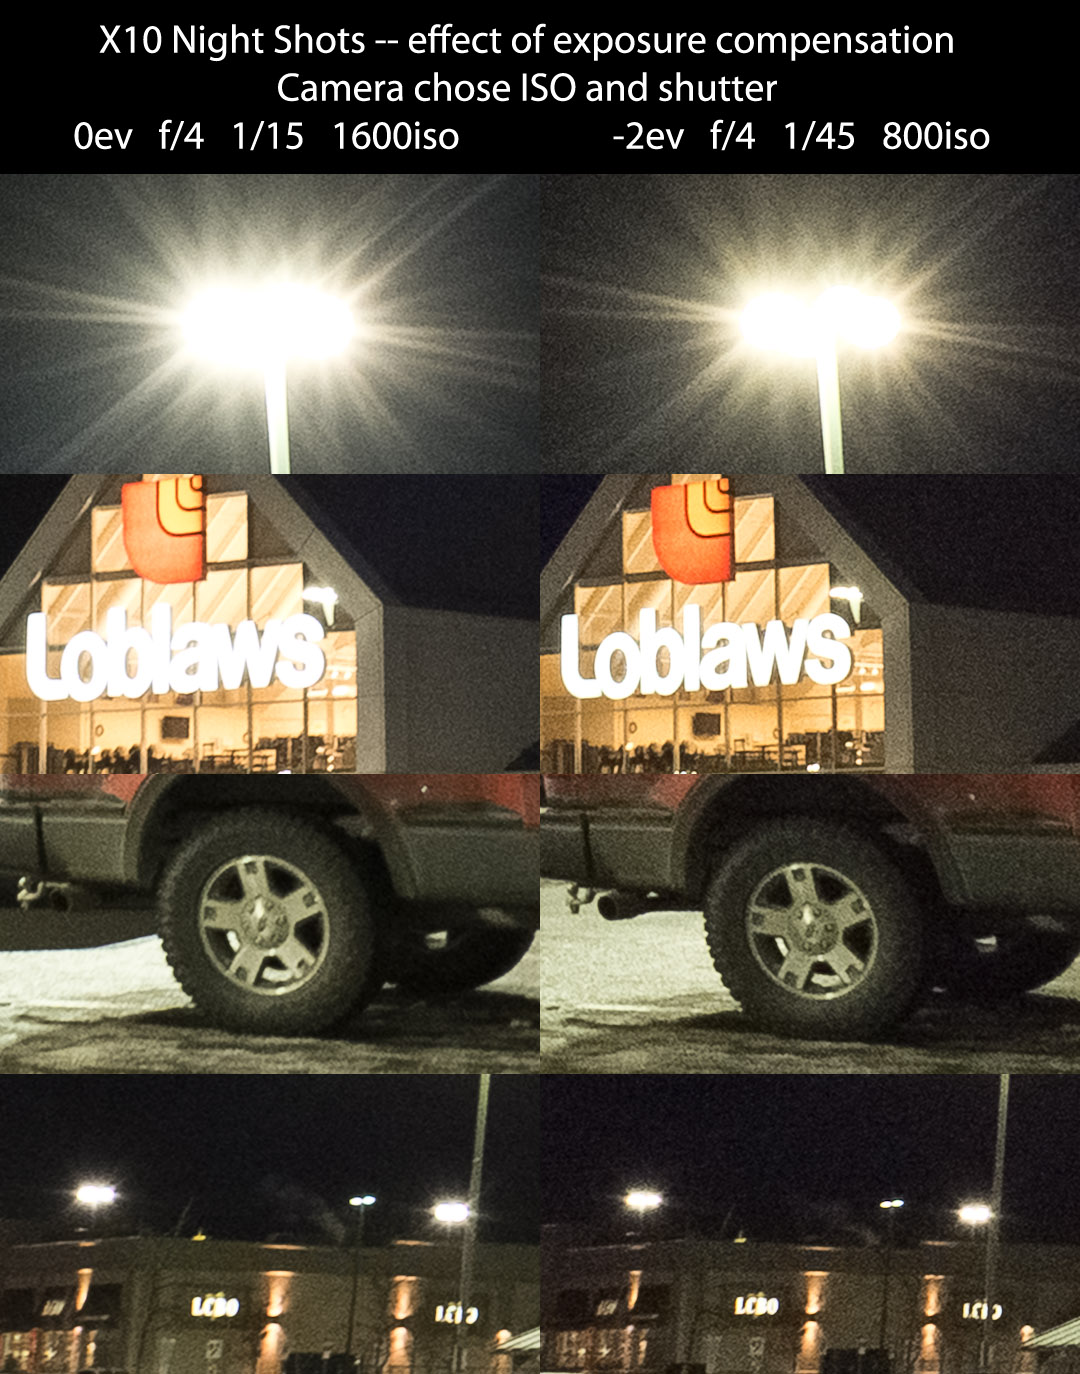
So last night (Christmas Eve) I went out shopping just before the stores all closed and just before leaving I shot some images as a test of the effects of exposure compensation. Basically, I wondered how differently the images would render at 0ev and –2ev. It is, of course, good practice to shoot lights with exposure compensation at –1 or –2, but many seem to shoot at 0ev anyway, perhaps expecting a miracle.

I shot these in RAW, as this camera is so fast that I consider it wasteful to shoot jpeg. The traditional disincentive (time) is just not there. Of course, some will say that they don’t want to process RAW and that’s fine. Just realize that this is a choice you make that reduces the potential of your imagery.

I will shoot some tests in jpeg of course, but for my own general shooting, I use RAW. This camera can be treated like a dSLR because it has the speed and control of one. (Don’t get too excited, my D7000 still stomps it easily where image quality counts.)

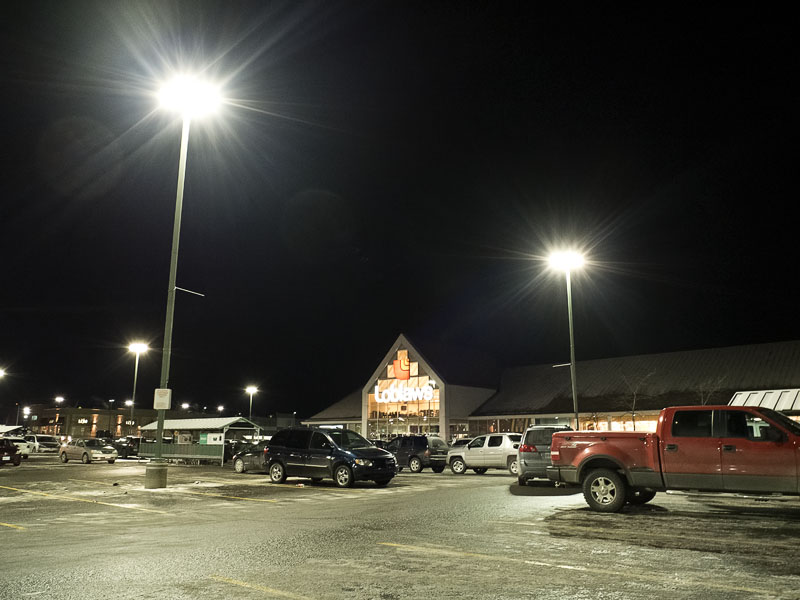
The 0ev shot had to be processed in ACR by dramatically reducing the exposure and upping the contrast a bit. I dropped the saturation a bit, as that often helps at higher ISO. The camera chose 1600 ISO and 1/15s at f/4. I was shooting A-prio, so I obviously fixed the aperture.

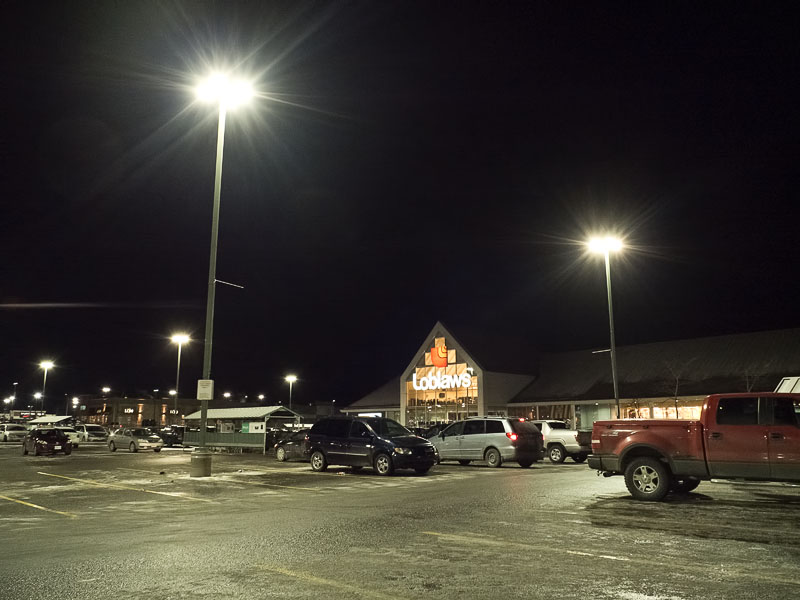
The –2ev shot was processed in ACR by adding fill light and upping contrast a bit, again with some drop in saturation. The camera chose 800iso and 1/45s at f/4. Now, the mathematicians out there have already figured out that the camera chose a darker exposure than –2 demanded. One stop of ISO plus 1.5 stops shutter. Since I did not shoot from tripod, there is no way to make a direct comparison, so we have to ignore slight differences like that.

Just looking at these images, a few things becomes obvious. Even though I equalized the exposures as best I could, the massive increase in light hitting the sensor for the 0ev shot made quite a difference. The lights are more blown out, the definition around the Loblaws sign is almost non-existent. There is just too much light. Had this been shot in jpeg, it would have been a disaster, which of course is what we see on some review sites, frankly.

But let’s look at some crops to really see some differences. These are shown after conversion with no noise reduction performed during conversion or thereafter.

Now, you really need to click through that set of crops to get the full-sized version. You will then be able to see what I am about to describe.

My observations:

  • FLARE! As with many recent Fuji lenses, this thing flares at the drop of a pin. The first image has obvious circles of flare and the second has that weird streak that is so common at night with the F550EXR. *sigh*
  • Despite being shot at 1 stop less ISO, the requirement to add fill light strengthened the grain in the –2ev shot. This is normal and Topaz Denoise 5 had no trouble with either shot to create the posted images.
  • There is more definition to the lighted areas with –2ev.
  • Detail is lost (3rd crop) at 0ev. The parking lot under the tail of the truck is a good example.
  • At 0ev, there is enough light to begin forming ORBs. These are far enough in the background to be irrelevant, but of course we have seen examples where they were not irrelevant.
  • Despite the large-ish sensor, there is grain in both images. There is no free lunch and sensor area counts.


Conclusion

Follow good shooting procedure at night. –1ev at minimum and –2ev is even better. Jpeg shooters might have to bracket to get a decent exposure. RAW shooters have more flexibility and I would always recommend –2ev. The results are perfectly usable.

Saturday, December 24, 2011

Fuji X10 – Review Part 2 – Dynamic Range Test

Caveat: This test may be flawed. I appear to have left the camera in S size, not M. However, in EXR-DR mode, the camera should perform the usual DR processing and emit the right file size. I’ll be doing other DR tests along the way, but I wanted to try this one on a nicely sunny day …

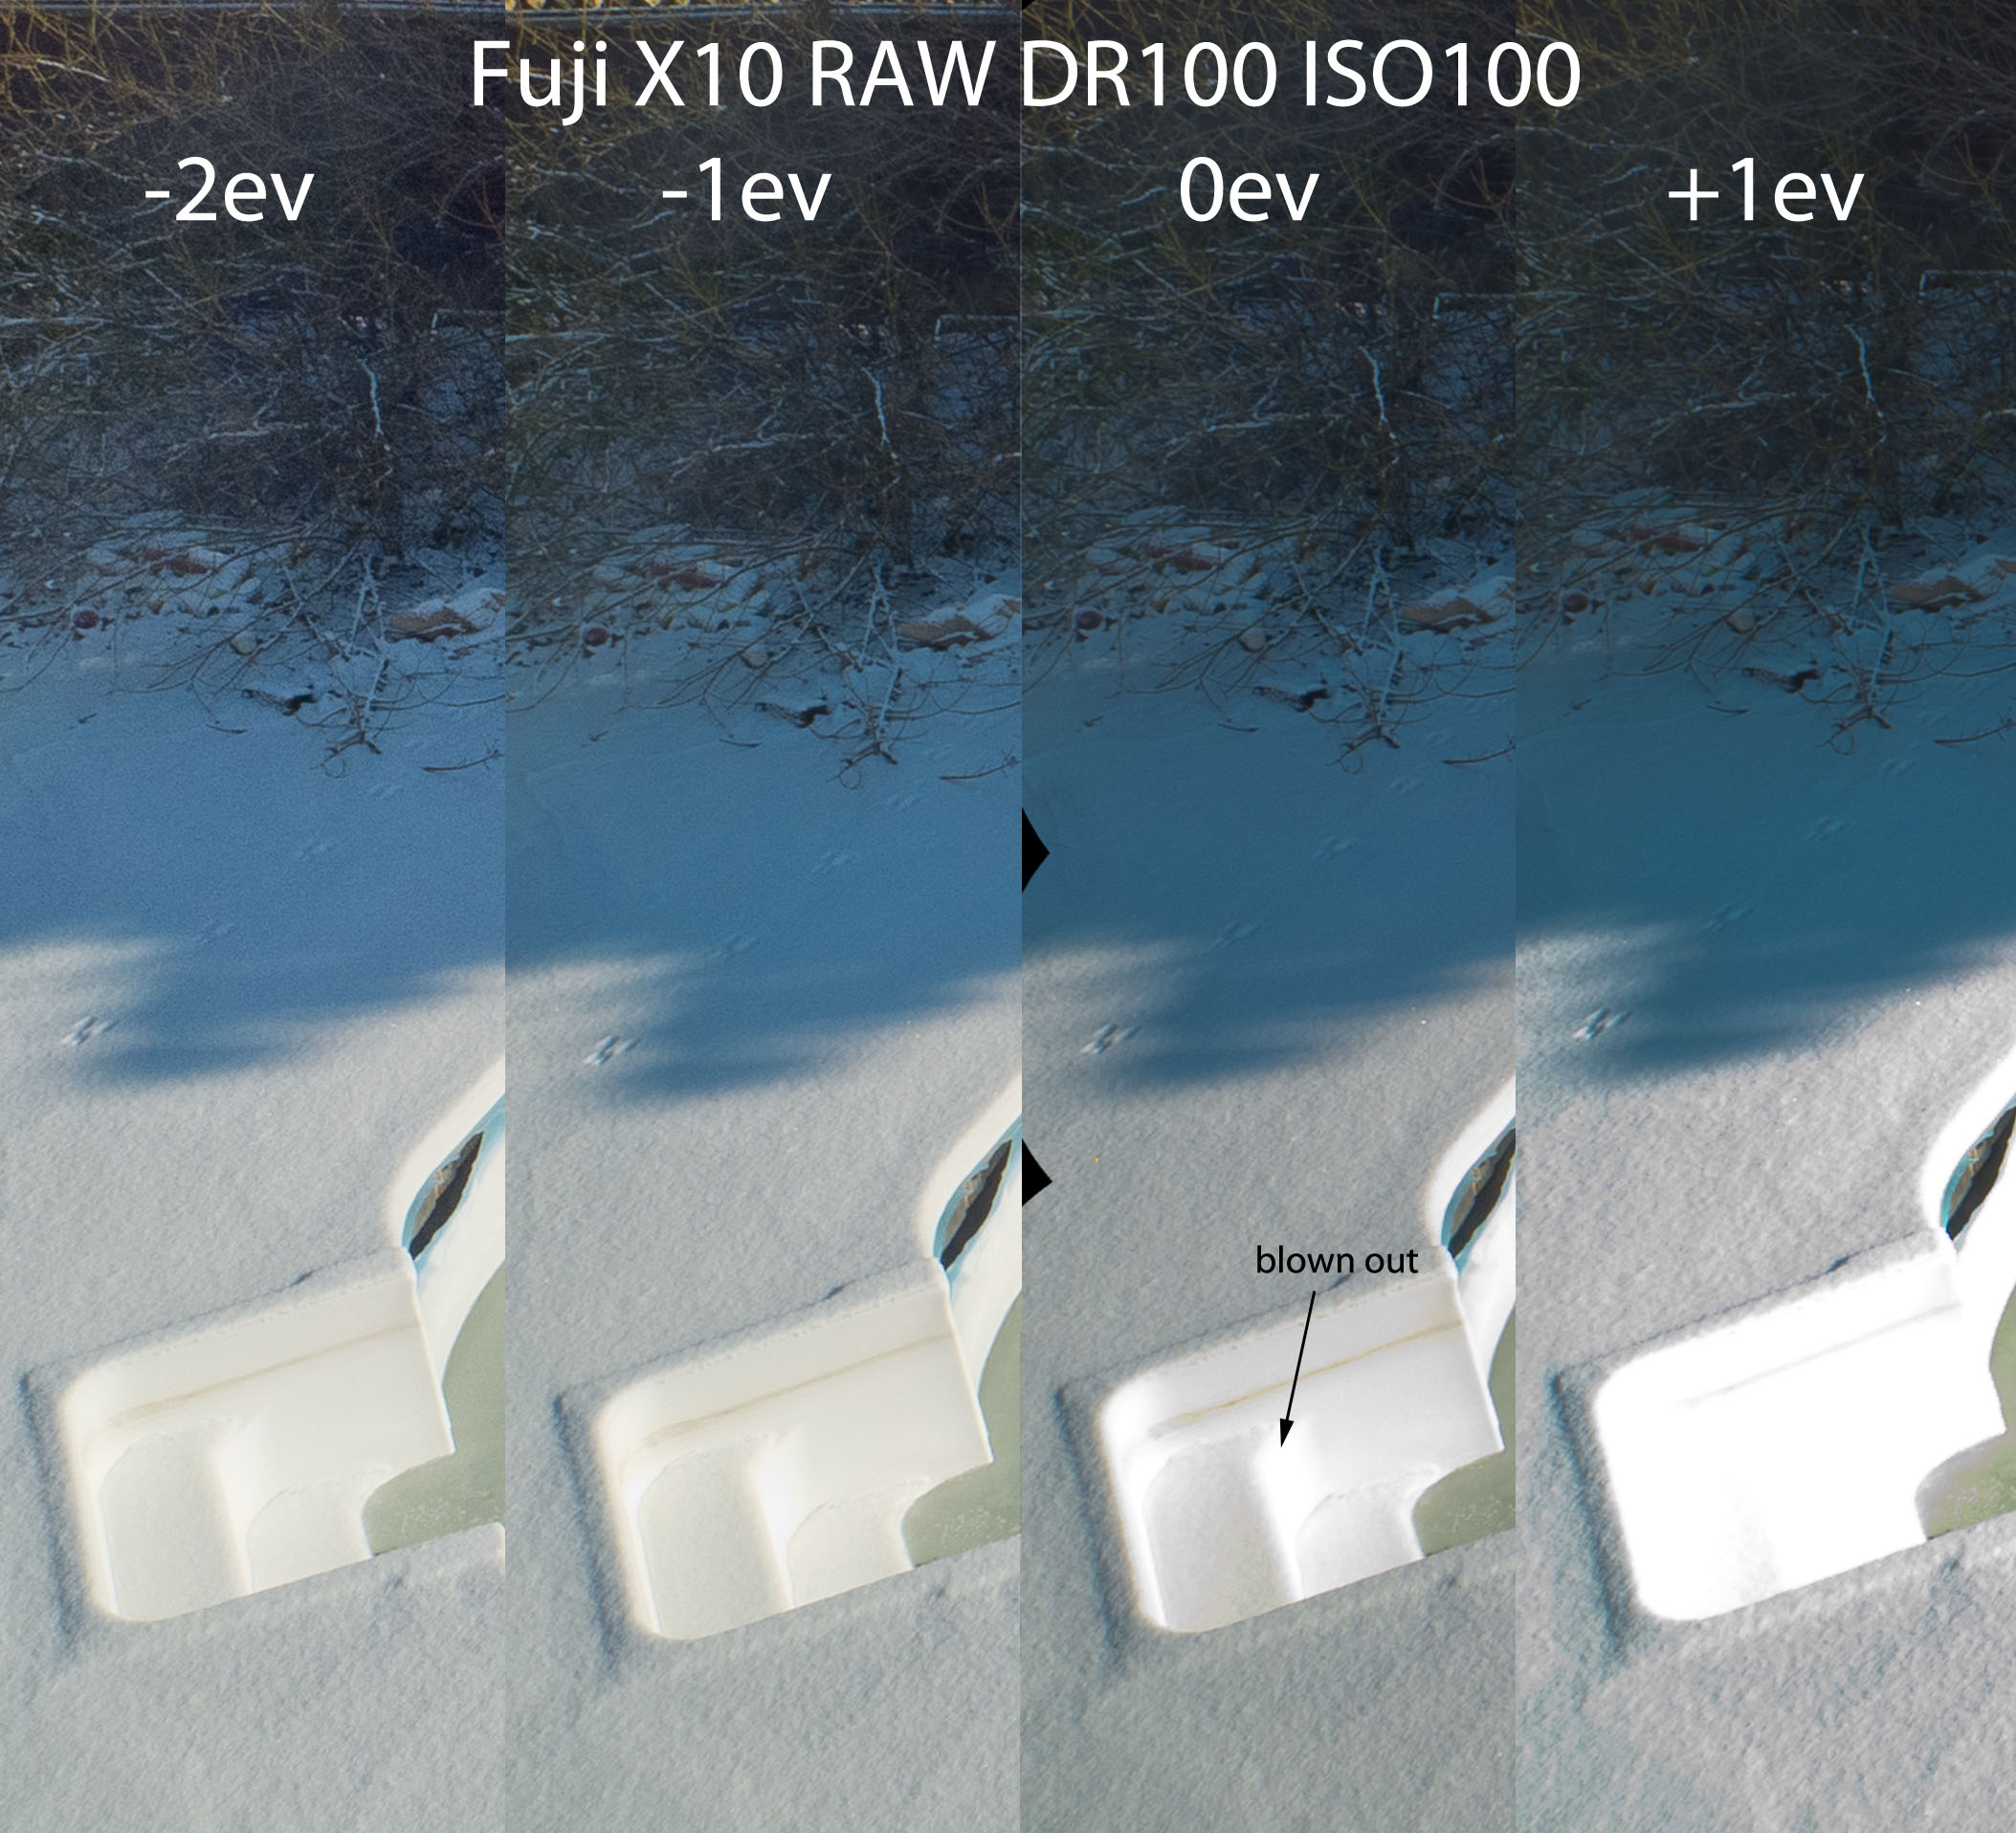
The first set of crops were shot in RAW at 100 ISO, which forced DR100.

If you click through, you can see how it renders shadow detail. Quite well actually.

As you push shadows up, you obviously see more grain when you underexpose. And you get a slight blue shift, which is pretty common on small sensors. I normally address that in ACR but I only wanted to try to equalize exposure and open shadows for this test.

The bottom line is that RAW has no headroom. At –1ev you are already risking highlights when metering with matrix mode. The best exposure for the sunlit highlights is –2ev, but the shadows are kind of grainy. Still, properly processed this would be fine.

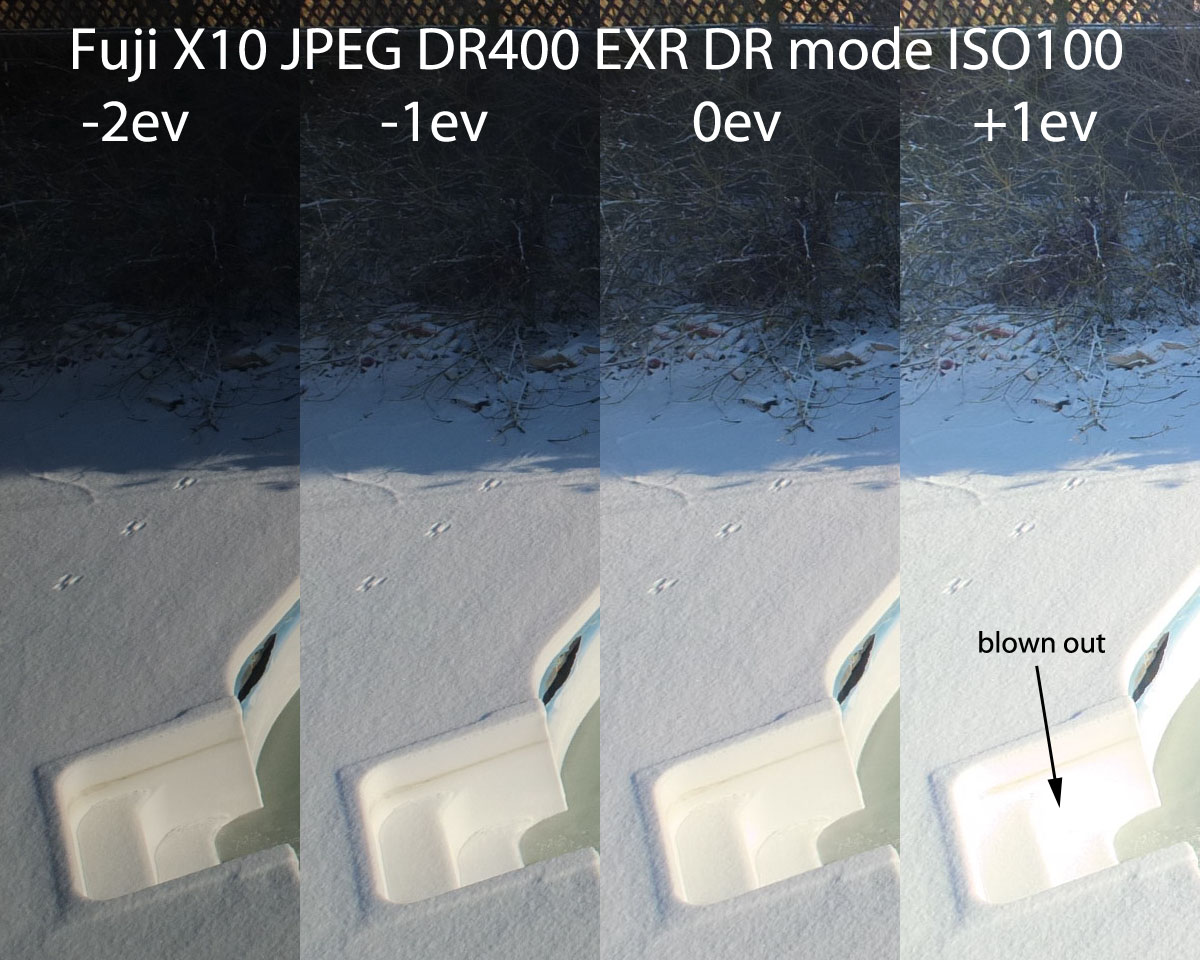
So how does EXR-DR compare? DR400 suggests a 2 stop headroom, so even +1ev should not be blown out.

Well, there goes that fantasy. You get one stop of protection with hardware DR extension. That’s pretty good, but less than implied by the designation DR400. Still, this is a torture test, so this is probably a pretty good performance.

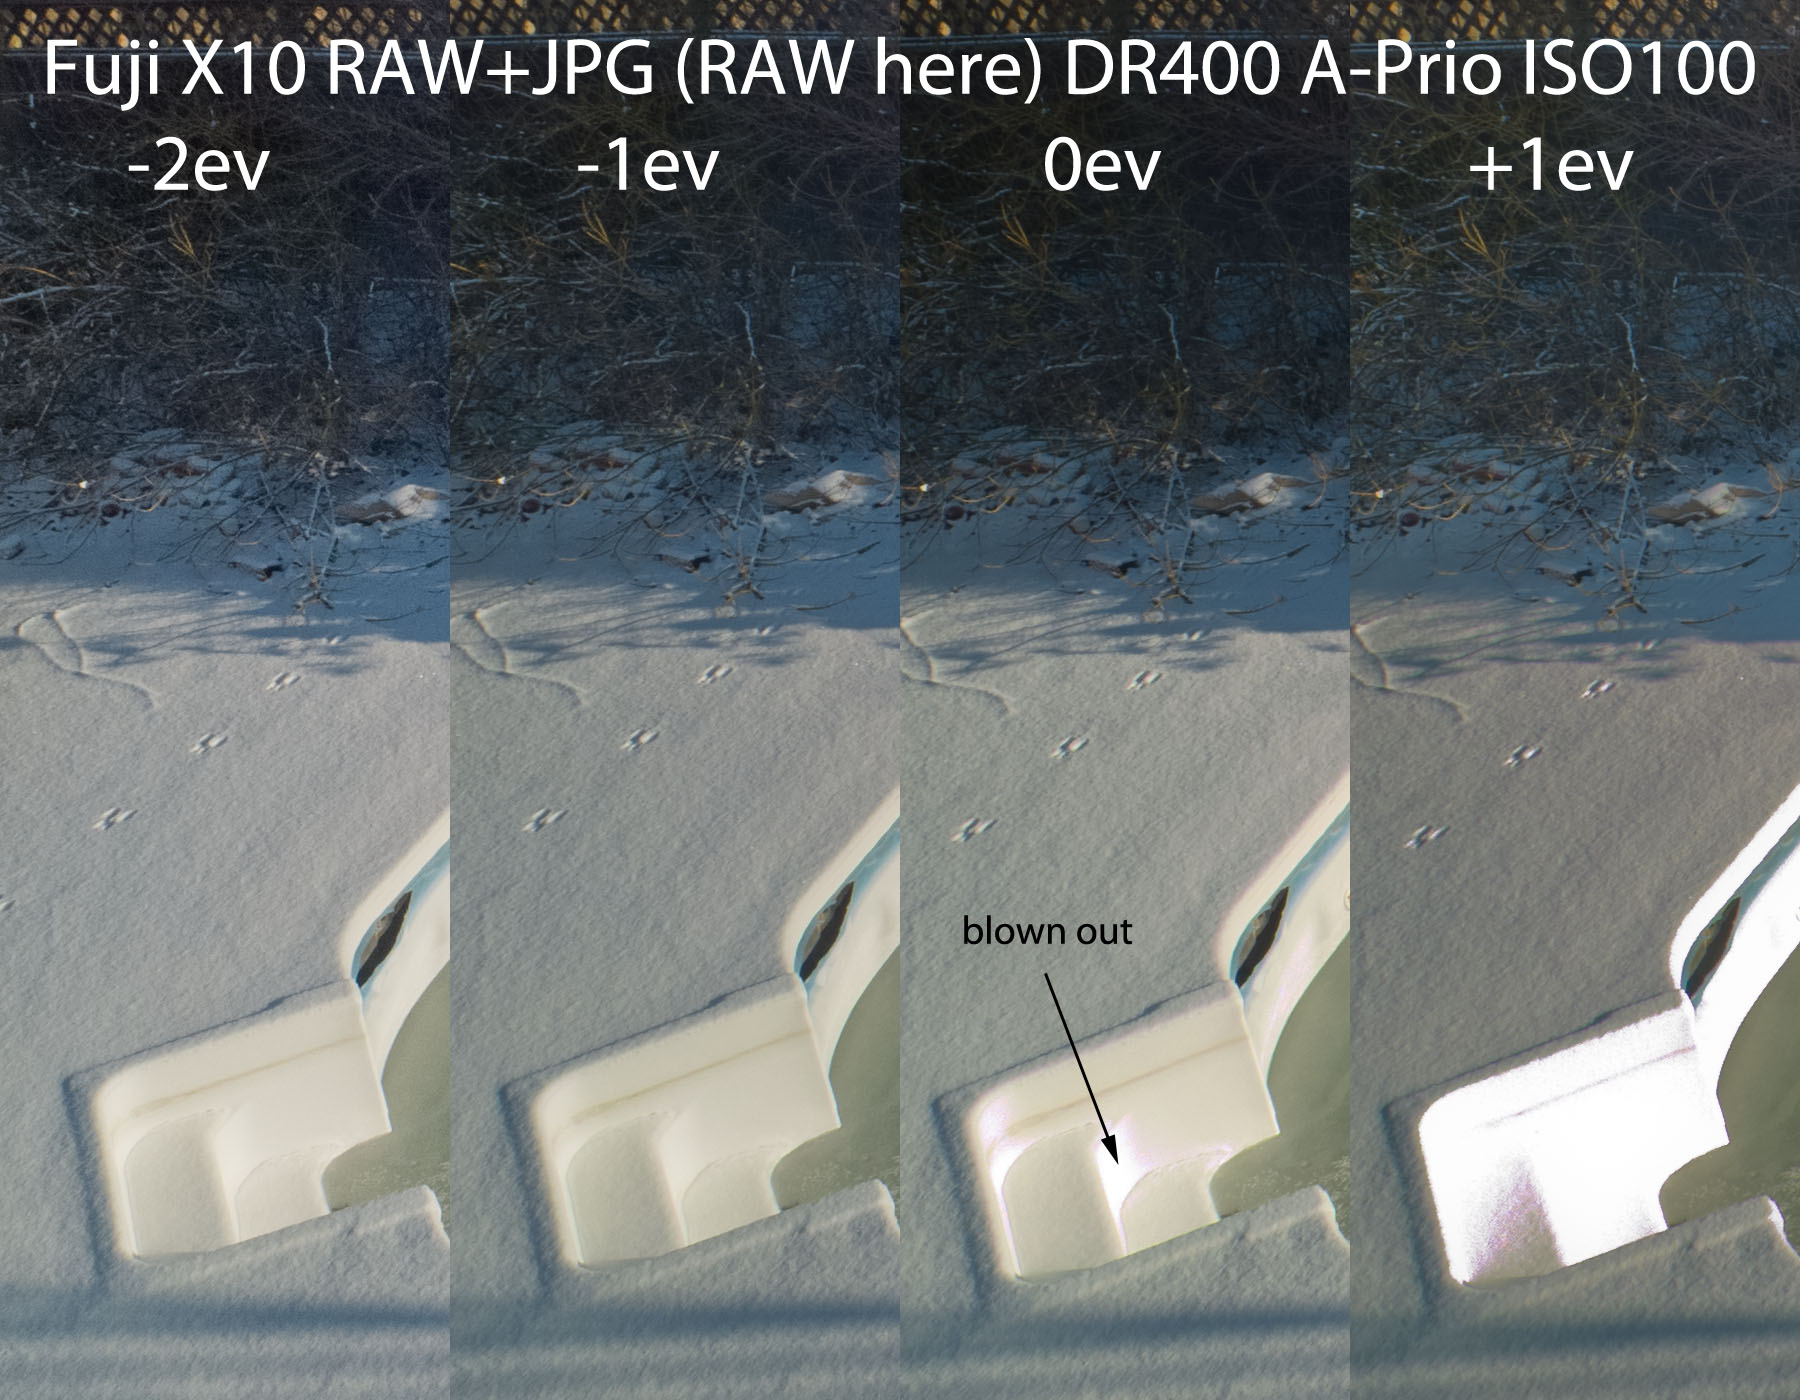
So how about RAW+JPG in a PASM mode? That should be the best of both worlds, no? Here are the crops from the RAW files.

No joy here … since I shot these almost half an hour later than the first set, I cannot really make a direct comparison … but for sure there is no extra protection.

So … the bottom line is that you can get 1 stop of protection if you are willing to shoot jpeg. I prefer RAW, so I will be underexposing by one stop as always and performing the protection myself in ACR.

Another impression: The X10 shoots RAW much faster than the F550EXR. Very nice to work with.

Requiem for a processor – F550EXR

My 6 core 1100T is no more. I share some of the blame, but a huge portion of the blame goes to Zalman and a little bit to the vendor … it was not NewEgg (although I had thought so) as it does not appear in the order history. NCIX no longer tracks order history (what, no computers in a computer sales shop?) so I cannot pin it on them. But they have great sales now and again and I would go to them right after NewEgg.

Anyway … someone did not warn me that I was getting a sale price because the REV 1 version of the Zalman CNPS10x EXTREME was inappropriate for AMD users. The crappy spring clip is simply not strong enough to control this behemoth …

All the shots except for one were made with the F550EXR.

Its heavy and it sticks out from the board so far that it touches the sides of the case. Worse, it interferes with tall memory like the Vengeance series, so you need to get memory with smaller heat sinks. I had to swap my memory around to get it all to fit.

And then came the crashes. At first, you had to really smack the case to get a blue screen. But by last week, you only had to breathe near the case to trigger a blue screen … it was happening several times per day. Unacceptable.

REV 3, by the way, has a proper clip that replaces the top half of the bracket and screw the whole thing down nice and tight. No wiggle. This is obviously a well known issue and I am really pissed that they would not insist that a warning be posted to discourage AMD users from buying the REV 1.

So I still had the stock fan available and I thought I would swap them out to prevent further blue screens. Feeling poorly that day, I took a short cut (here is where I take some of the blame) and tried to release the clip while the main board was still in the case. And that did not go well. I eventually twisted the Zalman a bit to get at the clip, which released on the wrong side, tilting the whole mess back against the pressure.

So I wiggled the unit until the closest side released and finally lifted out the Zalman. And then I saw that the chip was no longer in the socket. And that is never a good thing.

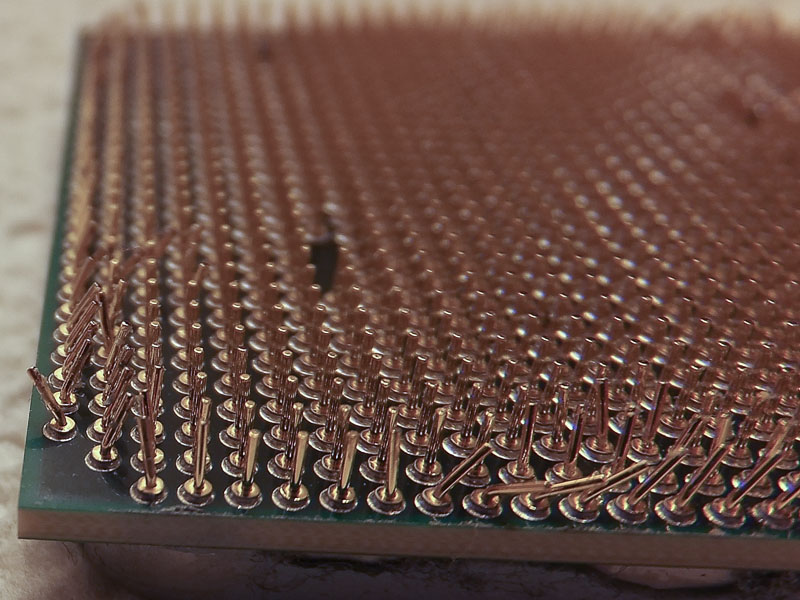
I doubt that this needs much explaining …

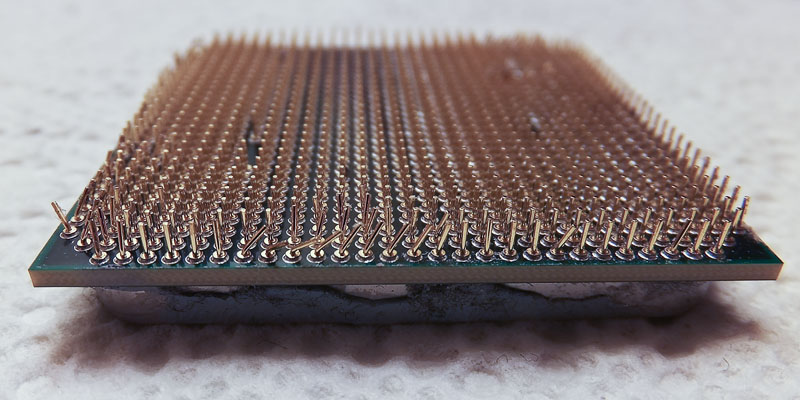
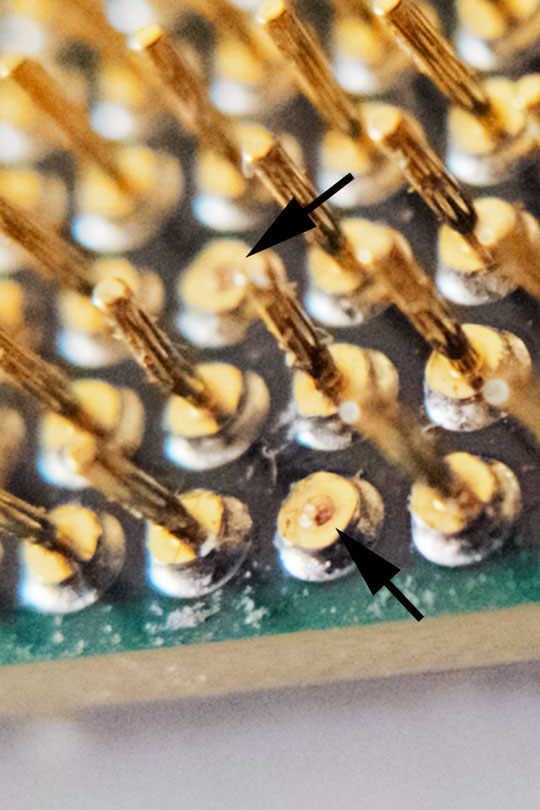
Yikes … hundreds of pins mangled.

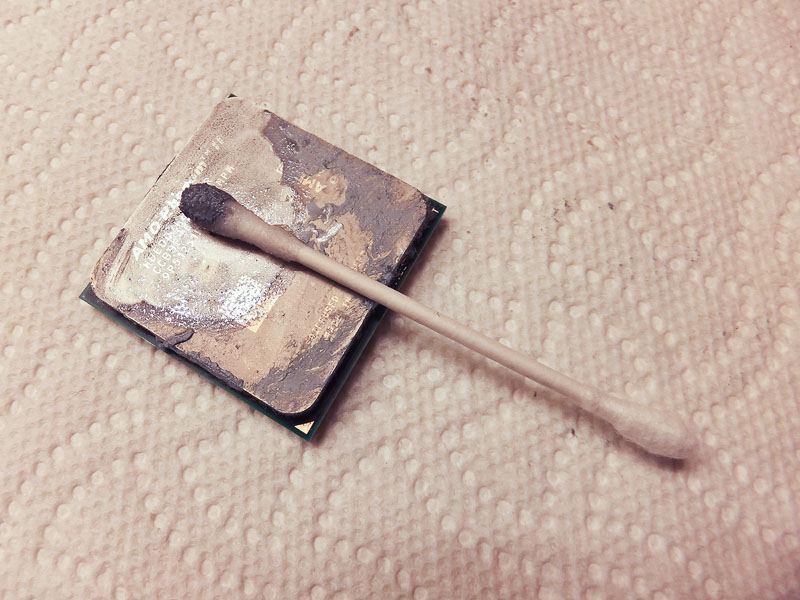
That’s just not a pretty sight. This is soft metal, so bending them back is pretty risky. Needless to say, it took me 45 minutes to get them fairly evenly straightened in rows and columns again. But first, you have to clean off the old interface material. I used the excellent stuff that came with the Zalman, but it is thick and gross so I used 99% pure Isopropyl Alcohol to clean it …

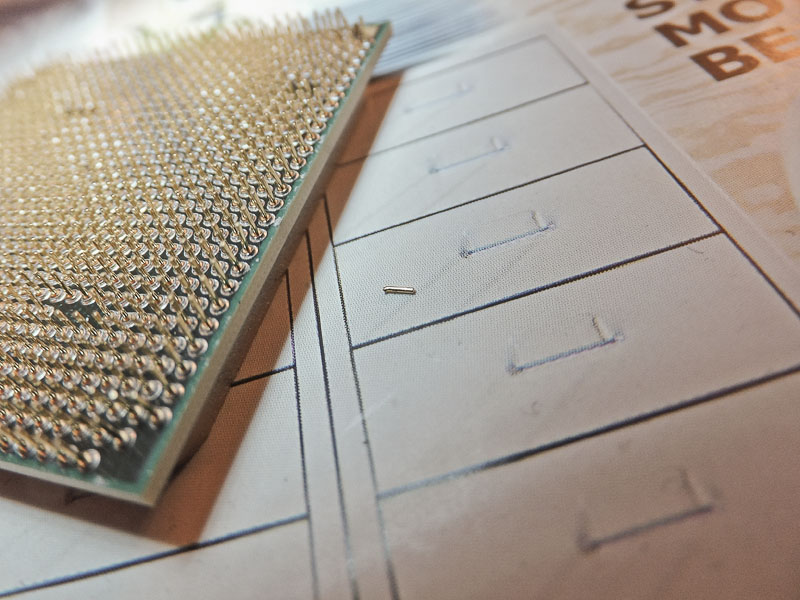
And when it was all said and done, I had managed to bust a pin. And that was that. Thank you Zalman.

Here’s a very small crop from the Fuji X10 in super macro mode … you can see that I actually broke two pins …

So I went to my favorite local computer store – PCCyber – and they have just gone out of business. They expanded like mad last year and the whole thing came tumbling down. Bummer.

So I called around to the few remaining stores that have not yet been wiped out by NewEgg, NCIX and TigerDirect and the only one that even stocks AMD CPUs was Everbest. I went down and they had the 1055T, which is a 6 core that is much slower than the 1100T. Oh well … that’s my long term penance for not taking the motherboard out of the case.

The chip went in with the stock cooler in 10 minutes. I checked the 1100T cooler against the 1055T cooler and the difference was curved blades on the latter versus straight blades. Turns out that straight blades are more effective but much louder, so I went for the curved blades. I want quiet.

I hit the CMOS during the first boot and ran the auto overclocker and it returned 3263mhz, which is not bad for a 2.8ghz chip. That’s on all 6 cores. The 1100T was running above 3800mhz though, so this is a definite downgrade … *sigh* …

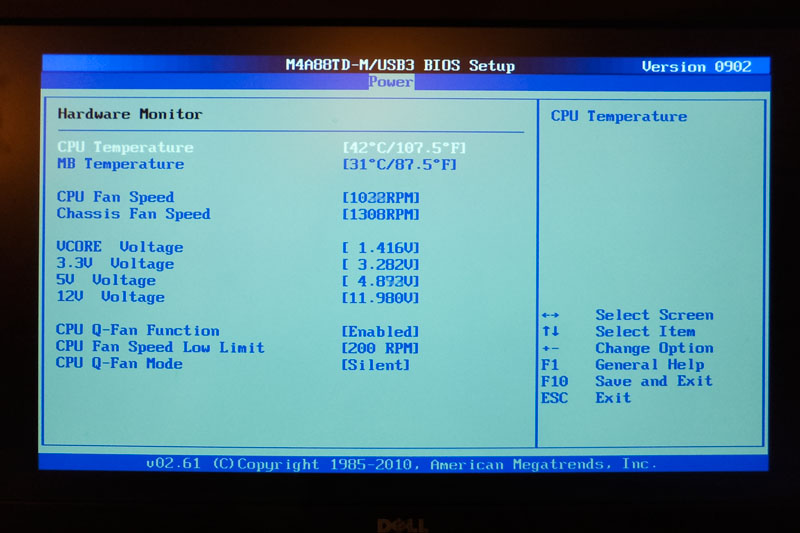
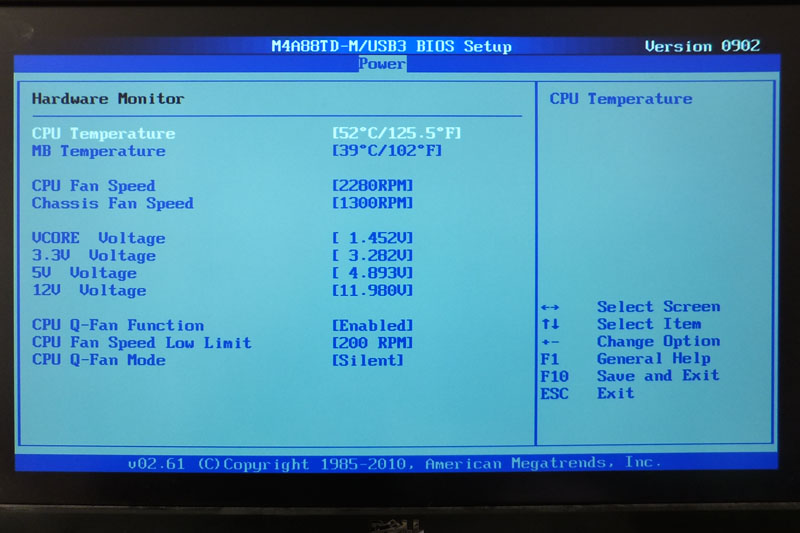
The temperatures tell the tale …

Before

After

The Zalman keeps the CPU 10 degrees cooler than the stock cooler does while running at half the speed.

So … if you get the newer revisions, it’s a great cooler, assuming it fits your case. But if you get snaked into buying the older revision, you will get screwed.

Merry Christmas to me from Zalman … not only did I have to throw away the cooler, but I had to replace the CPU with a downgrade. It’s just raining pain :-)