I have shown my new kitchen a few times, and I still have work to do to finish it
But one thing has bugged me from the get-go, that being the imbalance in my HVAC system since the new ductwork was installed under these new cupboards. The two locations are near the sink (which is where the old patio door was) and near the original sink location under the second window. This is now the work area on the right side of the new stove location.
For reference, imagine yourself standing in my kitchen with the old sink location directly to your right, not shown in this image. You are facing the new sink location and there is a duct coming out from below the sink and to the right. This is visible in the following image.

F550EXR 100iso f/3.5 1/60 +1/3ev
These ducts are simply holes in the floor that sit under the cabinets. I had planned for some sort of channel to carry the heat to the exit point, but that never happened for various reasons. So the heated and cooled air just blasts into the cabinetry and a lot of it stays there.
Thus, my house is really out of balance. In the winter, the top floor vents are shut (I use magnetic seals on the vents because I have no separate dampers for the upstairs, *sigh* … and the main floor vents are open, but so much of the heat is trapped in the kitchen and cabinets that the top floor is cold. This is really unusual, as we used to fight hard to keep the top floor from sweltering.
So my solution is to close the dampers going to the kitchen vents. It happens that there is a damper for the old patio door vent, and that helps a bit. But there is no damper for the second kitchen vent, because it had never been hooked up when the house was built, but now it has. Without a damper :-(
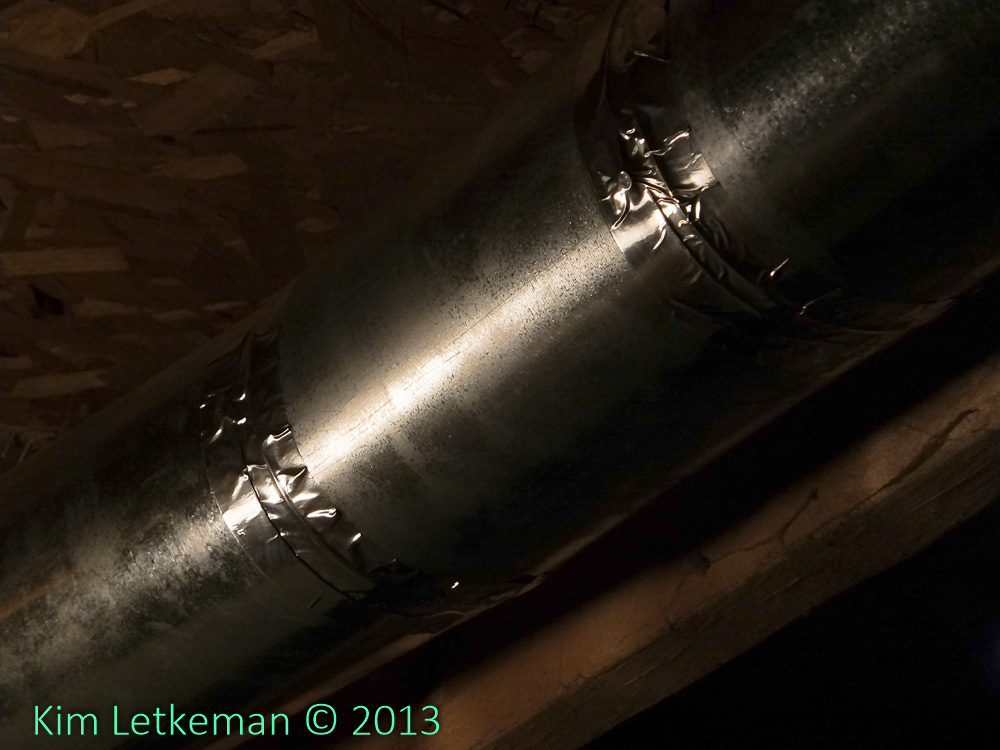
The 5” duct that was installed has this location right in the middle, a likely candidate for me to separate the pipes and install the damper.

F770EXR 3200iso(!) f/5.8 1/60
This 1/2” sensor shoots acceptable snap shots at 3200 ISO for this sort of documentary purpose. This was processed in Lightroom 4 from the RAW file. I had to desaturate the blue and magenta colors that build in shadows with such tiny photo sites. The next images is shot from a different angle and uses 400iso, which has no blue channel issues. I used the JPEG because it was adequate.
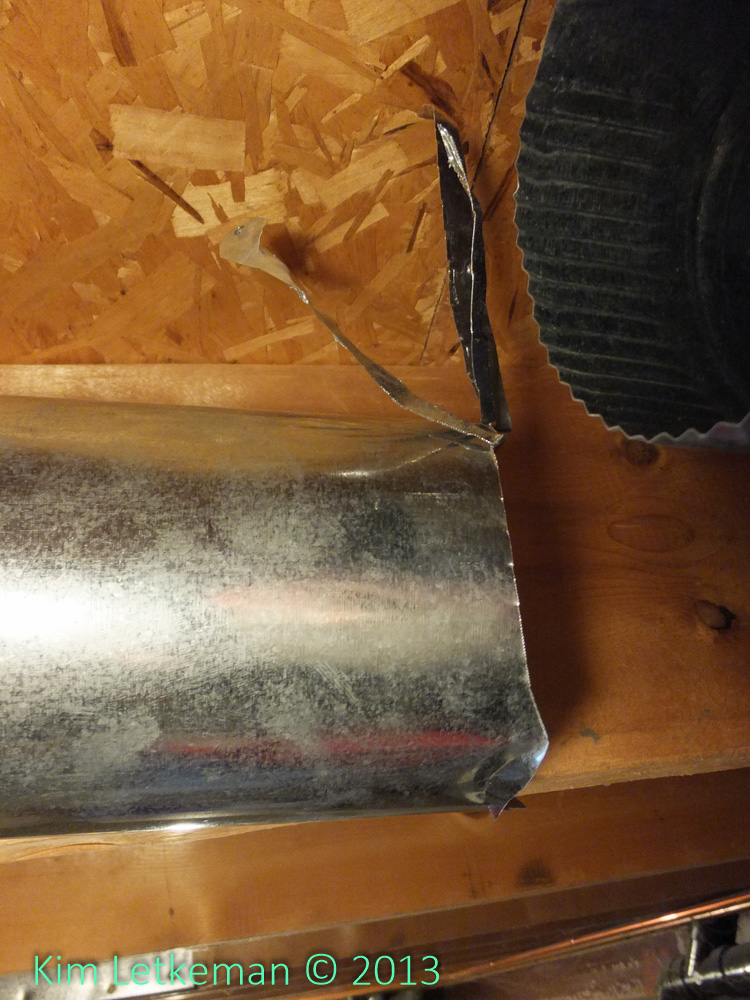
f770exr 400iso f/5.8 1/70
I will spare you the details on how I got these apart. It took hours of fooling around trying to peel the very sticky HVAC tape off the joints. I removed the screws that held it all together and tried working everything apart. But it turns out that this joint was installed before the final connections were made at each end so there was no issue getting it all to fit.
The middle pipe was about 3/4” too long for this to separate. So I did what any self-respecting handyman would do. I hacked the shti out of it.
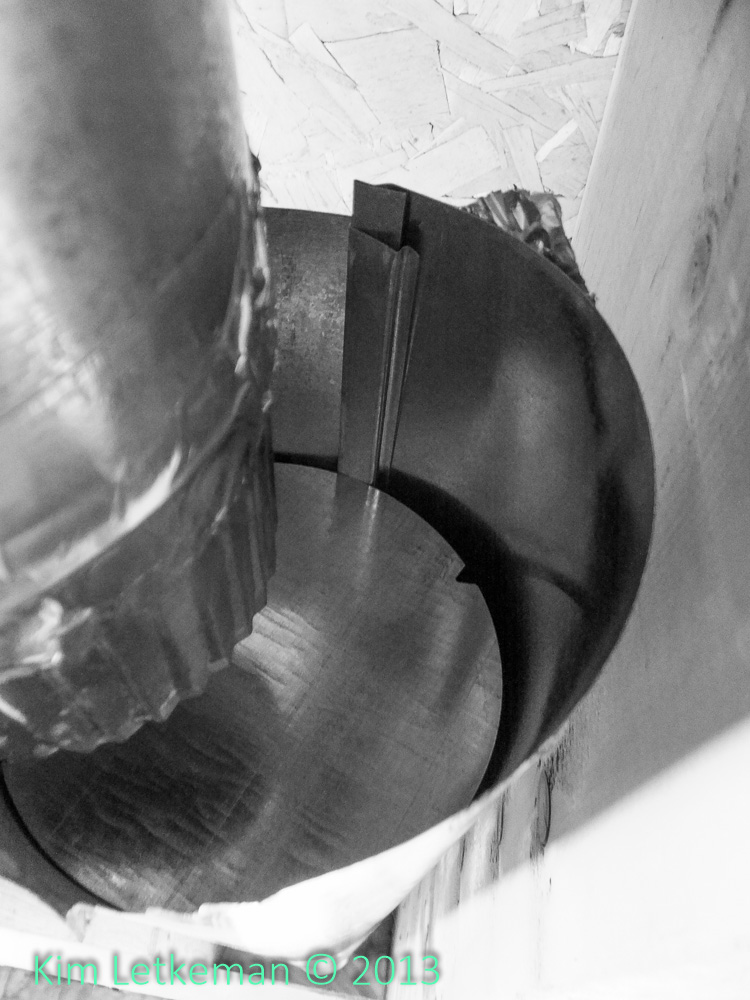
f770exr 800iso f/3.5 1/20
Aviation snips are your friend, I have found.
I forgot to photograph the actual part that I bought (DUH!) but I found a similar one on the internet. EDIT: I found the real one on the Home Depot Canada web site!

Home Depot sells these babies for $2.13. It is installed by drilling a hole in the side of the pipe a few inches from the end and inserting the damper into that hole. I inserted it from the outside first to make sure that it fit, and then I aligned it with the hole and pushed it into the pipe, which forced the bolt through the hole from the inside. I slipped the lever over the bolt and then gently applied the wing nut and tightened it all up. Works a treat.
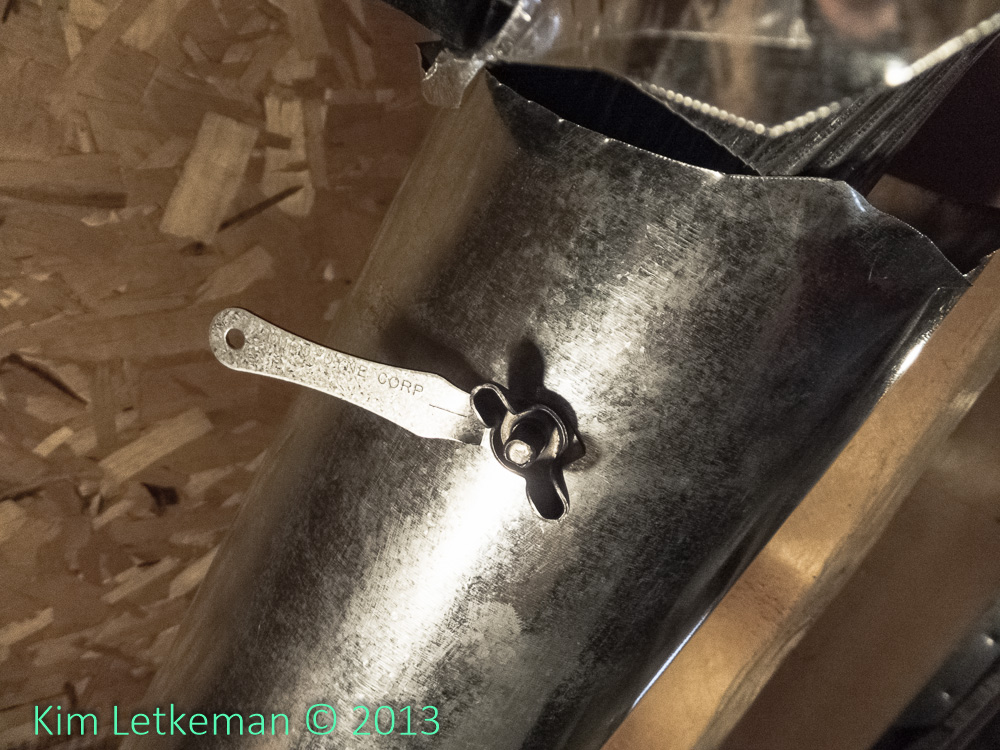
It looks like this installed:
f770exr 800iso f/3.5 1/4
The v-notch is probably meant to fit over the seam but that would not really work well when it was opened and frankly, the seam here is much bigger than the notch. So of course there will be rather a lot of air escaping past the damper even when it is closed. But that’s ok, I never wanted to completely shut off the air. Just create enough back pressure to redirect the air to other ducts that have no such restrictions.
Here is how it looks from the outside before I put the duct back together.
f770exr 200iso f/3.5 1/30
And finally, I slipped it all back together and folded the strips I had snipped back down to provide some extra strength to the joint. I clipped the really sharp ends to avoid hurting the next person that dicks around with these ducts.

f770exr 250iso f/3.5 1/30
I taped the joints (if you have not taped your HVAC ducts in the basement, consider getting some of this silver tape – not cloth “duct” tape that is actually for anything except duct work :-) -- and closing the holes. You will be surprised at the improvement of air pressure if you have really leaky ducts.
And I chose to improve the suspension of the ducts with strapping. I keep this stuff around for this kind of work. It is incredibly handy to put things in their place. It will also prevent rattles of the duct against the plumbing it had perviously been sitting on.

f770exr 800iso f/3.5 1/20
So … the job is easy, if a bit tedious. Home Depot has the parts and the tool list is small. Finger and thumb nails to remove the original tape. Aviation snips if you have to butcher the pipes as I did :-) … and the silver metal tape to seal it back up later. Strapping might help if the duct is weaker afterwards.
As for the photography, some might note that I used an inferior camera despite owning several m4/3 bodies. The thing about the F770EXR is that it fits in a pocket and that can make all the difference.